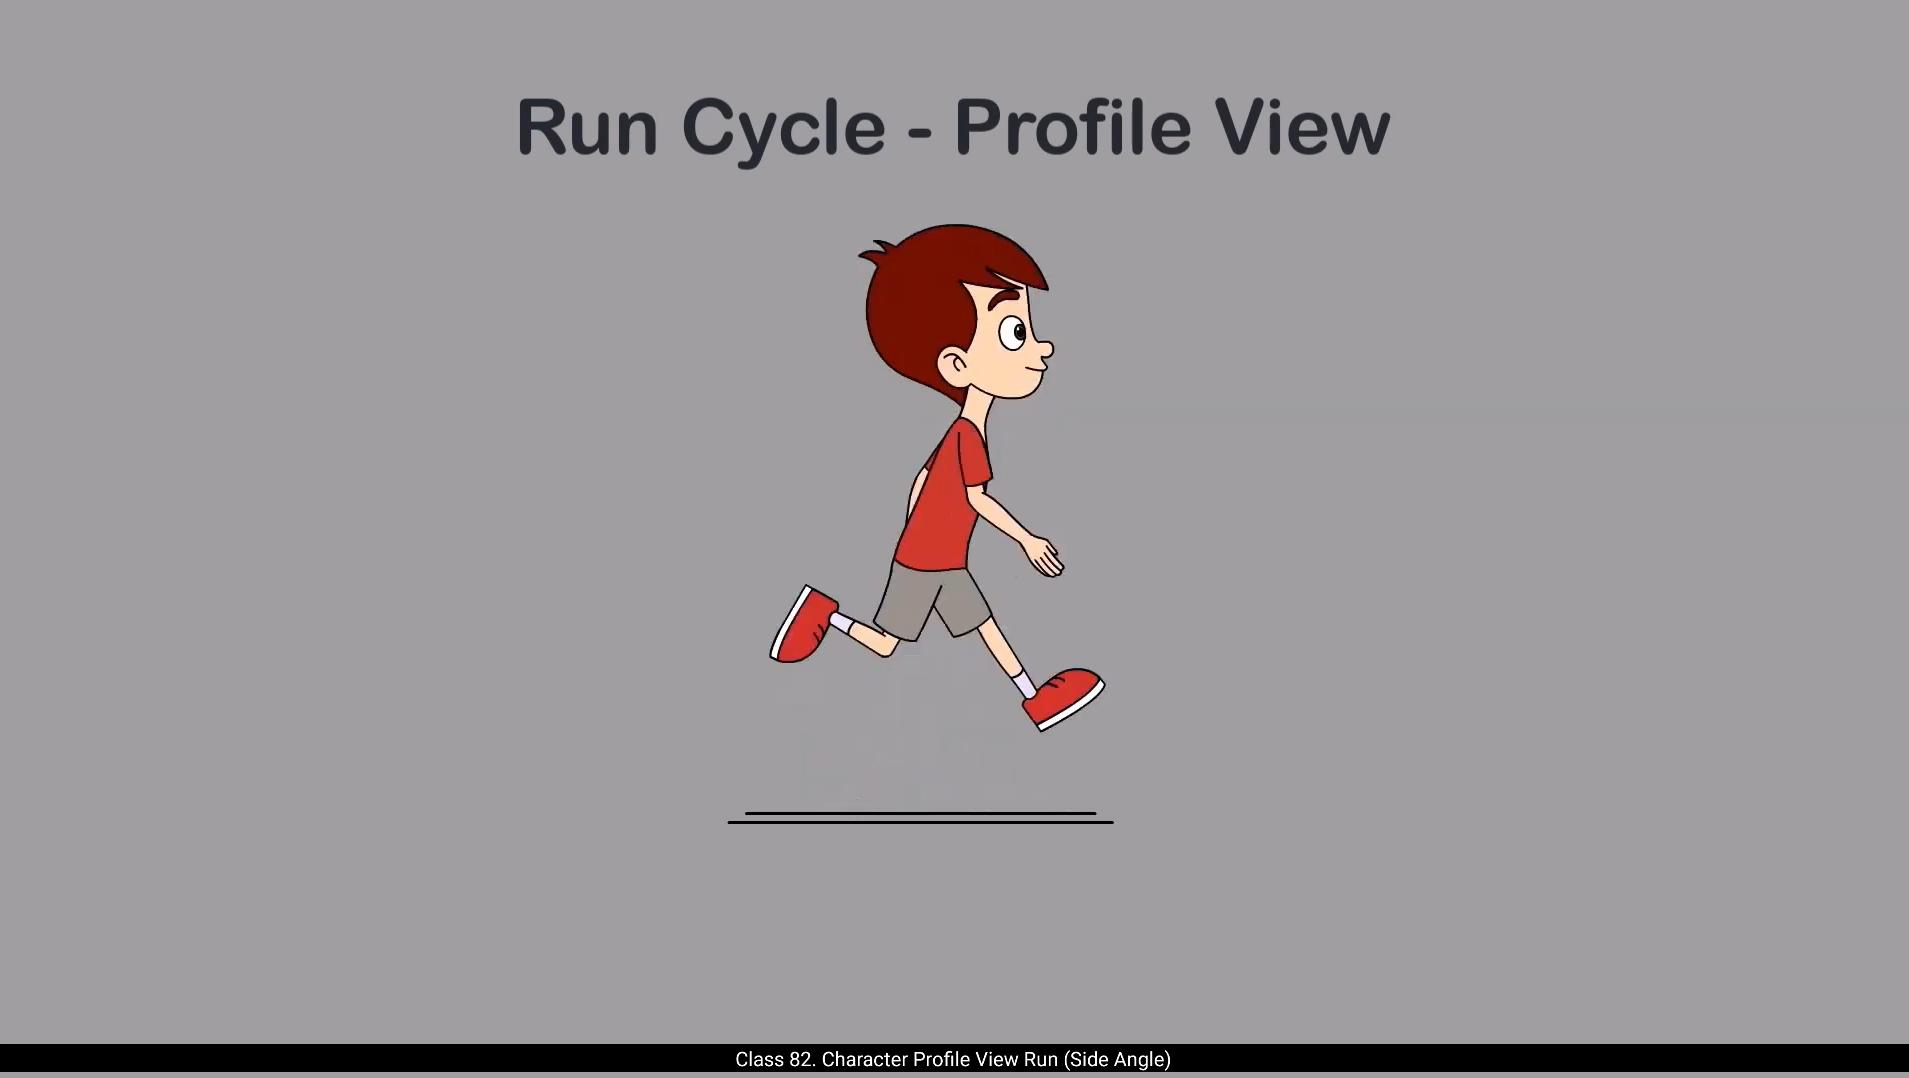
Hello students, in this video we're going to learn how to animate a run cycle in profile view that is the side angle of our character Orvin.And just like we always do, we'll start with rough key poses before getting into clean vector drawings. I've already prepared rough drawings to guide you through the basic flow of the run cycle. Let's play them in a loop so you can observe how the movement plays out.As you can see, this is a generic jogging motion. We're not adding any specific personality or emotion to the character yet. Our focus right now is purely on understanding the physical mechanics of the movement. You can use this kind of base run for any standard humanoid character.Now take a moment to look at the timeline. You'll notice the keyframes aren't evenly spaced. That's done deliberately. This has to do with how timing is used to create rhythm and weight in animation. Here an important principle, timing is applied. The faster the action, the fewer frames it takes to complete. That's why walk cycles, which are slower, usually takes more frames, while run cycles being quicker, needs fewer.Let's begin by studying the first key pose called the contact pose. In this pose, one leg is stretched forward touching the ground, while the other leg is lifted in the air behind the body. Now pay attention to the arms. Their movement is opposite to the legs. If the left leg is forward, the right arm comes forward and the left arm moves back. This kind of opposite motion is crucial for balancing the character during motion and is common in both walking and running. These limb positions are the extremes in the run cycle. They mark the furthest reach of the arms and legs before they reverse direction. 😘 The body limb slightly forward, showing the momentum of running, but the head remains upright, helping keep the motion grounded and believable. This pose captures a sense of energy and speed.And we'll repeat the exact same pose at the end of the cycle on frame 21. This repetition helps the cycle loop smoothly when played continuously.Once the first contact pose is drawn, we move to the opposite contact pose where the other leg steps forward. This pose is placed on frame 11 because our entire run cycle spans 21 frames, and the first pose repeats on frame 21, so frame 11 is the midpoint of the cycle. This symmetrical spacing ensures that the cycle loops cleanly and smoothly, as we've learned in the opposite contact the limbs are Roles If the left leg and right arm were forward in the first contact pose, now the right leg and left arm come forward the front comes back and the back becomes front.Now let me share a helpful drawing tip. I've kept the arms on a separate layer from the rest of the body. The body and legs are drawn together on one layer while the arms go on another.With this technique, you can focus on getting the body and legs right first. Once those parts are clean and accurate, you can add the arms.Moving on, after the contact pose, we place the next key pose on frame 4. This is the passing pose. In this pose, the rear leg swings forward, crossing past the supporting leg. The body is slightly lifted, showing a rise in the run. Then on frame 6, we draw the stretched pose. This is a dynamic pose where the back legs are fully stretched. It gives the run a sense of force and reach.Next on frame 8 comes the up pose.This is the moment when the character is completely off the ground. Both feet are in air. 😘 This is what makes running different from walking.After that, we land back into the opposite contact pose on frame 11.Always start by drawing the contact pose first, then go ahead and create the opposite contact pose. Once those are set, move on to the passing pose, then the stretched pose, and finally the up pose. Building your run cycle in this order helps you maintain consistent motion, proper balance, and accurate timing.It's a structured approach that makes the entire process smoother and ensures your final animation is clean, dynamic and believable.Now the second-half of the cycle is essentially a mirror image of the first half. So on frame 14 we draw the second passing pose, now with the opposite leg crossing forward. On frame 16 we draw the opposite stretched pose, then on frame 18 the Opposite up pose and finally the original contact pose on frame 21. Completing the cycle. Once you've completed the legs and torso for all your rough key poses, it's time to move on to the arms. Let's start with the right arm in the first contact pose. Since the right leg is back, the right arm should be forward.At frame 11, which is the opposite contact pose, we draw the right arm in its extreme backward position. Now in between those we animate the arms rotation. On frame 4, the right arm starts moving backward. At frame 6 it continues with a bit more rotation, a slight progression.By frame 8, the arm reaches a point where it's fully rotated back just before hitting the extreme on frame 11.This gives us a nice overlapping arc for the arms motion. From frame 14 onward, the arm begins swinging forward again, following the same arc in reverse order, reaching back to the original forward pose by frame 21.Now let's talk about the left arm. 😘 You'll draw it in opposite positions of the right arm for every frame. So if the right arm is forward, the left arm is back, and vice versa. And that completes your rough poses for a profile view run cycle of any standard character. Once you're satisfied with the rough animation, it's time to move on to the clean vector version of your character. For this, I'll bring in Orvin's profile view vector character.Which I had prepared earlier as part of a model sheet, and I hope you also have your profile angle character vector ready. This was your assignment from the rigging tutorial and we'll need that rigged version for this next part.First, open the file that contains your profile character model. Select the character symbol in profile view, copy it, then switch to your current animation file.Create a new layer.And paste the symbol on that layer.Now we're ready to start matching our clean vector character with the rough poses we just created. Before we begin matching the clean vector artwork with our rough poses, let's first add a couple of reference guidelines for the hip area and the neck area. These will help us maintain consistency across frames.Next, let's enter inside the oven profile symbol. Once inside, make sure the timeline inside the symbol matches the main timeline.We'll start by adding keyframes on frame 11, which is our opposite contact pose, and we'll work on frame one where the initial contact pose happens.Let's begin with the leg.You'll need to match the timeline inside each individual body part symbol as well.Like here we enter the right hand symbol, then match the timeline. Now insert a keyframe on frame 11. This locks in the original drawing at that frame. After that, on frame one, make the necessary edits to match the rough pose. 😘 Repeat this same process for everybody part.This part is mostly visual, so watch the video carefully. Observe how each body part is aligned with the rough pose. With practice, this process becomes quicker and more intuitive. So this is our first contact pose. Now we're going to copy this exact pose and paste it on the last frame, which is frame #21.After that, we move on to the opposite contact pose.Make sure to turn on the onion skin so you can easily refer to the previous drawings as you align the next pose.Now let's match each part of the body to fit the contact pose again. But with one important change. We switch the position of the legs and arms. So if in frame one the right arm is forward, now on frame 11 it will go back and the left arm comes forward. Same thing with the legs, right leg comes forward and left leg moves back. And that's your opposite contact pose done. Now continue to match the rest of the rough poses by following the same method.As you can see here on the timeline, I've now matched all the remaining poses and that completes our profile run cycle animation.Let me walk you through a few final refinements I made to Polish the animation. In the passing pose, I moved the character slightly upward to reflect the natural lift that occurs when a runner pushes off the ground.I applied the same concept to the stretched pose and up pose.Now let's look at the head and hair movement which brings in secondary motion. On frame one. The head stays upright and the hair naturally hangs downward due to gravity. As we move into the passing pose, I've added a slight forward rotation to the head and you'll notice the hair drags behind slightly. That's your follow through animation in action. This follow through continues in the stretched and up poses too, where the head tilts based on the body's motion.And the hair follows with a soft delay, adding more realism and flow to the movement.And there you have it. A simple but solid profile run cycle, combining accurate body mechanics with a touch of secondary motion to bring your character to life.Hope you found this tutorial helpful and learn something new.In the next video, we'll explore how to animate a run cycle from the 3/4 angle. Thanks for watching and learning with me. See you in the next tutorial. 😘😘😘😘😘😘😘😘😘😘😘😘😘😘😘😘😘😘😘😘😘😘😘😘😘😘😘😘😘😘😘😘😘😘😘😘😘😘😘😘 हेलो स्टूडेंट्स, इस वीडियो में हम प्रोफाइल व्यू यानी हमारे कैरेक्टर ऑर्विन के साइड एंगल से रन साइकिल को एनिमेट करना सीखेंगे। और जैसा कि हम हमेशा करते हैं, क्लीन वेक्टर ड्रॉइंग्स पर जाने से पहले हम रफ़ की पोज़ से शुरुआत करेंगे। मैंने पहले से ही कुछ रफ़ ड्रॉइंग्स तैयार की हैं, जो आपको रन साइकिल के बेसिक फ्लो को समझने में मदद करेंगी। चलिए इन्हें लूप में प्ले करते हैं ताकि आप देख सकें कि मूवमेंट कैसे काम कर रहा है। जैसा कि आप देख सकते हैं, यह एक जनरल जॉगिंग मोशन है। अभी हम कैरेक्टर में कोई खास पर्सनैलिटी या इमोशन नहीं जोड़ रहे हैं। इस समय हमारा पूरा फोकस सिर्फ़ मूवमेंट की फिज़िकल मैकेनिक्स को समझने पर है। इस तरह का बेस रन आप किसी भी स्टैंडर्ड ह्यूमनॉइड कैरेक्टर के लिए इस्तेमाल कर सकते हैं। अब थोड़ा टाइमलाइन पर ध्यान दें। आप देखेंगे कि कीफ़्रेम्स समान दूरी पर नहीं रखे गए हैं। यह जानबूझकर किया गया है। इसका संबंध इस बात से है कि एनिमेशन में टाइमिंग का इस्तेमाल रिदम और वज़न दिखाने के लिए कैसे किया जाता है। यहाँ एक अहम प्रिंसिपल लागू होता है, टाइमिंग। एक्शन जितना तेज़ होता है, उसे पूरा करने में उतने ही कम फ्रेम्स लगते हैं। इसी वजह से वॉक साइकिल, जो स्लो होती है, आमतौर पर ज़्यादा फ्रेम्स लेती है, जबकि रन साइकिल तेज़ होने के कारण कम फ्रेम्स में पूरी हो जाती है। अब चलिए पहले की पोज़ को स्टडी करते हैं, जिसे कॉन्टैक्ट पोज़ कहा जाता है। इस पोज़ में एक पैर आगे की ओर बढ़ा होता है और ज़मीन को छू रहा होता है, जबकि दूसरा पैर पीछे की ओर हवा में उठा हुआ होता है। अब हाथों पर ध्यान दें। उनकी मूवमेंट पैरों के उलट होती है। अगर बायाँ पैर आगे है, तो दायाँ हाथ आगे आएगा और बायाँ हाथ पीछे जाएगा। इस तरह की अपोज़िट मूवमेंट कैरेक्टर को बैलेंस बनाए रखने में बहुत ज़रूरी होती है और यह वॉक और रन दोनों में आम तौर पर देखने को मिलती है। ये लिम्ब पोज़िशन रन साइकिल के एक्सट्रीम्स होते हैं। ये उस सबसे दूर तक पहुँचने वाली स्थिति को दिखाते हैं जहाँ से हाथ और पैर अपनी दिशा बदलने से पहले पहुँचते हैं। 😘 रनिंग के दौरान बॉडी थोड़ी आगे की ओर झुकी होती है, जिससे रन की मोमेंटम दिखाई देती है, लेकिन सिर सीधा रहता है, जो मूवमेंट को ग्राउंडेड और बिलीवेबल बनाए रखता है। यह पोज़ एनर्जी और स्पीड का अच्छा एहसास देता है। हम इसी सेम पोज़ को साइकिल के एंड में फ्रेम 21 पर दोबारा रिपीट करेंगे। यह रिपीटेशन साइकिल को लगातार प्ले करने पर स्मूथ लूप बनाने में मदद करती है। पहला कॉन्टैक्ट पोज़ ड्रॉ करने के बाद, हम अपोज़िट कॉन्टैक्ट पोज़ पर जाते हैं, जहाँ दूसरा पैर आगे आता है। यह पोज़ फ्रेम 11 पर रखा जाता है क्योंकि पूरी रन साइकिल 21 फ्रेम्स की होती है और पहला पोज़ फ्रेम 21 पर दोहराया जाता है। इस तरह फ्रेम 11 साइकिल का मिडपॉइंट बन जाता है। यह सिमेट्रिकल स्पेसिंग यह सुनिश्चित करती है कि साइकिल क्लीन और स्मूथ तरीके से लूप हो। जैसा कि हमने सीखा है, अपोज़िट कॉन्टैक्ट में लिम्ब्स की रोल्स स्विच हो जाती हैं। अगर पहले कॉन्टैक्ट पोज़ में बायाँ पैर और दायाँ हाथ आगे थे, तो अब दायाँ पैर और बायाँ हाथ आगे आएँगे, जो आगे था वह पीछे जाएगा और जो पीछे था वह आगे आ जाएगा। अब मैं आपको एक हेल्पफुल ड्रॉइंग टिप बताता हूँ। मैंने आर्म्स को बॉडी के बाकी हिस्सों से अलग लेयर पर रखा है। बॉडी और लेग्स एक ही लेयर पर ड्रॉ किए गए हैं, जबकि आर्म्स दूसरी लेयर पर हैं। इस टेक्नीक से आप पहले बॉडी और लेग्स को सही और क्लीन बनाने पर फोकस कर सकते हैं। जब ये पार्ट्स सही हो जाएँ, तब आप आर्म्स जोड़ सकते हैं। अब आगे बढ़ते हैं। कॉन्टैक्ट पोज़ के बाद अगला की पोज़ फ्रेम 4 पर रखा जाता है, जिसे पासिंग पोज़ कहते हैं। इस पोज़ में पीछे वाला पैर आगे की ओर स्विंग करता है और सपोर्टिंग लेग को क्रॉस करता हुआ निकलता है। बॉडी थोड़ी ऊपर उठी हुई होती है, जो रन में राइज़ को दिखाती है। फिर फ्रेम 6 पर हम स्ट्रेच्ड पोज़ ड्रॉ करते हैं। यह एक डायनामिक पोज़ होता है, जहाँ पीछे वाले पैर पूरी तरह स्ट्रेच होते हैं। इससे रन में फोर्स और रीच का एहसास मिलता है। इसके बाद फ्रेम 8 पर आता है अप पोज़। यह वह मोमेंट है जब कैरेक्टर पूरी तरह ज़मीन से ऊपर होता है। दोनों पैर हवा में होते हैं। 😘 यही बात रनिंग को वॉकिंग से अलग बनाती है। इसके बाद हम फ्रेम 11 पर वापस अपोज़िट कॉन्टैक्ट पोज़ में लैंड करते हैं। हमेशा कॉन्टैक्ट पोज़ ड्रॉ करने से शुरुआत करें, फिर अपोज़िट कॉन्टैक्ट पोज़ बनाएँ। जब ये दोनों सेट हो जाएँ, तब पासिंग पोज़ पर जाएँ, उसके बाद स्ट्रेच्ड पोज़ और अंत में अप पोज़ बनाएँ। इस क्रम में रन साइकिल बनाने से मूवमेंट में कंसिस्टेंसी बनी रहती है, बैलेंस सही रहता है और टाइमिंग भी एक्यूरेट रहती है। यह एक स्ट्रक्चर्ड अप्रोच है, जो पूरे प्रोसेस को आसान बनाती है और यह सुनिश्चित करती है कि आपकी फाइनल एनीमेशन क्लीन, डायनामिक और बिलीवेबल लगे। अब साइकिल का सेकंड हाफ मूल रूप से फर्स्ट हाफ का मिरर इमेज होता है। इसलिए फ्रेम 14 पर हम दूसरा पासिंग पोज़ ड्रॉ करते हैं, जहाँ अब दूसरा पैर आगे की ओर क्रॉस करता है। फ्रेम 16 पर हम अपोज़िट स्ट्रेच्ड पोज़ बनाते हैं, फिर फ्रेम 18 पर अपोज़िट अप पोज़ और अंत में फ्रेम 21 पर ओरिजिनल कॉन्टैक्ट पोज़ दोबारा आता है, जिससे साइकिल पूरी हो जाती है। जब आप सभी रफ की पोज़ेस के लिए लेग्स और टॉर्सो पूरा कर लेते हैं, तब आर्म्स पर काम करने का समय आता है। चलिए पहले कॉन्टैक्ट पोज़ में राइट आर्म से शुरुआत करते हैं। क्योंकि राइट लेग पीछे है, इसलिए राइट आर्म आगे होना चाहिए। फ्रेम 11 पर, जो कि अपोज़िट कॉन्टैक्ट पोज़ है, हम राइट आर्म को उसकी एक्सट्रीम बैकवर्ड पोज़िशन में ड्रॉ करते हैं। अब इनके बीच हम आर्म्स की रोटेशन को एनिमेट करते हैं। फ्रेम 4 पर राइट आर्म पीछे की ओर मूव करना शुरू करता है। फ्रेम 6 पर यह थोड़ी और रोटेशन के साथ आगे बढ़ता है। फ्रेम 8 तक आर्म उस पॉइंट पर पहुँच जाता है, जहाँ वह फ्रेम 11 पर आने वाली एक्सट्रीम पोज़ से ठीक पहले पूरी तरह पीछे की ओर रोटेट हो चुका होता है। इससे आर्म्स की मूवमेंट में एक अच्छा ओवरलैपिंग आर्क बनता है। फ्रेम 14 से आगे आर्म फिर से आगे की ओर स्विंग करना शुरू करता है, उसी आर्क को रिवर्स ऑर्डर में फॉलो करते हुए, और फ्रेम 21 पर वापस ओरिजिनल फॉरवर्ड पोज़ पर पहुँच जाता है। अब चलिए लेफ्ट आर्म के बारे में बात करते हैं। 😘 आप हर फ्रेम में इसे राइट आर्म की अपोज़िट पोज़िशन में ड्रॉ करेंगे। यानी अगर राइट आर्म आगे है, तो लेफ्ट आर्म पीछे होगा और अगर राइट आर्म पीछे है, तो लेफ्ट आर्म आगे होगा। इसी के साथ किसी भी स्टैंडर्ड कैरेक्टर के लिए प्रोफाइल व्यू रन साइकिल की आपकी रफ पोज़ेस पूरी हो जाती हैं। जब आप रफ एनीमेशन से संतुष्ट हो जाएँ, तब क्लीन वेक्टर वर्ज़न पर जाने का समय आता है। इसके लिए मैं ऑरविन का प्रोफाइल व्यू वेक्टर कैरेक्टर इम्पोर्ट करूँगा, जिसे मैंने पहले ही एक मॉडल शीट के हिस्से के रूप में तैयार किया था, और मुझे उम्मीद है कि आपके पास भी आपका प्रोफाइल एंगल कैरेक्टर वेक्टर रेडी होगा। यह रिगिंग ट्यूटोरियल से आपका असाइनमेंट था और इस अगले पार्ट के लिए हमें उसी रिग्ड वर्ज़न की ज़रूरत पड़ेगी। सबसे पहले उस फाइल को खोलें जिसमें आपका प्रोफाइल कैरेक्टर मॉडल है। प्रोफाइल व्यू में कैरेक्टर सिंबल को सेलेक्ट करें, उसे कॉपी करें और फिर अपनी करंट एनीमेशन फाइल में स्विच करें। एक नया लेयर बनाइए और उस लेयर पर सिंबल पेस्ट कर दीजिए। अब हम अपने क्लीन वेक्टर कैरेक्टर को उन रफ पोज़ेस से मैच करने के लिए तैयार हैं, जो हमने अभी बनाए हैं। क्लीन वेक्टर आर्टवर्क को रफ पोज़ेस से मैच करना शुरू करने से पहले, आइए पहले हिप एरिया और नेक एरिया के लिए कुछ रेफरेंस गाइडलाइन्स ऐड कर लें। ये हमें सभी फ्रेम्स में कंसिस्टेंसी बनाए रखने में मदद करेंगी। इसके बाद ऑरविन प्रोफाइल सिंबल के अंदर एंटर करें। अंदर जाने के बाद यह सुनिश्चित करें कि सिंबल के अंदर की टाइमलाइन मेन टाइमलाइन से मैच कर रही हो। हम फ्रेम 11 पर कीफ्रेम्स ऐड करके शुरुआत करेंगे, जो हमारा अपोज़िट कॉन्टैक्ट पोज़ है, और फिर फ्रेम वन पर काम करेंगे जहाँ इनिशियल कॉन्टैक्ट पोज़ होता है। चलिए लेग से शुरुआत करते हैं। आपको हर एक बॉडी पार्ट सिंबल के अंदर भी टाइमलाइन को मैच करना होगा। जैसे यहाँ हम राइट हैंड सिंबल के अंदर जाते हैं, फिर टाइमलाइन मैच करते हैं। अब फ्रेम 11 पर एक कीफ्रेम इंसर्ट करें। इससे उस फ्रेम पर ओरिजिनल ड्रॉइंग लॉक हो जाती है। इसके बाद फ्रेम वन पर जाकर रफ पोज़ से मैच करने के लिए ज़रूरी एडिट्स करें। 😘 इसी प्रोसेस को कैरेक्टर के हर बॉडी पार्ट के लिए रिपीट करें। यह हिस्सा ज़्यादातर विज़ुअल है, इसलिए वीडियो को ध्यान से देखें। हर बॉडी पार्ट को रफ पोज़ के साथ कैसे अलाइन किया गया है, उसे ऑब्ज़र्व करें। प्रैक्टिस के साथ यह प्रोसेस और भी तेज़ और ज़्यादा इंट्यूटिव हो जाता है। तो यह हमारा पहला कॉन्टैक्ट पोज़ है। अब हम इसी एक्सैक्ट पोज़ को कॉपी करेंगे और आख़िरी फ्रेम यानी फ्रेम नंबर 21 पर पेस्ट करेंगे। इसके बाद हम अपोज़िट कॉन्टैक्ट पोज़ पर मूव करेंगे। ज़रूर ध्यान रखें कि अनियन स्किन ऑन हो, ताकि आप पिछले ड्रॉइंग्स को आसानी से रेफर करते हुए अगला पोज़ अलाइन कर सकें। अब फिर से हर बॉडी पार्ट को कॉन्टैक्ट पोज़ के हिसाब से मैच करें, लेकिन एक ज़रूरी बदलाव के साथ। इस बार हम लेग्स और आर्म्स की पोज़िशन स्विच करेंगे। यानी अगर फ्रेम वन में राइट आर्म आगे था, तो अब फ्रेम 11 पर वह पीछे जाएगा और लेफ्ट आर्म आगे आएगा। यही चीज़ लेग्स के साथ भी होगी। राइट लेग आगे आएगा और लेफ्ट लेग पीछे जाएगा। और इस तरह आपका अपोज़िट कॉन्टैक्ट पोज़ पूरा हो जाता है। अब बाकी सभी रफ पोज़ेस को भी इसी मेथड से मैच करते जाएँ। जैसा कि आप यहाँ टाइमलाइन में देख सकते हैं, मैंने अब सभी रिमेनिंग पोज़ेस मैच कर लिए हैं और इसके साथ हमारा प्रोफाइल रन साइकिल एनीमेशन पूरा हो जाता है। अब मैं आपको कुछ फाइनल रिफाइनमेंट्स दिखाता हूँ जो मैंने एनीमेशन को पॉलिश करने के लिए किए हैं। पासिंग पोज़ में मैंने कैरेक्टर को थोड़ा सा ऊपर मूव किया है, ताकि रन करते समय ज़मीन से पुश करने पर जो नैचुरल लिफ्ट आती है, वह दिख सके। यही कॉन्सेप्ट मैंने स्ट्रेच्ड पोज़ और अप पोज़ में भी अप्लाई किया है। अब हेड और हेयर मूवमेंट पर नज़र डालते हैं, जो सेकेंडरी मोशन को इंट्रोड्यूस करता है। फ्रेम वन पर हेड सीधा रहता है और बाल ग्रैविटी की वजह से नैचुरली नीचे की ओर गिरते हैं। जैसे ही हम पासिंग पोज़ की ओर बढ़ते हैं, मैंने हेड में हल्का सा फॉरवर्ड रोटेशन ऐड किया है और आप देखेंगे कि बाल थोड़े से पीछे ड्रैग करते हैं। यही फॉलो थ्रू एनीमेशन है। यह फॉलो थ्रू स्ट्रेच्ड और अप पोज़ में भी कंटिन्यू रहता है, जहाँ हेड बॉडी की मूवमेंट के हिसाब से टिल्ट करता है। और बाल हल्की सी डिले के साथ फॉलो करते हैं, जिससे मूवमेंट में और ज़्यादा रियलिज़्म और फ्लो आता है। और बस, यही है एक सिंपल लेकिन सॉलिड प्रोफाइल रन साइकिल, जो सही बॉडी मेकैनिक्स और सेकेंडरी मोशन के टच के साथ आपके कैरेक्टर को ज़िंदा कर देता है। उम्मीद है आपको यह ट्यूटोरियल हेल्पफुल लगा होगा और आपने कुछ नया सीखा होगा। अगले वीडियो में हम 3/4 एंगल से रन साइकिल एनीमेट करना सीखेंगे। देखने और सीखने के लिए धन्यवाद। अगले ट्यूटोरियल में मिलते हैं।