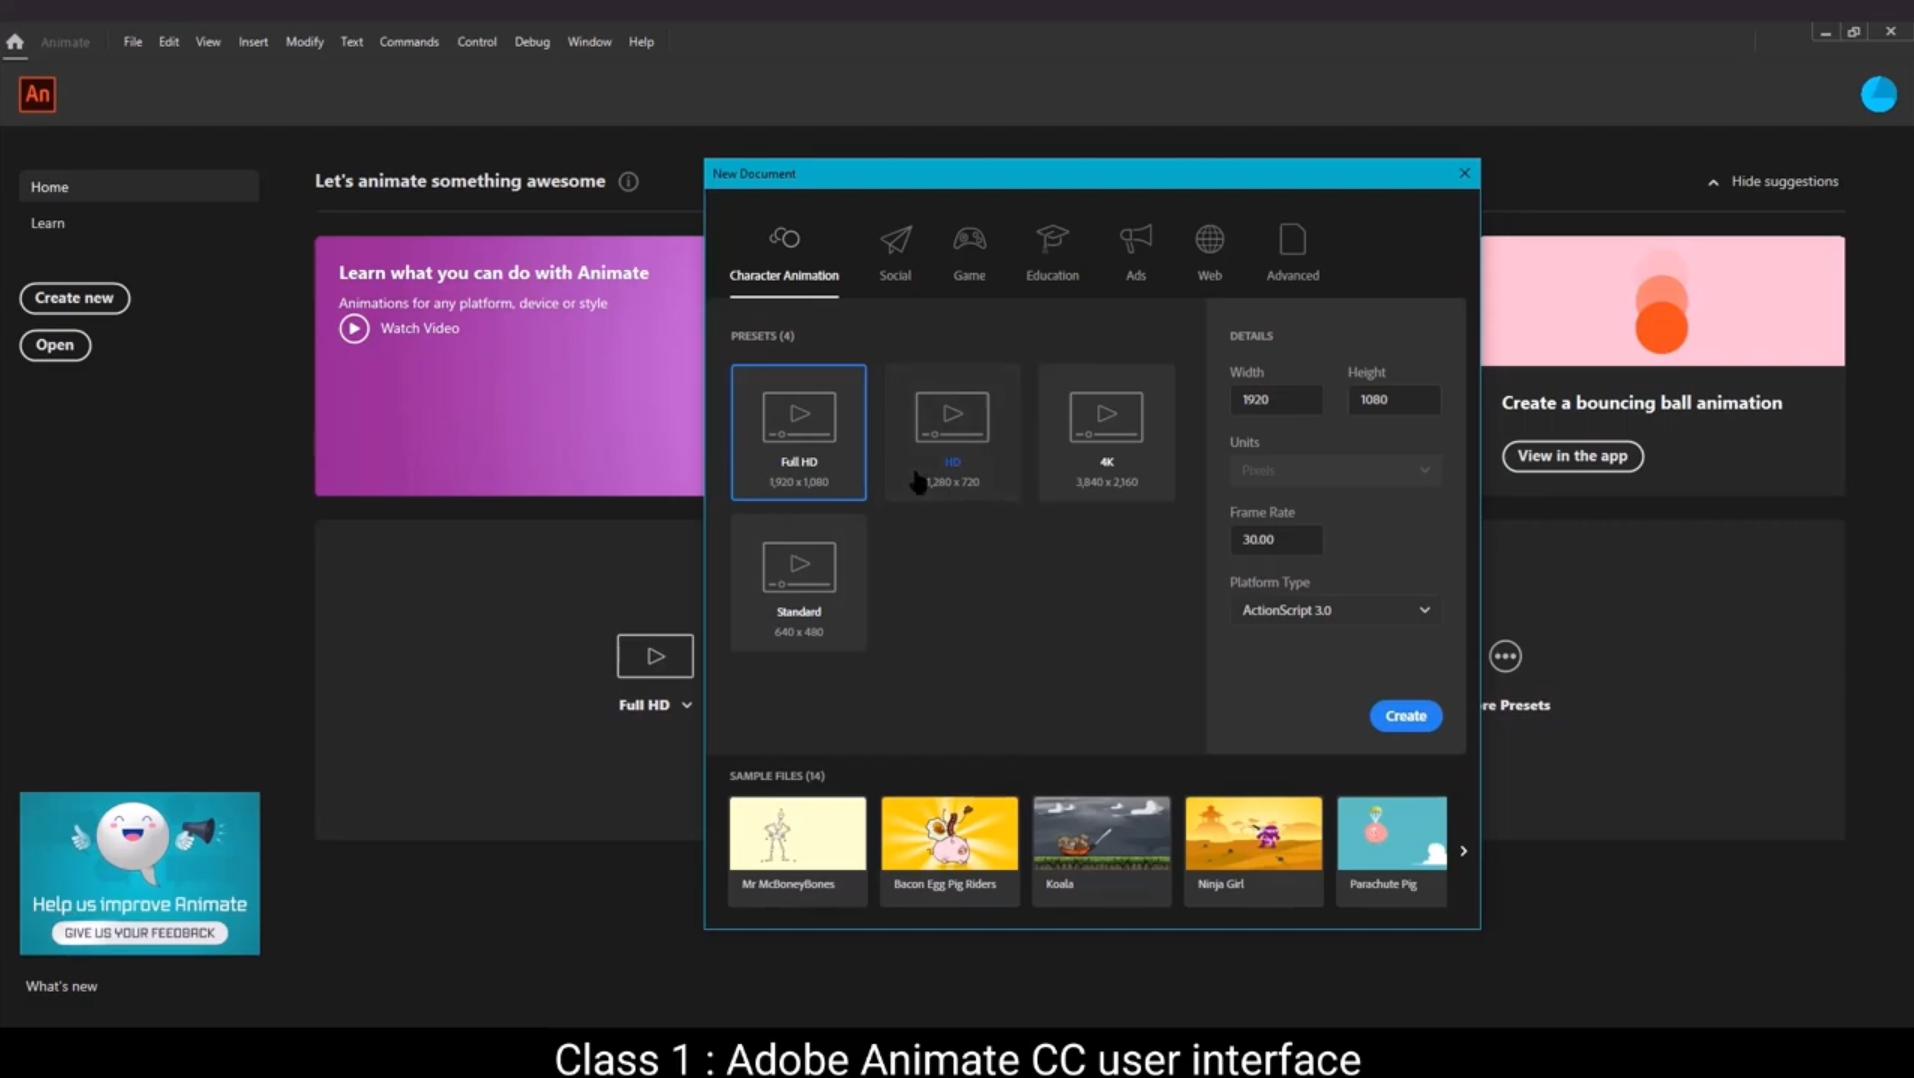
In this tutorial we are going to get familiar with the user interface of Adobe Animate.Let's start by double clicking on the Adobe Animate icon to open the program. Here we see there are four buttons on the top left Home, Learn, Create, New, and Open.The learn button will take you to lessons that Adobe Animate has for us.The create new button opens a new document and the Open button opens an already created document. Organized horizontally, we can see some preset document sizes that are standard for certain formats like Full HD, Android, iPad, etcetera. You can easily choose a preset size if you're working for any particular device.We could also use the Shortcut Control plus N or go to the file on the top menu and choose the new options there to create a new document to use a standardized size like we saw below. For any particular format or device, we can choose the Create from template option. Then the Open option obviously opens a previously created file. Adobe Bridge will take you to the Adobe Bridge program which allows you to see files that might have been saved.Another Adobe format. For example, you can see PST files which are the Photoshop format, or AI files which is the Adobe Illustrator format, and so on. The Open Recent button will give you an option to quickly choose and open from recently worked files. You will notice that the shortcut for all these options can be seen right next to them, so if you can memorize them, you can go to the options faster cuts rather than going to the Menu tab and clicking on them.Now let's click the Create New button.We see a new window pop up with several categories to choose from. We can see that we are on the character animation option by default. We can see a few options for the resolution. We choose Full HD here. This is probably the most used format. After clicking on Full HD, we can see the details to the right of the window like the width, the height, pixel, and the frame rate and the platform type which is Actionscript 3.Next we see the social options where we can see several presets for social platform like Facebook, Twitter and YouTube. Then there is a game option where again we see several presets for various gaming platforms and it's the same with all the other options. Now let's go back to character animation option. Go to Full HD template and click Create.You'll notice that the new document is ready for us to work with.This area is called the workspace. The workspace is a specific arrangement of panels, toolbars, and windows designed to help you create and manipulate your documents efficiently. Now let's explore how to manage the workspace. A workspace here is on and around the canvas. We can make changes to this if we like. Let's see what our options are. We go to the Windows main menu. Then we go down to Workspaces on the drop down menu.We see a sub menu appear when we move the cursor to the workspaces.We are now on the classic workspace. There are several to choose from. Let's choose basic just to see the difference.You will notice that there is a very different layout compared to the classic one. We can see that there's a button on the top right that allows you to switch workspace type.Let's stick to the classic mood for now. If you find that you like the other type of workspace, you can make that your default setting. The next thing we are going to look at is customizing our workspace. If you are not comfortable with any of the preset workspace layout and want to create your own, you can do that too. When you find the layout you are comfortable with, you can save that customization and use it as your default every time you open.As seen in the video, you can go to the button at your right. You will see a dialog box under the new workspace. Let's call this new workspace and then click the icon next to the box which will save our new workspace. When we go back and click the same button, you will notice that a new workspace has been saved under the saved label.You will also find the delete or the trash icon and also reset icon next to that, which means you can delete your customized workspace or reset it to default.Hope you Found this tutorial helpful, Thank you.
इस tutorial में हम Adobe Animate के user interface से familiar होने वाले हैं। चलिए शुरू करते हैं — Adobe Animate icon को double click करके program को open करते हैं। यहाँ हम देख सकते हैं कि top left में चार buttons हैं: Home, Learn, Create New, और Open. Learn button हमें Adobe Animate द्वारा दी गई कुछ basic lessons पर ले जाता है। Create New button से हम एक नया document बना सकते हैं, और Open button पहले से बने किसी document को खोलने के लिए होता है। Horizontally कुछ preset document sizes दिख रहे हैं — जैसे कि Full HD, Android, iPad, वगैरह। अगर आप किसी particular device के लिए काम कर रहे हैं, तो आप easily एक preset चुन सकते हैं। आप Ctrl + N shortcut का use करके या top menu में File > New पर जाकर भी नया document create कर सकते हैं। अगर आप किसी particular format या device के लिए standardized size का use करना चाहते हैं, तो आप Create from template का option चुन सकते हैं। Open option obviously पहले से बने हुए files को open करता है। Adobe Bridge एक अलग program है जो आपको saved files देखने की सुविधा देता है — जैसे कि .psd or Photoshop या .ai or Illustrator files वगैरह। Open Recent से आप जल्दी से हाल ही में इस्तेमाल किए गए files open कर सकते हैं। आप देखेंगे कि हर option के पास उसका shortcut लिखा हुआ होता है — अगर आप इन्हें याद कर लें, तो menu में जाने की बजाय fast access कर सकते हैं। अब चलिए Create New button पर click करते हैं। एक नई window pop-up होती है जहाँ कई categories दी गई हैं। By default, हम Character Animation option पर हैं। यहाँ कुछ resolution options भी दिखते हैं। हम यहाँ Full HD चुनते हैं — जो सबसे ज्यादा commonly used format है। Full HD पर click करते ही, window के right side में हमें इसके details दिखते हैं — जैसे width, height, pixel, frame rate और platform type. Next हम देखते हैं Social options — जिसमें Facebook, Twitter, YouTube जैसे platforms के लिए presets हैं। Game option में भी अलग-अलग gaming platforms के लिए presets दिए गए हैं — बाकी सभी categories की तरह। अब वापस Character Animation option पर जाते हैं, Full HD template चुनते हैं और Create पर click करते हैं। अब नया document हमारे सामने ready है। इस area को हम Workspace कहते हैं। Workspace एक ऐसी जगह होती है जहाँ panels, toolbars और windows arranged होते हैं ताकि आप efficiently काम कर सकें। Workspace canvas के आस-पास होता है और आप इसमें changes भी कर सकते हैं। आइए देखते हैं क्या-क्या options हैं: Top menu में Window > Workspaces पर जाएं — drop down menu में cursor को Workspaces पर ले जाएं। अब आप देखेंगे कि हम अभी Classic workspace पर हैं। कई अलग-अलग layouts available हैं — चलिए Basic select करके देखते हैं। आप देखेंगे कि Classic और Basic workspace में layout काफी अलग है। Top right में एक button है जिससे आप workspace switch कर सकते हैं। अभी हम Classic पर वापस आते हैं। अगर आपको कोई workspace अच्छा लगता है, तो आप उसे default भी बना सकते हैं। अब बात करते हैं workspace को customize करने की। अगर preset layouts आपको comfortable नहीं लगते, तो आप अपना खुद का layout बना सकते हैं। जब आप comfortable layout बना लें, तो आप उसे save भी कर सकते हैं। जैसा कि video में दिखाया गया है, right side में दिए गए button पर जाएं — एक dialog box खुलेगा जहाँ आप अपना layout नाम दे सकते हैं, जैसे "My Workspace", और फिर save icon पर click करें। अब जब आप वापस वही button open करेंगे, तो Saved label के नीचे आपका नया workspace दिखेगा। वहाँ आपको Delete or Trash और Reset icons भी दिखेंगे — जिससे आप custom workspace को delete या reset कर सकते हैं। उम्मीद है ये tutorial आपके लिए helpful रहा होगा। Thank you.