Welcome to part 2. Now that we have animated the Wick of the bomb with sparks in the first part, we will move to the actual explosion. In this part we have a new layer already made called explosion. We start by locking all the other layers except the explosion layer. The next step will be to draw a rectangle using the rectangle tool. The shortcut key is R We delete the outlines and change the fill to yellow by going to fill which is in properties, Object Color and style.We are now going to modify the shape of this rectangle holding down the alt key and turn it into a starry shape. Please follow the video for the shape to be created. What we are doing now is drawing keys for our explosion animation. This will start making more sense as we move along ahead and draw more keys. Once our shape is done we select the shape and convert it into a symbol using F8 and we call it explosion. We now enter the symbol by double clicking on our first Key drawing that we have just drawn. Then we add a new layer too and lock layer one. We're going to draw a similar shape to the first one, only this one will be smaller, white and will be inside the first one. Next we Add a blank keyframe on frame 3, then we switch on the onion skin. please See the video to locate the onion skin so that we can see the previous frame and draw our current frame in relation to that. This is how it works in traditional animation, we lock layer 2 and we draw a similar shape on layer one as seen in the video. And so we have drawn this shape, we scale it up to 110%, then scale it up to same percentage once more using the scale and rotate tool, for which the shortcut is Control Alt S.
😘
Then we go and lock layer one, go to layer 2 and draw other smaller white starry shape inside the bigger yellow starry shape, exactly like we've done for keyframe 1.We then scale it up to around 130% as seen in the video.Then we draw two more keyframes of bright flashing light. After the first two keyframes that we have already drawn using the same process, there will be slight color change in the next two frames. Please follow the video and make those changes. Once these two key drawings for the flashlight things are done, we start drawing the keyframes for the smoke. Please keep a close look on how the layers are placed. Layers with the smoke have been added under layer one. Please keep with the video and follow the drawings in the video closely to keep as close to the effect as possible. We have Now drawn 4 key drawings of flashlight and five key drawings of smoke filling most of the screen.We are now going to fill our key drawings of the smoke. We will choose a darkish grey for this. To add a fill to these key drawings, we add a new layer 5 as seen in the video and drag it under layer 4 so that this is the first layer in the stack.We then go to frame 7 where our first keep drawing of smoke is add a keyframe there using F6. We then color the drawing using the brush tool instead of fill bucket. Because our drawings of a small are drawn using brush tool in the traditional style, they are not derived from a shape such as rectangle or circle. So they are going to have a several break in the shape. And I'm sure you already are aware that unless the outline of a vector is completely closed, we cannot use the bucket tool to fill it. So we are going to have to color our smoke drawings using brush tool. So we are going to have to color our smoke drawings using brush tool. Please follow the video to see the brush settings. We choose the shade of grey from fill which is in properties, Object Color and style and then adjust the brush size by going to brush options which is again in properties and objects. Now that our coloring of all the keyframes is done, we exit the symbol by clicking on the scene 1 tab and we move the first key of the explosion further ahead to frame 31 as seen in the video.
Part 2 में आपका स्वागत है। अब जब हमने पहले हिस्से में बम की Wick को sparks के साथ animate कर लिया है, हम actual blast की तरफ बढ़ेंगे।
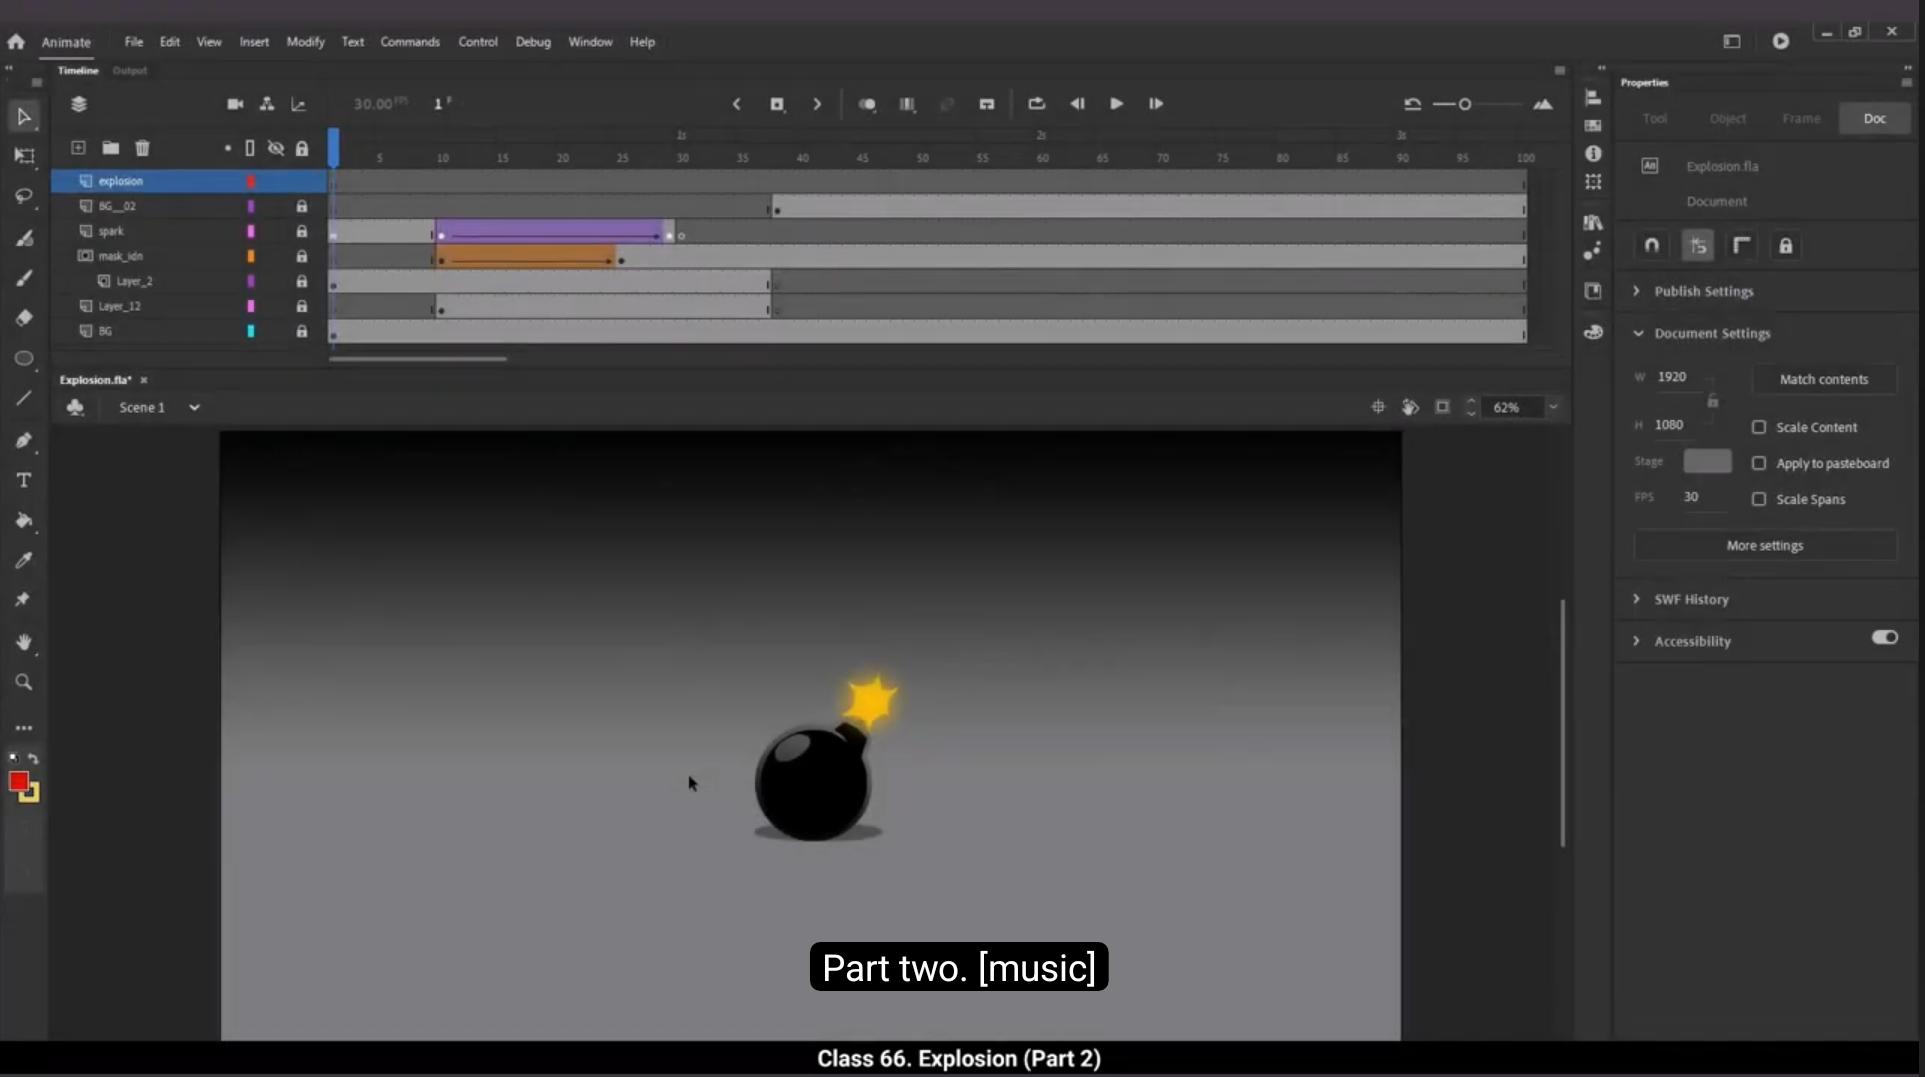
इस हिस्से में हमारे पास पहले से बनाया हुआ एक नया layer है जिसका नाम explosion है।
हम सबसे पहले explosion layer को छोड़कर बाकी सभी layers को lock कर देते हैं।
अगला step है rectangle tool का इस्तेमाल करके एक rectangle draw करना। Shortcut key है R।
हम outlines को delete कर देते हैं और fill को properties में जाकर Object Color and Style से yellow कर देते हैं।
अब हम Alt key को दबाकर rectangle की shape modify करते हैं और उसे star जैसा shape देते हैं। Shape बनाने के लिए वीडियो को follow करें।
हम अभी explosion animation के key drawings बना रहे हैं। जैसे-जैसे और keys बनेंगे, ये और ज्यादा समझ में आएगा।
Shape बनने के बाद हम उसे select करते हैं और F8 दबाकर उसे एक symbol में convert कर देते हैं, और उसे explosion नाम देते हैं।
अब हम symbol के अंदर enter करते हैं, इसके लिए अभी-अभी बनाए गए first key drawing पर double click करते हैं।
फिर हम एक नया layer add करते हैं और layer 1 को lock कर देते हैं।
हम पहली shape के जैसा ही एक shape draw करेंगे, लेकिन ये छोटी होगी, सफेद रंग की होगी और पहली shape के अंदर होगी।
अब हम frame 3 पर एक blank keyframe add करते हैं और फिर onion skin को ON करते हैं। पिछला frame देखकर current frame draw करने के लिए वीडियो देखें।
Traditional animation में यही तरीका उपयोग होता है। हम layer 2 को lock करके, layer 1 पर वीडियो में दिखाए अनुसार similar shape draw करते हैं।
Shape draw होने के बाद हम इसे 110% तक scale करते हैं, और फिर उसी प्रतिशत से दोबारा scale करते हैं। इसके लिए scale and rotate tool इस्तेमाल करते हैं, जिसका shortcut है Control + Alt + S।
😘
फिर हम layer 1 को lock कर देते हैं, layer 2 पर जाते हैं और बड़ी yellow starry shape के अंदर एक और छोटी white starry shape draw करते हैं, बिल्कुल वैसे ही जैसे हमने keyframe 1 में किया था।
फिर हम इसे लगभग 130% तक scale करते हैं जैसा कि वीडियो में दिखाया गया है।
इसके बाद हम bright flashing light के दो और keyframes draw करते हैं। पहले दो keyframes उसी process से हैं जो हमने पहले बनाए, और अगले दो frames में हल्का-सा color change होगा। वीडियो follow करके ये बदलाव करें।
जब flashlight वाले ये दो key drawings बन जाते हैं, तब हम smoke के keyframes draw करना शुरू करते हैं।
Layers कैसे रखी गई हैं उस पर ध्यान दें। Smoke वाली layers, layer 1 के नीचे add की गई हैं। वीडियो के drawings को ध्यान से follow करें ताकि effect वैसा ही बने।
अब हमने flashlight के 4 key drawings और smoke के 5 key drawings बना लिए हैं जो screen का ज़्यादातर हिस्सा cover कर रहे हैं।
अब हम smoke वाले key drawings को fill करना शुरू करेंगे। इसके लिए हम dark grey चुनेंगे।
इन key drawings को fill करने के लिए, हम एक नया layer 5 add करते हैं और इसे drag करके layer 4 के नीचे ले जाते हैं ताकि ये stack में सबसे पहले रहे।
फिर हम frame 7 पर जाते हैं जहाँ हमारा पहला smoke key drawing है और वहाँ F6 दबाकर keyframe add करते हैं।
हम इन drawings को brush tool से color करते हैं, fill bucket से नहीं। क्योंकि हमारे smoke drawings traditional style brush से बनाए गए हैं और ये rectangle या circle जैसे shapes पर आधारित नहीं हैं, इस वजह से इनकी outlines कई जगहों पर टूटी होती हैं।
आप जानते हैं कि जब तक vector outline पूरी तरह बंद न हो, हम bucket tool से fill नहीं कर सकते, इसलिए हमें brush tool ही इस्तेमाल करना पड़ेगा।
वीडियो में brush settings देखें। हम grey shade fill में properties, Object Color and Style से चुनते हैं और brush size को properties में जाकर adjust करते हैं।
जब हमारे सारे keyframes का coloring पूरा हो जाता है, हम scene 1 tab पर click करके symbol से बाहर आ जाते हैं और explosion के पहले key को आगे बढ़ाकर frame 31 पर ले जाते हैं जैसा कि वीडियो में दिखाया गया है।