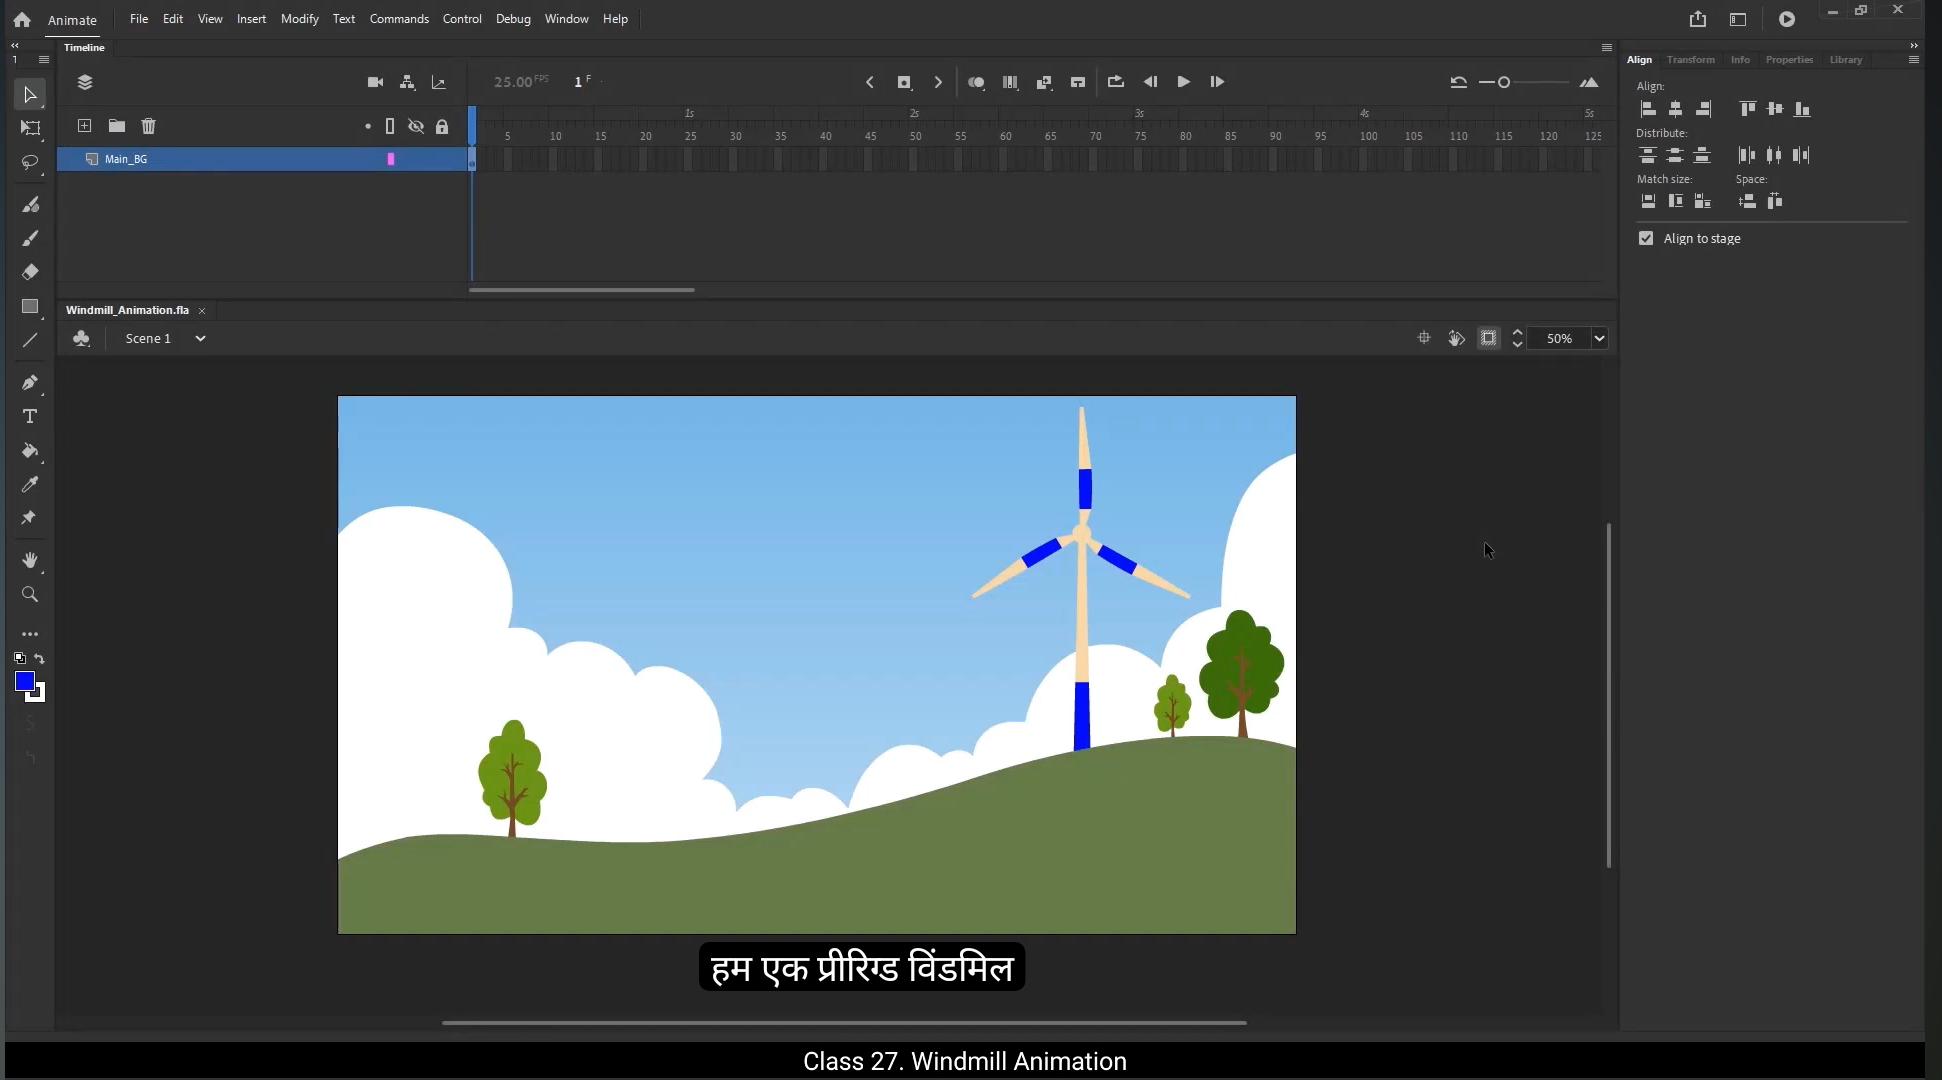
Hello students, welcome back to the digital tutors. In this video, we're going to learn how to create a beautiful windmill animation using a very simple technique. So let's get started.We are starting with a pre rigged windmill animation vector file. First double click on the main BG symbol to explore its structure. Inside you'll see there are four separate layers, a windmill, trees, the sky with clouds and a hill.Now go into the windmill symbol to focus on its component. The windmill has two layers, the pole and all blades.All blade symbol contains another nested symbol called shaft.Which holds four different parts, Blade one, blade 2, blade 3 and the center pivot.I've set the pivot point exactly in the middle because we want the blades to rotate smoothly from the center.Let's animate it, get inside the windmill symbol, then extend the timeline on both layers till frame 75.Shortcut key is F5.Keep the pole layer locked to avoid accidental changes. On the last frame of the blade's layer, insert a keyframe. Then on the 1st frame create a motion tween.Now in the Properties panel, under Frame tab, set the rotation to Clockwise.You can see now the blades are rotating smoothly. Currently the animation is only visible within the windmill symbol. To make it visible outside, exit the windmill symbol and extend the frames for all symbols in the main BG layer till frame 375. This extends the animation duration to 15 seconds. Next exit the symbol as well by clicking the scene one link.Back in the main timeline, let's extend the frames to match the duration of the.Animation Select frame 375 and press F5. This ensures the entire animation, including the spinning blades, is visible for the full 15 seconds.Double click on the main BG symbol to enter it.Now select the windmill layer in the timeline.Go to Modify symbol and click Duplicate symbol to create multiple windmills.Rename the symbol as Windmill one.Notice that the new symbol does not appear in the timeline. To fix this, let's create a new layer. Name this layer Windmill one.Now open the library panel, find the Windmill One symbol and drag it onto the stage.Scale it down to 25%.Adjust the pivot point to the base of the windmill.Position it correctly and use free transform tool to adjust its size to match with background.To add another windmill, add a new layer and rename it as Windmill 2.Then copy Windmill one symbol shortcut key control C and paste it on windmill two layer using shortcut control V.Use the free transform tool to adjust its size and position it accordingly in the scene. Select Windmill symbol and right click it. Select Duplicate symbol then name it as Windmill 2.Make another copy of windmill symbol, add a new layer and rename it as Windmill 3.Next, copy the symbol.And paste in place on windmill three layer.Adjust its position using shift left arrow key.Use free transform tool to adjust its size to match with background.Select Windmill symbol and right click it. Select Duplicate symbol then name it as Windmill 3.Let's preview the animation. Right now, all the windmills are rotating at the same speed. While this looks neat, it's not entirely realistic. In real life, when you observe windmills from a distance, you'll notice that the blades of the closer windmills appear to rotate faster, while the distant ones seem slower. This happens because of the visual perception of movement over distance. To make our animation look more natural and add that.Stick Touch. We'll adjust the rotation speed for each windmill based on its distance from the viewer.Enter the windmill three symbol. Select both layers inside the symbol. Extend the timeline by pressing F5 on your keyboard, adding 13 frames.Then enter the windmill 2 symbol and add 25 more frames in the same way.Next, enter windmill one symbol and remove 10 frames using Shift F5 key. This will make it rotate slightly faster.As you can see, the windmills are now rotating at different speeds. Lastly, we will tweak the starting frames in the looping section to offset their rotations.Select windmill symbol.Go to Properties panel and under Object tab find the looping section.Here change the value of 1st frame.Here I have set it 16.So it starts the animation from the 16th frame. Do the same for the other windmills. For windmill 2, change the 1st frame value to 7.And for windmill three, set it to 69. You can set any value. Our aim is to make the rotation look offset. With these adjustments, the rotations are now offset, making the animation look much more subtle and smooth.Now let's add shadows for each windmill to make the scene look more realistic.Right click Windmill Layer and select Duplicate Layer.Move the layer above all layer and rename it as windmill shadow.Now right click the symbol, then go to Transform and choose Flip Vertical.Use free transform tool to skew and adjust perspective to align the slope of hill.Then go to Modify symbol and choose Duplicate symbol. Name it as windmill shadow.Double click on it to enter the symbol.Now lock the all blade layer.Then right click on the poll symbol and choose duplicate symbol. Name it as poll shadow. Now double Click to enter poll symbol.Press Control B to break apart.And adjust the drawing to match the shape and perspective of the pole itself.To make it feel more natural, add a slight curve to the shadow so it mimics the Hill's slope. Don't overdo it, Just a subtle curve will give the shadow the right perspective, making it look like it's naturally falling on the ground. This adds A realistic touch to your scene.Exit the symbol by clicking outside. Then select symbol and go to properties object and find color effect. Select tint effect.Now unlock all blade layer and select all blade symbol. Go to properties object.Color effect and select Tint effect.Exit the symbol.Select the Windmill shadow layer.Go to Properties object Color Effect and select Alpha.Set value to 35.Alright, let's preview the animation now.If you notice a glitch, that's because we forgot to add the tint effect on the last frame of the shadow symbol.No worries, let's fix it. First, double Click to enter the windmill shadow symbol. You'll see that on the 1st frame we've already added the tint effect, but we missed it on the last frame. So select the last frame of the shadow symbol and then add the tint effect there as well.Let's preview the animation one more time.That looks much better. The shadow and the windmill are perfectly In Sync and everything is matching up nicely.We will follow the same steps to make shadows for remaining windmills.Right click Windmill one Layer and select Duplicate Layer.Move the layer to the top.And rename it as Windmill 1 Shadow.Now right click the symbol, then go to Transform and choose Flip Vertical.Right click again and choose Duplicate symbol. Name it as Windmill 1 Shadow.Use free transform tool to skew and adjust perspective to align the slope of hill.Double click on it to enter the symbol.Select 1st frame on all blade symbol, go to properties object color effect and select tint effect.Do the same for the last frame as well.Now lock the all blade layer then right click on the pole symbol and choose duplicate symbol.Name it as Pole 1 Shadow.Now double Click to enter poll symbol. Press Control B to break apart and adjust the drawing to match the shape and perspective of the pole like we did for the first pole. Exit the symbol by clicking outside.Then select pole layer and go to properties object and find color effect. Select tint effect.Exit the symbol.Select the Windmill 1 shadow layer, go to Properties, Object Color Effect and select Alpha.Set value to 31.Now, we'll repeat the same process for the next two windmills. By now, I am sure you've got a good understanding of the steps, but if you missed anything, feel free to rewind the video and follow the steps again. To keep things engaging and avoid repetition, I'll skip over this part for now and jump to the next step. Let's keep moving forward.Finally, all windmills are now ready. I'll save the file and test the animation.The windmills are rotating at different speeds and the shadows are moving seamlessly with them. And that's it. A simple yet effective windmill animation with realistic shadows and varying speeds.Thank you for joining me in this tutorial. See you in the next session. हैलो स्टूडेंट्स, वेलकम बैक टू द डिजिटल ट्यूटर्स। इस वीडियो में हम सीखेंगे कि कैसे एक बहुत सिंपल टेक्निक से एक ब्यूटीफुल विंडमिल एनीमेशन बनाया जाता है। तो चलिए शुरू करते हैं। हम एक प्री-रिग्ड विंडमिल एनीमेशन वेक्टर फाइल से शुरू कर रहे हैं। सबसे पहले मेन BG सिंबल पर डबल क्लिक करें ताकि उसकी स्ट्रक्चर को एक्सप्लोर किया जा सके। अंदर आपको चार अलग-अलग लेयर्स दिखेंगी — एक विंडमिल, ट्रीज़, क्लाउड्स वाला स्काई और एक हिल। अब विंडमिल सिंबल के अंदर जाएं ताकि उसके कंपोनेंट्स पर फोकस किया जा सके। विंडमिल में दो लेयर्स हैं — पोल और ऑल ब्लेड्स। ऑल ब्लेड सिंबल के अंदर एक और नेस्टेड सिंबल होता है जिसे शाफ्ट कहा गया है। जिसके अंदर चार अलग-अलग पार्ट्स हैं — ब्लेड 1, ब्लेड 2, ब्लेड 3 और सेंटर पिवट। मैंने पिवट पॉइंट को बिल्कुल सेंटर में सेट किया है ताकि ब्लेड्स स्मूथली सेंटर से रोटेट कर सकें। अब इसे एनिमेट करते हैं — विंडमिल सिंबल के अंदर जाएं और दोनों लेयर्स की टाइमलाइन को फ्रेम 75 तक एक्सटेंड करें। शॉर्टकट की है F5। पोल लेयर को लॉक रखें ताकि कोई गलती से बदलाव न हो। ब्लेड लेयर के लास्ट फ्रेम पर एक कीफ्रेम इंसर्ट करें। फिर पहले फ्रेम पर एक मोशन ट्वीन बनाएं। अब प्रॉपर्टीज पैनल में, फ्रेम टैब के अंदर रोटेशन को क्लॉकवाइज़ सेट करें। अब आप देख सकते हैं कि ब्लेड्स स्मूथली घूम रहे हैं। अभी एनीमेशन सिर्फ विंडमिल सिंबल के अंदर ही दिखाई दे रहा है। इसे बाहर भी विज़िबल करने के लिए, विंडमिल सिंबल से बाहर आएं और मेन BG लेयर में सभी सिंबल्स के फ्रेम्स को 375 तक एक्सटेंड करें। इससे एनीमेशन की ड्यूरेशन 15 सेकंड तक बढ़ जाएगी। अब सीन वन लिंक पर क्लिक करके सिंबल से बाहर आएं। अब मेन टाइमलाइन में, फ्रेम्स को एनीमेशन की ड्यूरेशन के अनुसार एक्सटेंड करें। फ्रेम 375 को सेलेक्ट करें और F5 दबाएं। इससे पूरी एनीमेशन, जिसमें स्पिनिंग ब्लेड्स भी शामिल हैं, पूरे 15 सेकंड तक विज़िबल रहेगी। मेन BG सिंबल पर डबल क्लिक करें ताकि उसके अंदर जा सकें। अब टाइमलाइन में विंडमिल लेयर को सेलेक्ट करें। Modify सिंबल में जाएं और Duplicate Symbol पर क्लिक करें ताकि मल्टीपल विंडमिल्स बनाई जा सकें। सिंबल का नाम बदलकर Windmill One रखें। ध्यान दें कि नया सिंबल टाइमलाइन में दिखाई नहीं दे रहा है। इसे ठीक करने के लिए एक नई लेयर बनाएं। इस लेयर का नाम Windmill One रखें। अब लाइब्रेरी पैनल खोलें, Windmill One सिंबल को ढूंढें और उसे स्टेज पर ड्रैग करें। इसे 25% तक स्केल डाउन करें। पिवट पॉइंट को विंडमिल के बेस पर एडजस्ट करें। इसे सही पोजिशन में रखें और फ्री ट्रांसफॉर्म टूल से इसका साइज बैकग्राउंड के हिसाब से एडजस्ट करें। एक और विंडमिल जोड़ने के लिए, नई लेयर बनाएं और उसे Windmill 2 नाम दें। फिर Windmill One सिंबल को कॉपी करें (शॉर्टकट कंट्रोल + C) और Windmill Two लेयर पर पेस्ट करें (कंट्रोल + V)। फ्री ट्रांसफॉर्म टूल का उपयोग करके उसका साइज और पोज़िशन सीन के अनुसार एडजस्ट करें। विंडमिल सिंबल को सेलेक्ट करें और राइट क्लिक करें। Duplicate Symbol चुनें और उसका नाम Windmill 2 रखें। विंडमिल सिंबल की एक और कॉपी बनाएं, नई लेयर जोड़ें और उसका नाम Windmill 3 रखें। अब सिंबल को कॉपी करें। और उसे Windmill 3 लेयर पर उसी जगह पेस्ट करें। Shift + Left Arrow key का इस्तेमाल करके उसकी पोज़िशन एडजस्ट करें। फ्री ट्रांसफॉर्म टूल से उसका साइज बैकग्राउंड के अनुसार एडजस्ट करें। विंडमिल सिंबल को सेलेक्ट करें और राइट क्लिक करें। Duplicate Symbol चुनें और उसका नाम Windmill 3 रखें। अब एनीमेशन को प्रीव्यू करते हैं। अभी सभी विंडमिल्स एक ही स्पीड से घूम रही हैं। यह अच्छा लग रहा है, लेकिन पूरी तरह रियलिस्टिक नहीं है। रियल लाइफ़ में जब आप विंडमिल्स को दूर से देखते हैं, तो आपको लगेगा कि पास वाली विंडमिल्स तेज़ घूम रही हैं और दूर वाली स्लो। ऐसा इसलिए होता है क्योंकि दूरियों पर मूवमेंट की विजुअल परसेप्शन बदल जाती है। हमारी एनीमेशन को ज़्यादा नेचुरल और रियलिस्टिक बनाने के लिए, हम हर विंडमिल की रोटेशन स्पीड को उसकी दूरी के हिसाब से एडजस्ट करेंगे। विंडमिल 3 सिंबल के अंदर जाएं। सिंबल के अंदर दोनों लेयर्स को सेलेक्ट करें। कीबोर्ड पर F5 दबाकर टाइमलाइन को 13 फ्रेम तक एक्सटेंड करें। फिर विंडमिल 2 सिंबल में जाएं और उसी तरह 25 और फ्रेम्स जोड़ें। इसके बाद विंडमिल 1 सिंबल में जाएं और Shift + F5 का इस्तेमाल करके 10 फ्रेम्स हटा दें। यह इसे थोड़ा तेज़ी से रोटेट करेगा। जैसा कि आप देख सकते हैं, अब विंडमिल्स अलग-अलग स्पीड पर घूम रही हैं। आख़िर में, हम लूपिंग सेक्शन में शुरुआती फ्रेम्स को थोड़ा एडजस्ट करेंगे ताकि उनकी रोटेशन ऑफसेट लगे। विंडमिल सिंबल को सेलेक्ट करें। प्रॉपर्टीज पैनल में जाएं और ऑब्जेक्ट टैब के अंदर लूपिंग सेक्शन को ढूंढें। यहाँ 1st फ्रेम का वैल्यू बदलें। मैंने यहाँ इसे 16 सेट किया है ताकि एनीमेशन 16वें फ्रेम से शुरू हो। बाकी विंडमिल्स के लिए भी यही करें। विंडमिल 2 के लिए, 1st फ्रेम वैल्यू को 7 सेट करें। और विंडमिल 3 के लिए, इसे 69 सेट करें। आप कोई भी वैल्यू रख सकते हैं — हमारा मक़सद है कि रोटेशन ऑफसेट लगे। इन एडजस्टमेंट्स के बाद, अब रोटेशन्स ऑफसेट दिखेंगी, जिससे एनीमेशन और ज़्यादा स्मूद और नेचुरल लगेगी। अब हर विंडमिल के लिए शैडोज़ ऐड करते हैं ताकि सीन और ज़्यादा रियलिस्टिक दिखे। विंडमिल लेयर पर राइट क्लिक करें और Duplicate Layer सेलेक्ट करें। लेयर को सबसे ऊपर मूव करें और उसका नाम Windmill Shadow रखें। अब सिंबल पर राइट क्लिक करें, Transform में जाएं और Flip Vertical चुनें। फ्री ट्रांसफॉर्म टूल का इस्तेमाल करके उसे स्क्यू करें और हिल की स्लोप के साथ परफेक्टली अलाइन करें। फिर Modify Symbol में जाएं और Duplicate Symbol चुनें। इसका नाम Windmill Shadow रखें। डबल क्लिक करके सिंबल के अंदर जाएं। अब All Blade लेयर को लॉक करें। फिर पोल सिंबल पर राइट क्लिक करें और Duplicate Symbol चुनें। इसका नाम रखें Pole Shadow। अब डबल क्लिक करके पोल सिंबल के अंदर जाएं। Control + B दबाकर उसे Break Apart करें। ड्रॉइंग को एडजस्ट करें ताकि वो पोल की शेप और परस्पेक्टिव से मैच करे। नेचुरल फील देने के लिए, शैडो में थोड़ा सा कर्व ऐड करें ताकि वो हिल की स्लोप को मिमिक करे। ज़्यादा ओवरडू न करें, बस थोड़ा कर्व ही शैडो को रियलिस्टिक लुक देगा जिससे ऐसा लगेगा कि वो नैचुरली ग्राउंड पर गिर रही है। यह आपकी सीन में एक रियलिस्टिक टच जोड़ देगा। बाहर क्लिक करके सिंबल से बाहर आएं। फिर सिंबल को सेलेक्ट करें और प्रॉपर्टीज → ऑब्जेक्ट में जाएं और कलर इफेक्ट ढूंढें। Tint Effect चुनें। अब All Blade लेयर को अनलॉक करें और All Blade सिंबल को सेलेक्ट करें। प्रॉपर्टीज → ऑब्जेक्ट → कलर इफेक्ट में जाएं और Tint Effect सेलेक्ट करें। सिंबल से बाहर आएं। Windmill Shadow लेयर को सेलेक्ट करें। प्रॉपर्टीज → ऑब्जेक्ट → कलर इफेक्ट में जाकर Alpha सेलेक्ट करें। वैल्यू को 35 सेट करें। अब एनीमेशन का प्रीव्यू करते हैं। अगर कोई गड़बड़ी दिखे, तो वो इसलिए है क्योंकि हमने शैडो सिंबल के लास्ट फ्रेम पर Tint Effect ऐड करना भूल गए थे। कोई बात नहीं, इसे फिक्स करते हैं। सबसे पहले Windmill Shadow सिंबल में डबल क्लिक करके अंदर जाएं। आप देखेंगे कि पहले फ्रेम पर Tint Effect लगा हुआ है, लेकिन लास्ट फ्रेम पर नहीं है। तो शैडो सिंबल के लास्ट फ्रेम को सेलेक्ट करें और वहाँ भी Tint Effect ऐड करें। अब एनीमेशन को फिर से प्रीव्यू करें। अब ये काफी बेहतर लग रहा है। शैडो और विंडमिल परफेक्टली इन सिंक हैं और सब कुछ बहुत अच्छे से मैच हो रहा है। अब बाकी विंडमिल्स के लिए भी यही स्टेप्स फॉलो करेंगे। Windmill One लेयर पर राइट क्लिक करें और Duplicate Layer सेलेक्ट करें। लेयर को ऊपर मूव करें और उसका नाम Windmill 1 Shadow रखें। अब सिंबल पर राइट क्लिक करें, Transform में जाएं और Flip Vertical चुनें। फिर से राइट क्लिक करें और Duplicate Symbol चुनें। इसका नाम Windmill 1 Shadow रखें। फ्री ट्रांसफॉर्म टूल से स्क्यू करें और हिल की स्लोप के साथ अलाइन करें। डबल क्लिक करके सिंबल के अंदर जाएं। All Blade सिंबल के पहले फ्रेम को सेलेक्ट करें, प्रॉपर्टीज → ऑब्जेक्ट → कलर इफेक्ट में जाकर Tint Effect सेलेक्ट करें। लास्ट फ्रेम के लिए भी यही करें। अब All Blade लेयर को लॉक करें, फिर पोल सिंबल पर राइट क्लिक करें और Duplicate Symbol चुनें। इसका नाम रखें Pole 1 Shadow। अब पोल सिंबल के अंदर डबल क्लिक करें। Control + B दबाकर उसे Break Apart करें और ड्रॉइंग को एडजस्ट करें ताकि वो पहले पोल की तरह शेप और परस्पेक्टिव से मैच करे। बाहर क्लिक करके सिंबल से बाहर आएं। फिर पोल लेयर को सेलेक्ट करें और प्रॉपर्टीज → ऑब्जेक्ट → कलर इफेक्ट में जाकर Tint Effect सेलेक्ट करें। सिंबल से बाहर आएं। Windmill 1 Shadow लेयर को सेलेक्ट करें, प्रॉपर्टीज → ऑब्जेक्ट → कलर इफेक्ट में जाकर Alpha सेलेक्ट करें। वैल्यू को 31 सेट करें। अब अगले दो विंडमिल्स के लिए भी यही प्रोसेस रिपीट करेंगे। अब तक मुझे यकीन है कि आपको सारे स्टेप्स अच्छे से समझ आ गए हैं। अगर कुछ मिस हो गया हो, तो वीडियो को रिवाइंड करके स्टेप्स फिर से फॉलो करें। वीडियो को रोचक बनाए रखने और रिपीटेशन से बचने के लिए, हम इस हिस्से को स्किप करेंगे और अगले स्टेप पर बढ़ेंगे। आगे बढ़ते हैं। आख़िरकार, अब सारी विंडमिल्स तैयार हैं। मैं फाइल को सेव करूंगा और एनीमेशन को टेस्ट करूंगा। विंडमिल्स अलग-अलग स्पीड पर घूम रही हैं और उनकी शैडोज़ भी उनके साथ स्मूथली मूव हो रही हैं। और बस इतना ही — एक सिंपल लेकिन इफेक्टिव विंडमिल एनीमेशन, जिसमें रियलिस्टिक शैडोज़ और वेराइंग स्पीड है। इस ट्यूटोरियल में मेरे साथ जुड़ने के लिए धन्यवाद। नेक्स्ट सेशन में मिलते हैं।