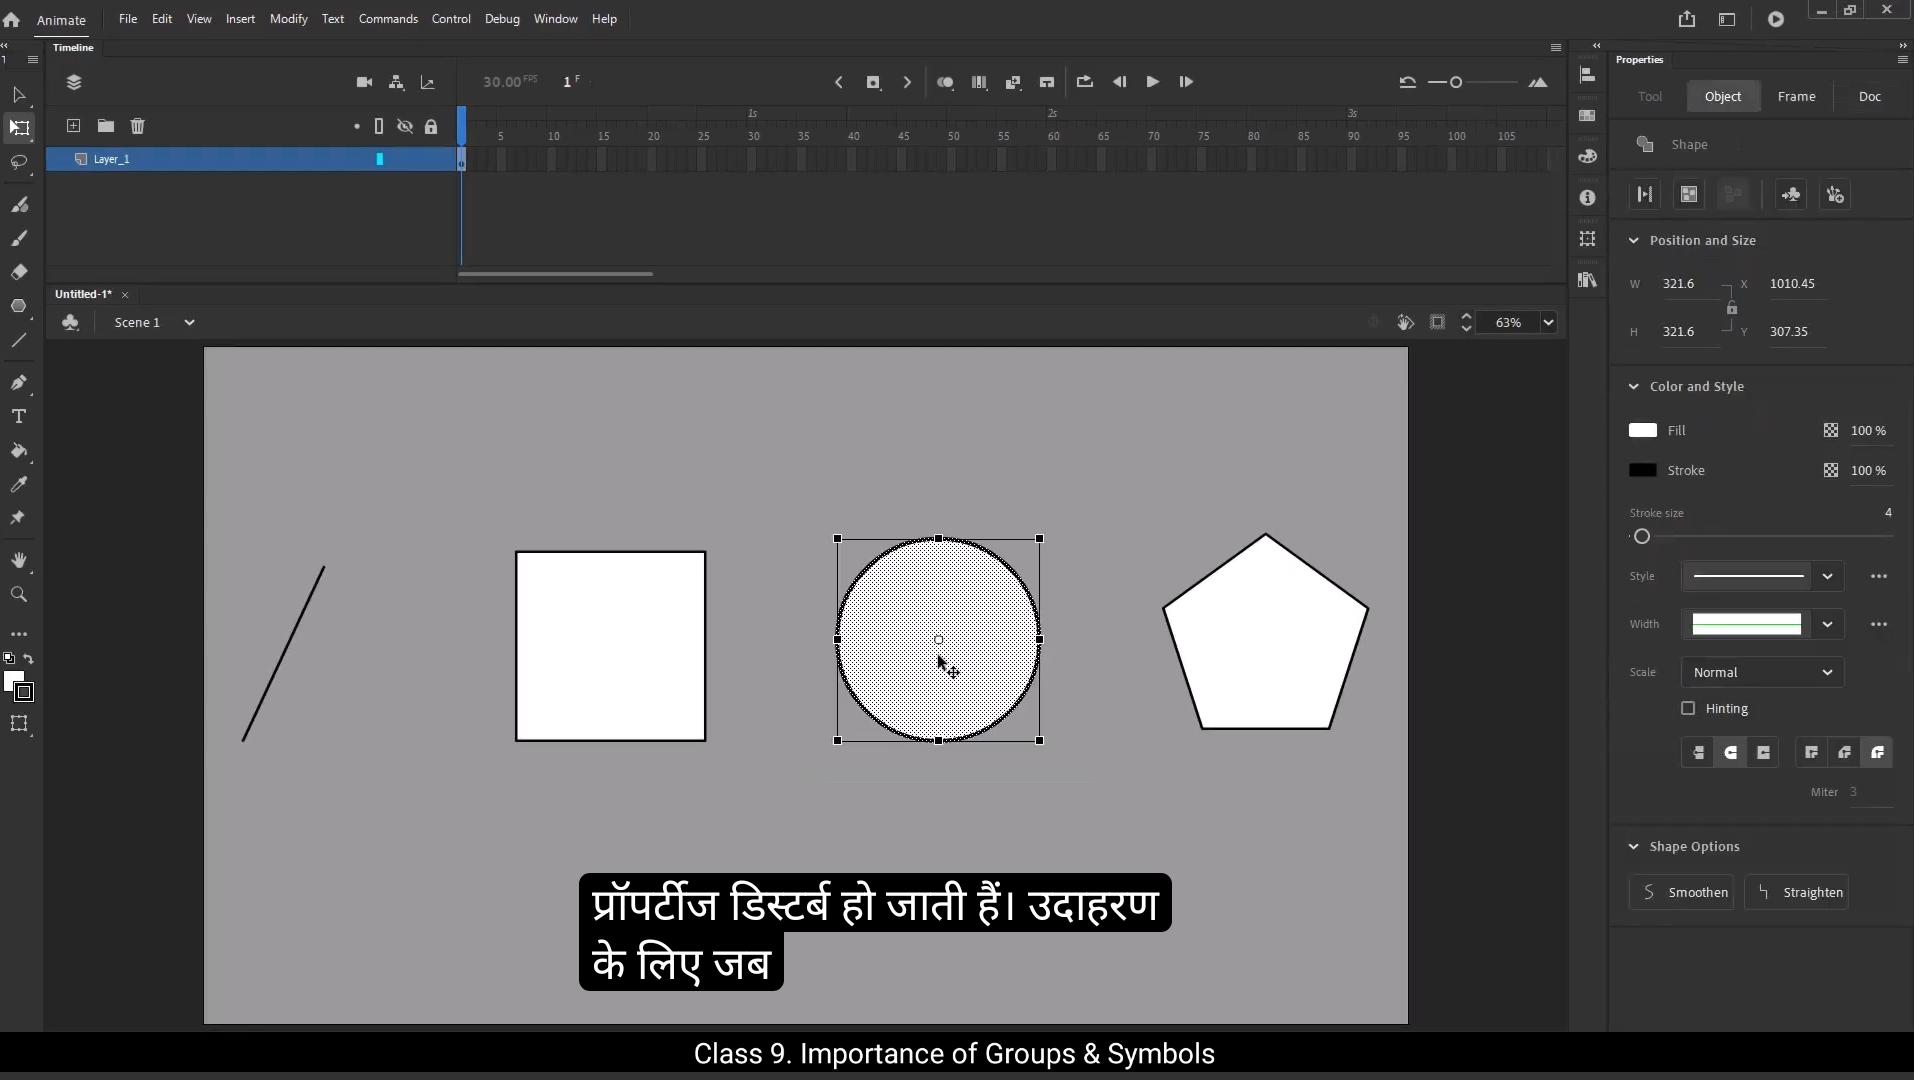
Hello students, In previous tutorial we explored the importance of using layers. We saw how overlapping shapes on the same layer can disturb their individual properties. For instance, when we place 1 shape over another, it changes or distorts their original form. This demonstrated why having separate layers is essential. However, in this tutorial, we'll focus on another useful feature.Groups. Imagine you want to draw multiple shapes but keep them on the same layer without them interfering with each other. That's where groups come in handy. Let's dive into it.We'll start by creating a group. To do this, go to Modify in the top menu and select Group, or simply press Control G on your keyboard.Once grouped, you'll notice a new symbol appear on the stage labeled Group, indicating the objects are now contained together. Let's draw a line using line tool.You will notice that the timeline changes slightly to be faded because you're now inside the group.To exit, simply click on the Scene button.You can confirm a group is created by selecting it with the selection tool. Groups are indicated by an outline around the objects.If the timeline looks faded, it means you're inside a group.To exit, simply double click anywhere outside the group to return to the mainstage. To enter the group again, just double click on the grouped object and now you can edit the shape. It's that simple.Let's create another group using a different shape. Go to Modify and choose Group. Select the Rectangle tool.Hold down shift and draw a square.To better visualize the group, change its color. Now we have two groups, one for the line and one for the square on same layer. The key difference is that grouped objects do not disturb each other even when overlapped.You can also arrange groups on the layer by using Control up arrow to move a group forward, or Control down arrow to move it backward. Alternatively, you can go to modify, then arrange to adjust their position.When creating multiple groups, remember to deselect the current group first.If you don't, grouping will combine all selected shapes into one group. Use Control Z to undo if this happens. For separate groups, always deselect everything before starting a new group.And then go to modify and click group or press Control G to create a new group. Now you can draw a new shape. I will draw a circle using Oval tool. Hold shift key to draw a perfect circle.Now we've created 3 distinct groups.Let's create another group and here I will draw a Polygon shape or a Pentagon shape.Now all the shapes are in separate groups, which means they won't interfere with each other. Even if you overlap them, their shapes will remain intact without deleting or merging into one another.You can organize these groups on a single layer or distribute them across multiple layers. To do this, select All groups, right click and choose Distribute to Layers. Shortcut key for the same is Control Shift D.This will create a new layer for each group. However, note that layer names default to generic labels like layer 2 or layer three. If you want more meaningful names for your layers, you have two options. You can rename each layer manually or before distributing the groups to layers, you can convert the groups into symbols. Let me show you how.1st I'll undo everything to go back to the stage where all the groups are on one layer. To convert a group to a symbol, select it, go to Modify and choose Convert to Symbol or press F8A dialogue box appears where you can name your symbol. For example, if the shape is a circle, name the symbol circle. Once converted, symbols have a blue outline and a small pivot point indicated by a white circle. This is what a symbol looks like.You can select it and in the properties tab you'll see that the type of object is listed as graphic. Now if you select a Pentagon that isn't a symbol yet, you'll notice that the object is group.Symbols in Adobe Animate have a blue outline with a small circle which represents the pivot point. If you select both the symbol and the group at the same time, you'll notice that in the Properties tab it shows mixed.This means that not all of the objects are symbols. We will see the importance of pivot point also. But before that I will convert the Pentagon into symbol.Go to modify and convert it to a symbol or press the shortcut key F8. I'll give it a name.And for the registration point, which is a pivot point, I'll set it to the top middle of the shape. This means it's the point from which the shape will rotate.Once I press OK, you'll notice there's a circle and plus sign at that registration point.When we create a symbol, we need to make sure the pivot point is where we want the rotation to happen. If I select the free transform tool by pressing Q, and if I try to rotate the shape, it still rotates around the center, but I want it to rotate from the top part of the Pentagon for that double click on that small white circle. Ass I double click, it moves to the pivot point we set during symbol creation.Now when I rotate it, the shape rotates from the topmost point, exactly where we wanted it to.You can set the pivot point wherever you want, and you can also adjust it directly from here. However, it's always recommended that the small white circle and the pivot point or the plus sign should be on the same spot. This ensures proper rotation.If you want to change the pivot point, here's what you need to do. Double click on the symbol to enter it. Now, as you can see, we're inside the Pentagon symbol.Again, double click. Now you are inside the group. To adjust the pivot point, you'll need to select the drawing inside the group, then move it to the desired pivot point. Once done, exit the group and return to the mainstage. Now you can see the pivot point is set to the left corner of the Pentagon and it will rotate from this point just as we intended.Now similarly we will convert the line and rectangle into symbol and set the pivot point. When all your shapes are converted to symbols, you'll notice they appear as graphics in the Properties tab. This ensures their individual integrity.Before distributing to layers, make sure no extra shapes or groups are selected. Check the Properties tab to ensure the selection type is graphic, not mixed.This avoids unwanted extra layers being created.Now select all symbols, then right click and select Distribute to Layers. The new layers are created for each symbol will automatically adopt the symbol names you've assigned while converting it to symbol like square, line, Pentagon and circle. Remember the naming of the symbol is very important because the layer name automatically takes the name of the specific symbol you've created.You can add additional shapes inside a symbol, like if I want to add another shape inside the circle. To do this, go inside the circle symbol and create a new layer by clicking the new layer button.This new layer is named layer 2.Next I will draw a line on this layer.Remember, the order of the layers in the timeline is important. If you want the new drawing to appear on top, make sure the new layer is above the previous one.Now if I select layer one it is a group, but if I select layer 2 it is just a drawing. To make it group as well, activate the object drawing mode in the Properties tab, select Align tool and then go to Properties tab.Under tool find Object drawing mode.When this mode is turned on.And then I draw a line. Notice that the line is enclosed with a blue outline, making it a drawing object.The benefit of this is that I no longer need to go inside the drawing to edit it.I can make changes from outside, saving time and effort.I will rename the layers. Now you can see I have two different layers, one with a group, the circle, and the other with a drawing object, the line.To edit the circle I must go inside the group and then I can edit the shape.But for the drawing object I can edit it without going inside. And that's it for this tutorial. We've learned how to use groups and symbols to manage objects on the same layer and distribute them to separate layers.Also, we learned how to add shapes inside the symbol. By creating groups you can ensure that different elements don't interfere with each other, while symbols allow for efficient reuse and modification of objects.Drawing objects, on the other hand, offer a quick and non destructive way to create shapes and edit them without going inside their container. Whether you're creating simple drawings or more complex animations, mastering these tools will help you work more efficiently and produce cleaner, more manageable projects.Keep experimenting with these techniques and see how they can enhance your workflow. Thank you and see you in the next tutorial.