In this tutorial we are going to see how the camera tool in Adobe Animate works. To select the camera tool, we can go to the toolbar and select on the three dots below to open the menu and drag the camera icon to the toolbar or just click on the icon to select it.On the other hand, the shortcut for the camera tool is C, which is much easier if we can memorize it.It's also located above the layer tab on the screen.If you select the camera tool, a new layer is added to our stack of layers and it's called Camera. We have our background here and we are going to use the camera tool on this background. So let's get started. When we select the camera tool, you will see that there is a slider on the staging area below.If we move the slider to the right, we can see the camera zooms in, and in the same way if we move the slider to the left, the camera zooms out.There are two buttons to the left of the slider. 1 is the rotation button which we can use to rotate the screen.And the other one is the zoom button which we've just seen in the properties tab. We can also move the camera by changing the X and the Y axis values.We can also add filters and color effect to our camera moves.Let's look at the application of the camera tool. We increase the frames in the timeline using F5 up to 180.On the 1st keyframe we will zoom in. On the lighthouse in the background, we use the slider to zoom in and use the cursor to move across the screen to get the frame where we want.We then add a keyframe on frame 10 and frame 20 using F6.On the 1st frame we go to the color effect and properties. We choose brightness from the menu and we set the brightness to -100.On keyframe 10 we'll do the same, and on keyframe 20 will bring the brightness to normal but zero.We add another keyframe on frame 45 using F6 and move the camera tool to the bottom of the lighthouse.Let's add keyframes on frame 55 and frame 80 using F6.On keyframe 80, we move the camera tool to the left side of our screen.On keyframe 120 we again add a keyframe and zoom out to reveal the entire background.Now we select the frames in between and keys, right click on them and choose Create Classic Tween from the menu.We can see what our camera moves look like by pressing the enter key.It's very much like we've planned. Hope you found this tutorial helpful. Thanks.
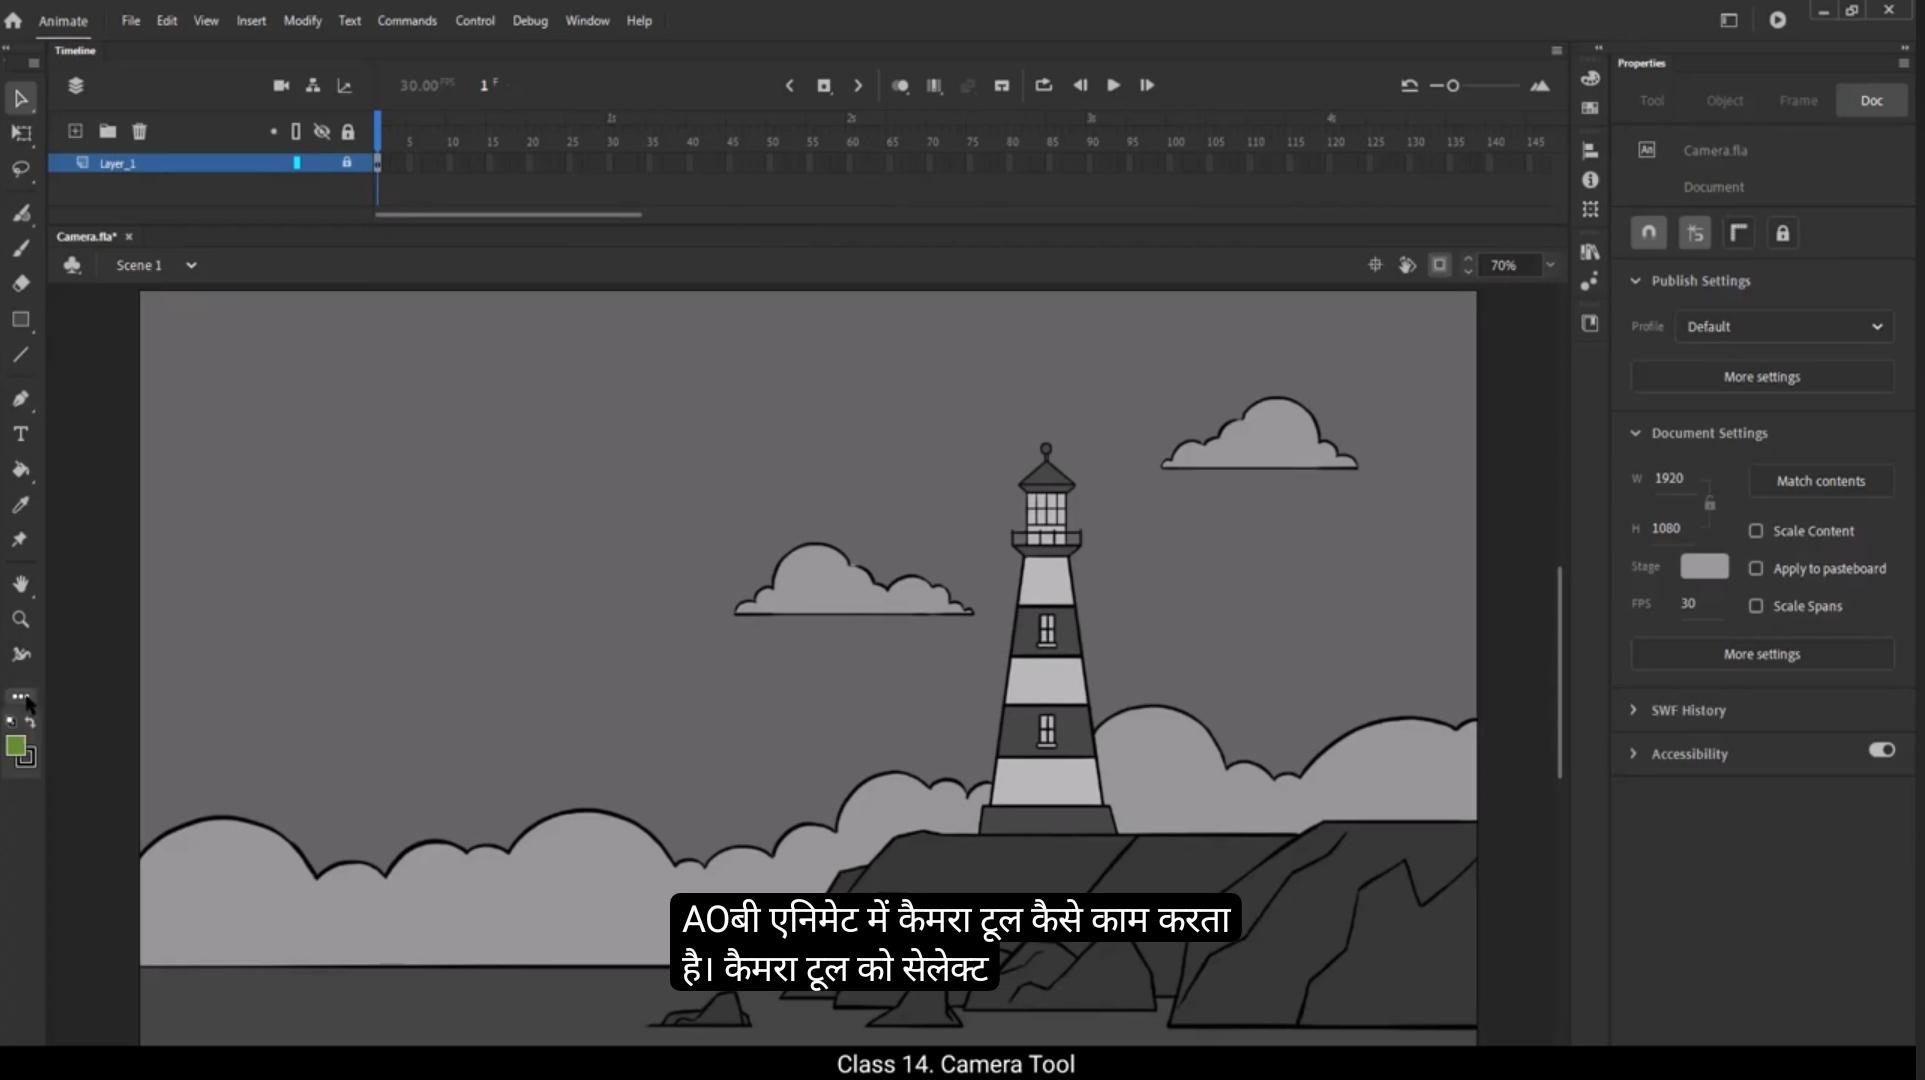
इस ट्यूटोरियल में हम देखने वाले हैं कि Adobe Animate में Camera Tool कैसे काम करता है। Camera Tool को सेलेक्ट करने के लिए हम Toolbar में जा सकते हैं और नीचे तीन डॉट्स पर क्लिक करके मेन्यू खोल सकते हैं, फिर Camera आइकन को Toolbar पर ड्रैग कर सकते हैं या सीधे आइकन पर क्लिक करके सेलेक्ट कर सकते हैं। दूसरी ओर, Camera Tool का शॉर्टकट C है, जो याद कर लें तो काफी आसान हो जाएगा। ये स्क्रीन पर Layer Tab के ऊपर भी मौजूद होता है। जब आप Camera Tool को सेलेक्ट करते हैं, तो हमारी Layers के स्टैक में एक नया Layer जुड़ता है, जिसे Camera कहा जाता है।
हमारे पास यहाँ Background है और हम Camera Tool का इस्तेमाल इस Background पर करने वाले हैं। चलिए शुरू करते हैं। जब हम Camera Tool सेलेक्ट करते हैं, तो आपको Staging Area के नीचे एक Slider दिखाई देगा। अगर हम Slider को दाईं ओर मूव करें, तो Camera Zoom In करता है, और इसी तरह अगर Slider को बाईं ओर मूव करें, तो Camera Zoom Out करता है। Slider के बाएँ दो बटन होते हैं — एक Rotation Button, जिसका इस्तेमाल हम स्क्रीन को Rotate करने के लिए कर सकते हैं, और दूसरा Zoom Button, जिसे हमने Properties Tab में देखा।
हम Camera को X और Y Axis Values बदलकर भी मूव कर सकते हैं। Camera Moves पर Filters और Color Effect भी लगा सकते हैं। अब देखते हैं Camera Tool का Application। Timeline में हम F5 दबाकर Frames को 180 तक बढ़ाते हैं। पहले Keyframe पर हम Background में Lighthouse पर Zoom In करेंगे। Slider का उपयोग Zoom In के लिए और Cursor से स्क्रीन पर मूव करके वो फ्रेम सेट करेंगे जहाँ हमें चाहिए। फिर Frame 10 और Frame 20 पर F6 से Keyframes जोड़ते हैं।
पहले Frame पर हम Properties में जाकर Color Effect चुनते हैं। Menu से Brightness Select करते हैं और Brightness को -100 पर सेट करते हैं। Keyframe 10 पर भी यही करते हैं, और Keyframe 20 पर Brightness को Normal यानी Zero कर देते हैं। Frame 45 पर F6 दबाकर एक और Keyframe जोड़ते हैं और Camera Tool को Lighthouse के नीचे मूव करते हैं। फिर Frame 55 और Frame 80 पर F6 से Keyframes ऐड करते हैं। Keyframe 80 पर Camera Tool को हमारी स्क्रीन के Left Side पर ले जाते हैं।
Keyframe 120 पर हम फिर से एक Keyframe जोड़ते हैं और Zoom Out करते हैं ताकि पूरा Background दिख सके। अब हम बीच के Frames और Keys को सेलेक्ट करते हैं, उन पर Right Click करके Menu से Create Classic Tween चुनते हैं। Enter Key दबाकर हम देख सकते हैं कि हमारे Camera Moves कैसे लग रहे हैं। ये बिलकुल वैसे ही हैं जैसे हमने प्लान किया था। उम्मीद है कि आपको ये ट्यूटोरियल मददगार लगा होगा। धन्यवाद।