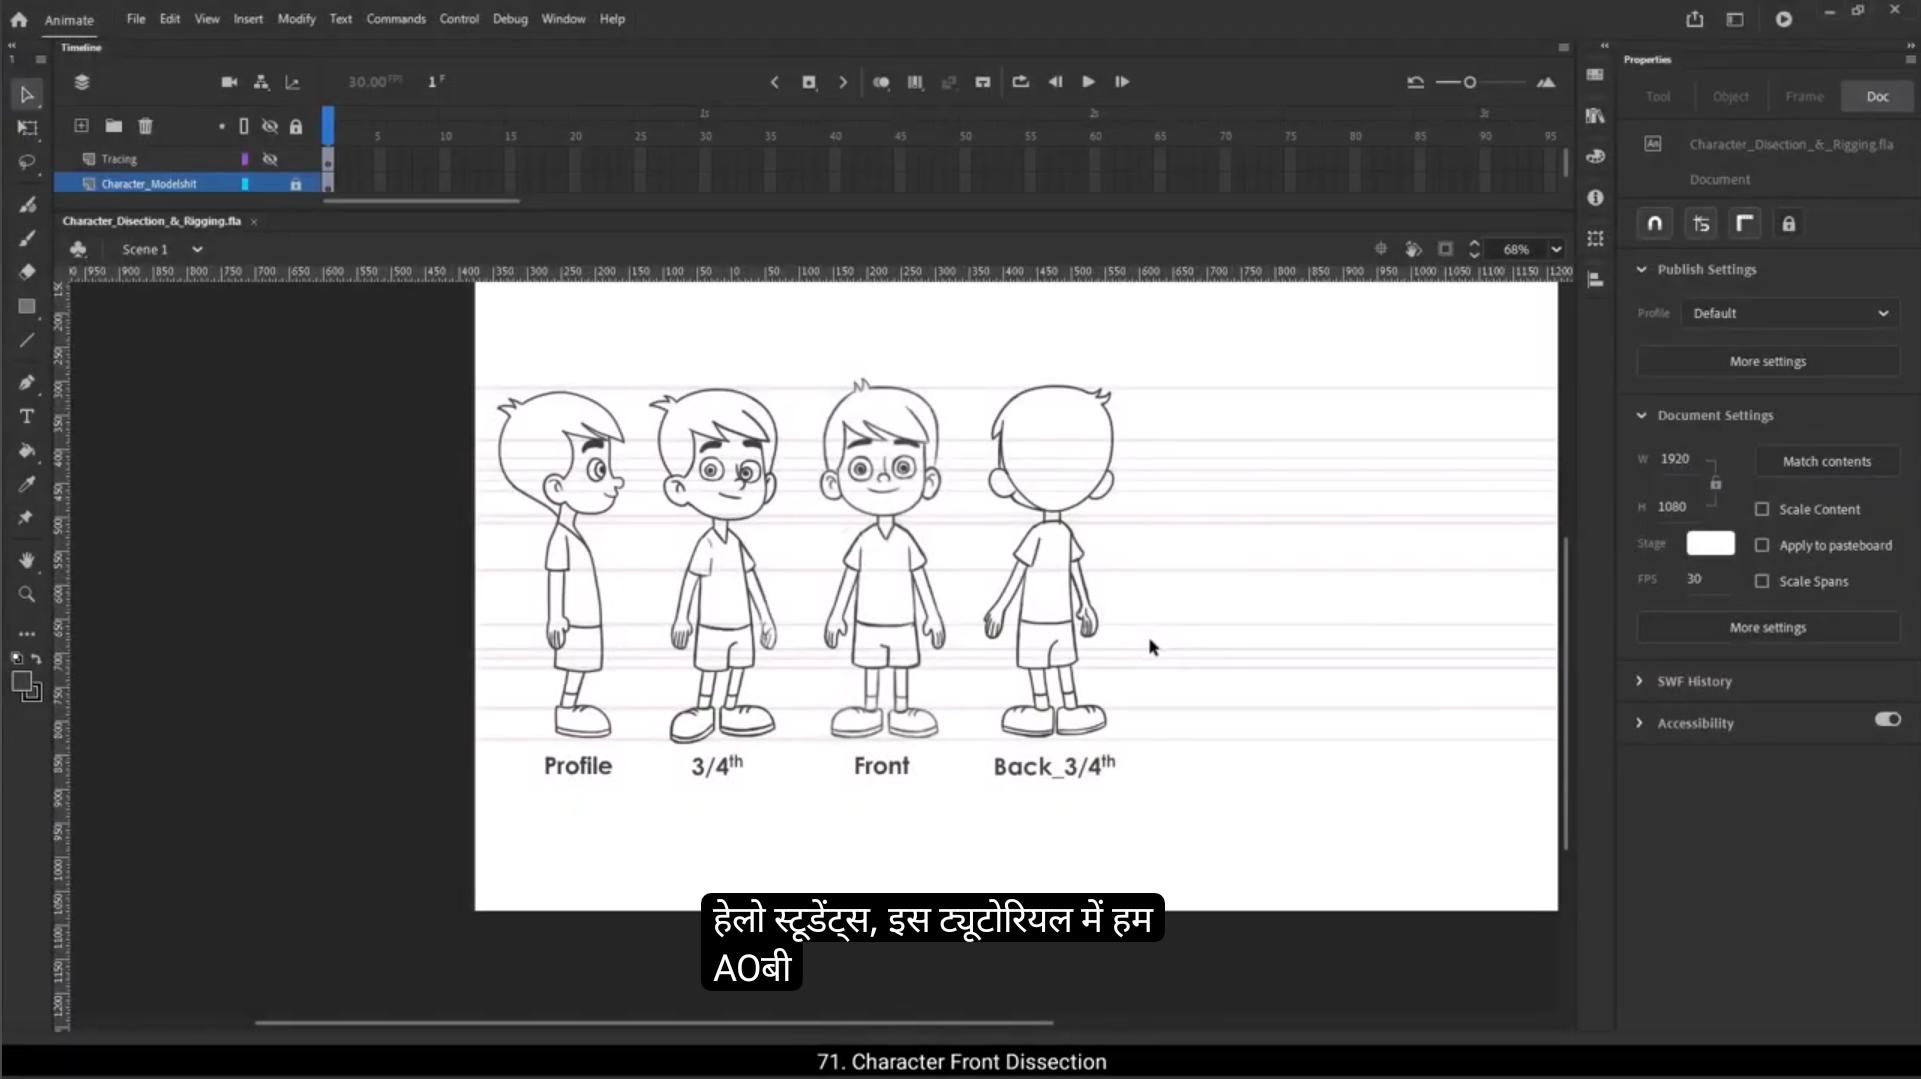
Hello students, in this tutorial we are going to learn about character dissection and rigging in Adobe Animate. When working on production animation, broadcast animation or even story development, we often need a character model sheet. Sometimes we might even have to create one from scratch. Now in Adobe Animate there are two main ways to animate a character. 1 is traditional frame by frame animation.In this method, we draw the entire character on a single layer, frame by frame. For example, in this animation we have drawn the character on every 3rd frame to create movement. This technique is similar to classic hand drawn animation where each frame is slightly different from the previous one to create motion. Second way to animate is rigging based animation. The second method is more efficient and widely used in digital animation. Here instead of drawing the character frame by frame, we dissect the body into separate parts like the head, neck, body, legs and hands and group them individually.Each body part is then converted into a symbol. Once we have the character broken down into these movable parts, we can animate it using Classic Tween which allows for smoother and more controlled motion without redrawing every frame. So these are the 2 main ways to animate a character in Adobe Animate.In the next steps, we'll dive deeper into how to properly dissect a character and rig it for smooth animation.Before we begin rigging, the 1st and most important step is preparing our character. This process is called character dissection or breaking down a character where we separate different body parts to allow smooth and flexible movement in animation. 😘 Think of it like creating a puppet. Each part needs to move independently for a more natural and controlled animation. To do this, we will divide our character into Several sections like the head, neck, body, hands, palms, pants, legs, and shoes. This segmentation ensures that every part can be animated separately without any restrictions. While dissecting, it's also crucial to draw the hidden parts of the body, such as the shoulders behind the arms, the full neck behind the head, and the upper legs under the pants.This prevents unwanted gaps when the character moves. For this process I will use several tools from the toolbar including the selection and sub selection tools for modifying shapes, the free transform tool for adjusting and rotating parts, the pencil and brush tools for fine details, and the line tool which will be our primary tool for defining body sections. The character we are working on is called Orvin and we will carefully dissect him step by Step making sure he is fully ready for animation. So let's dive in and start the dissection process. I will begin by renaming the layer as character tracing to keep our workspace organized.Next I'll create a new group for the character using the shortcut control G, which will help in keeping different parts structured.Now let's start dissecting the character, beginning with the head.To define the basic shape of the head, I will use the rectangle tool. I'll make sure to keep the fill blank, set the stroke color to black, and adjust the stroke size to 2 units. Then I'll draw a rough rectangle as the base shape for the head.Once the shape is in place, I'll use the selection tool to modify and match it to the character's jawline.To refine the shape further, I'll switch to the sub selection tool and adjust the anchor points by using the arrow keys, ensuring smooth curves and proper alignment.Since we will later animate the jaw movement, it's important.To separate it from the skull To achieve this, I'll select the skull outline and group it separately. 😘 Then I'll create another group specifically for the jaw and trace it separately. This will allow us to animate the characters talking movements and facial expressions more effectively when we reach that stage.Next, I'll use the sub selection tool to adjust the notes carefully, ensuring the shape matches the jawline perfectly. At this point we have two separate groups, one for the skull and another for the jaw. These separate groups will allow us to animate the jaw independently, making the characters talking and expressions smoother. Once we move on to coloring, we will delete one of the outline strokes, keeping either the jawline or the upper skull line intact.So there's no need to worry about extra lines right now. This will be taken care of when we apply colour.Now let's move on to tracing the hair. For this, I will create a new group specifically for the hair section. To outline the hair, I'll use the pen tool, which allows for precise curves and smooth edges. For remaining hair details. I'll switch to the line tool to complete the shape. This Method ensures that the hair structure is clean and easy to animate in later steps. Now Let's move on to dissecting the ears. Since the ears are a separate part of the character, we need to create a new group specifically for them. First, I will exit the current group and create a new group for the ears. To trace the outer shape of the ears, I'll use the rectangle tool and adjust its shape to match the outline of the ears exactly as seen in the model sheet. For the inner details of the ear, I'll switch to the pencil tool.However, notice that when I start drawing with the pencil, the lines are appearing as simple strokes and not as objects. 😘 To fix this, I'll go to the properties panel and turn on the object drawing mode. You can see the blue outline as we select it. This means the line is the object now.I'll continue tracing the inner details of characters right ear the same way, ensuring all lines are properly placed.Now that the right ear is complete, we don't need to manually trace the left ear. Instead, I will duplicate the right ear by selecting the ear group, holding Alt on the keyboard, and dragging to create a copy. Finally, I'll flip the copied ear horizontally and adjust its position to perfectly match the background lines in the model sheet.Next, let's create a separate group for the lips.For now, I'll keep it simple by just drawing a single curved line to define the lips. We will explore detailed lip animation in our next tutorial, but for now our focus is on breaking down the character into different parts.Now let's move on to drawing the eyes. Since the eyes are independent elements, I will first create a new group for them. To draw the base shape of the eyes, I'll use the Oval tool and draw a circle.I'll remove the fill color so that only the outline remains.Next I'll use the same tool to draw the pupils, making sure they are well proportioned inside the eye shape.Once this eye is complete, I'll duplicate the entire eye group by holding Alt on the keyboard and dragging it to create a copy. Finally, I'll adjust the position of the copied eye to make sure that both eyes align perfectly with each other.Now let's create a separate group for the nose.I'll use the pencil tool to draw the nose lines and then smooth them out for a cleaner look.Next, we'll move on to the eyebrows. To create them, I'll start with the rectangle tool, drawing a basic rectangular shape.I'll remove the fill color and adjust the stroke to match the model sheet. 😘 Once the first eyebrow is done, I'll make it a group. Instead of drawing the second eyebrow from scratch, I'll duplicate the first one by holding Alt on the keyboard and dragging it to the right side of the character. Then I'll flip it horizontally to ensure it matches the left eyebrow perfectly.With this, we have successfully completed the dissection of our characters head.Now let's continue dissecting the neck, body, hands, legs and shoes in the same way.For the neck, I'll draw a rectangle, remove the fill color, and then convert it into a group. Inside the group, I'll adjust the shape as needed to fit the character model. If you an extra outline at bottom Don't worry about it, this will be covered when we move on to the body dissection. Now that we have two separate groups, one for the head and one for the neck, we will select both and combine them into a single group. This way, inside this new group, we will have both the head and the neck, keeping things organized for animation. Next, we will dissect the character's torso. To do this, I'll start by drawing a rectangle.Removing the fill color and then tracing the torso, carefully matching it with the model sheet lines.For the V shaped collar, I will use the pencil tool to draw the shape. But here's an important warning. When using drawing objects in Animate, they can only contain shapes. If we mix a regular shape with a drawing object, Animate will automatically convert them into a group. It will prompt a message asking whether we want to keep both together. However, we don't want multiple groups inside groups as it can make animation more complex. So to fix this issue, we will break the lines apart by pressing Control B. 😘 This will keep everything as a single drawing, making it easier to edit.To ensure our tracing is accurate, we can turn the I button on and off on the layer panel to check our work.We need to erase this part near the shoulder area. For that, I'll go inside the torso group, select the eraser tool, and carefully erase the unwanted parts near the shoulder.Now I will move on to dissecting the right hand sleeve of the character. To do this, I will first create a new group. Inside this group, I'll use the rectangle tool to draw a rectangle, remove the fill color, rotate it, and scale it down to properly match the outline of the character's arm.It's important to always consider the hidden parts of the illustration. Even though some parts might not be visible in the default pose, they will be exposed when the character moves. For example, if the character raises their arm and we haven't drawn the hidden parts, there will be an empty space, making the animation look incomplete. To avoid this, I will make sure to draw the full shape of the sleeve. I will exit the current group, and additionally I will add a small portion of The bicep to ensure a natural looking transition when the arm moves. To further refine the rig, I will add a semicircle at the joint of the arm. This will help give the arm volume and prevent glitches when rotating it during animation.These small details play a crucial role in making the movement smooth and realistic. Now inside this new group, we have two elements, the sleeve of the T-shirt and the visible part of the bicep.Now I will exit the current group and move on to tracing the right forearm of the character. To do this, I will first create a new group. Inside this group, I will use the rectangle tool to draw basic rectangular shape, then rotate and adjust it to match the character's forearm outline. 😘 At the wrist joint I will add a semicircle to create a smooth cylindrical shape.This is crucial because it ensures that the forearm moves naturally during animation.If the joints are not properly aligned, glitches may appear when the character moves, so I'll carefully adjust the shape, making sure the outlines match perfectly.Now notice that we haven't added a curve at the elbow. That's because if we rotate the forearm from the elbow pivot point, it will follow the curve naturally. To demonstrate, I will move the pivot point of the group to the elbow and rotate it. You can see that the forearm moves, but there's a slight mismatch between the forearm and bicep lines.To fix this, I will adjust the nodes of the bicep outline, aligning it perfectly with the forearm.Once that's done, I will again select the forearm and use the free transform tool to check the rotation. Now, as I rotate it, you can see that it moves precisely along the edges of the bicep. Make any necessary corrections to ensure smooth movement. This is why adding a curve at the joints is so important. It allows for seamless animation without any visual glitches.Similarly, I will add a curve at the top side of the sleeve to maintain proper alignment and flexibility when animating the character's movements.Now I will move on to drawing the right hand of the character. To do this I will first create a new group for the hand.Inside this group I will use the line tool, ensuring that object drawing mode is turned on before I start tracing. As I trace the hand, I will make sure that snap to object is enabled so that the line snaps perfectly at ends.For the fingers, I will switch to the pencil tool, carefully drawing each finger while adding a slight curve at the edges to create a more natural shape. 😘 It's important to make sure the drawing is fully enclosed. Leaving gaps in the outline will prevent us from properly filling in colors later. To avoid this, I will close all open areas and add subtle curves where necessary. This will ensure that when we apply colors later in the process, the fill will be applied smoothly without any issues.Now we will move on to tracing the left arm of the character, following the same process as we did for the right arm.First, I will start by drawing the sleeve using the rectangle tool. While ensuring that object drawing mode is turned on. I will adjust and match it precisely with the outline of the character model sheet.Then I will draw a rectangle for the visible part of the biceps and start tracing it carefully. Once The initial tracing is complete. It's always a good practice to exit the group and enable outline mode to check if everything is aligned properly. If any corrections are needed, I will go back inside the group and adjust accordingly.Next, I will trace the forearm by creating a new group, drawing a rectangle and refining it to match the outline. After that I will create another group for the hand and using the pencil tool I will sketch the rough shape of the hand ensuring all fingers are properly defined. To refine the hands shape I will use straighten option which helps in smoothing and adjusting the drawing for a more polished look. Once the hand is fully traced, I will set the pivot point correctly.This is essential to ensure that when we animate, the hand rotates naturally without glitches.Now that we have completed the upper body, let's move on to the lower body, starting with the right leg.First I will create a new group for the right leg. 😘 Then using the rectangle tool I will draw a rectangle, aligning it with the pants outline of the character.To prevent any glitches while animating, I will add a slight curve at the top side. This will allow smooth joint movement when the character is in motion.Even though the thighs are not entirely visible due to the pants covering them, it is still important to trace them separately. I will draw another rectangle to define the thigh area, keeping in mind that the pants end exactly at the knee.When creating characters for animation, it is crucial to consider the type of clothing they are wearing and identify where the body joints are.This helps in achieving realistic movements.By being mindful of body mechanics, we can strategically place joints while tracing.This ensures smooth motion without glitches when animating different body parts, making the movement natural and seamless.Now that the right thigh of the character is complete, we will move on to creating the right leg. First, I will create a new group and use the rectangle tool to draw a rectangle that matches the outline of the lower leg.At the ankle joint, I will add a curve to ensure smooth movement while animating.Next I will draw a line to separate the sock from the leg and slightly curve it for a natural look.Once the lower leg is ready, I will select this group and set the pivot point at the knee.To ensure perfect alignment, I will rotate the leg and make any necessary adjustments so that it seamlessly matches the thigh outline.Now let's move on to drawing the right shoe. I will create a new group and start with a rectangle as the base shape.Inside this object I will use the Alt key to add extra nodes and adjust them to perfectly match the illustration. 😘 Using the pencil tool, I will draw the necessary lines on the shoe to define its structure.Since I want these new lines outside of the drawing object, I will cut them using control X, exit the drawing object and paste them in place using shift control V. To create the soul of the shoe, you have two options. You can either draw a line and manually match it with the outline.Or you can select the bottom line of the shoe, press the Alt key and drag it down slightly. This method ensures that the original shape of the shoe is maintained while adjusting the sole.Now let's move on to the left leg. Instead of redrawing it, I will make a copy of the right thigh, lower leg, and shoe by selecting all three groups. I will paste them on the left side, creating an identical set of the leg components, and then flip it horizontally. After flipping, I will adjust the position of the left leg to perfectly match the given illustration.Now I will fine tune the thigh shape. To do this I will enter the right thigh group and adjust the nodes accordingly to match the characters left thigh shape.To complete the overlapping pant outline, I will create a new group and use a rectangle to match the overlapping line at the pants edge.After placing the shape correctly, I will delete the unnecessary 3 lines, ensuring a clean overlap.Finally, I will match the outlines of both thighs.Now that we have completed the tracing, there's one important invisible part that we still need to draw the pelvis of the character.This is crucial because if the character jumps and spreads both legs, there will be a blank space between the thighs, which would look unnatural.To prevent this, we need to add a pelvis.To do this I will create a new group and use the rectangle tool to draw a basic pelvis shape. 😘 I will match the waste outline and add a slight curve at the top for a more natural transition between the upper and lower body.And with that, our dissection part is complete.Now we move on to the coloring stage. Here we will use our color reference image to fill in the appropriate colors for each part of the character.Next we will fill colors inside each group we have created and then convert each group into a symbol for better organization.After that we will distribute them onto separate layers for a structured workflow. We will start with the hair.For coloring, I will primarily use the shortcut key I for the eyedropper tool to pick colors and K for the paint bucket tool to fill colors.To navigate inside groups, I will frequently use the shortcut key V to use the selection tool.First I will pick the hair color using the eyedropper tool from the reference image. Then I will enter the hair group and use the paint bucket tool to fill in the selected color.Since the eyebrows should match the hair color, I will use the same color to fill them as well.Next I will pick the skin color and fill it inside both the jaw group and the skull group.Once done, I will delete the bottom outline of the skull and the top outline of the jaw.If needed I will adjust the outlines to match perfectly.Similarly, I will fill color inside the ears to maintain consistency with the skin tone.For the nose, I need to make sure the shape is properly closed before filling it with color.To do this, I will draw a small line inside the drawing object to close the shape, fill it with the skin color and then delete the outline.Next I will use the brush tool to draw a stroke of color on the nose.After drawing I will straighten and adjust the shape. 😘 Erasing any unwanted parts to refine the details.I will match the waste outline and add a slight curve at the top for a more natural transition between the upper and lower body.And with that, our dissection part is complete.Now we move on to the coloring stage. Here we will use our color reference image to fill in the appropriate colors for each part of the character.Next we will fill colors inside each group we have created and then convert each group into a symbol for better organization.After that we will distribute them onto separate layers for a structured workflow. We will start with the hair.For coloring, I will primarily use the shortcut key I for the eyedropper tool to pick colors and K for the paint bucket tool to fill colors.To navigate inside groups, I will frequently use the shortcut key V to use the selection tool.First I will pick the hair color using the eyedropper tool from the reference image. Then I will enter the hair group and use the paint bucket tool to fill in the selected color.Since the eyebrows should match the hair color, I will use the same color to fill them as well.Next I will pick the skin color and fill it inside both the jaw group and the skull group.Once done, I will delete the bottom outline of the skull and the top outline of the jaw.If needed I will adjust the outlines to match perfectly.Similarly, I will fill color inside the ears to maintain consistency with the skin tone.For the nose, I need to make sure the shape is properly closed before filling it with color.To do this, I will draw a small line inside the drawing object to close the shape, fill it with the skin color and then delete the outline.Next I will use the brush tool to draw a stroke of color on the nose.After drawing I will straighten and adjust the shape. Erasing any unwanted parts to refine the details. 😘 Now I will fill white color inside the eyeballs to give them a natural look.For the pupils, I will pick the color from the reference image and reduce the outline stroke to one for a finer, cleaner look. Then I will fill the selected color inside the pupils. Similarly, I will fill the outer part of the pupils with the appropriate shade from image.Instead of manually filling color in the second eye, I will duplicate the completed eye by pressing Alt and dragging a copy to the other side.After that, I will delete the old group, place the copied group in the correct position and align it properly. To ensure perfect alignment, I will enable outline mode and make necessary adjustments for symmetry and accuracy.Now let's continue filling the skin color. Instead of going back to the reference image, I will simply use the eyedropper tool to pick the existing body color. First, I will go inside the neck group and fill it with the selected shade. Then I will move on to the hands, ensuring that all parts of the skin are consistently colored.Once the color is applied, I will delete any unwanted outlines to keep the character clean and polished.Inside the hand group I will also remove unnecessary lines after filling the color.If any glitches appear, I will use the sub selection tool to adjust the fill color properly.After that I will fill the V shape near neck area, delete any extra lines and refine the outlines to blend smoothly with the body.Next, I will move on to coloring the T-shirt. I will start by picking the T-shirt color from the reference image using the eyedropper tool. Before filling, I need to enclose the shape to prevent color leakage. For that, I will use the line tool with a reduced stroke size to close any open gaps. Once the shape is properly enclosed, I will use the paint bucket tool to fill the color inside.After filling I will delete the extra lines used for closing the shape. 😘 Then I will proceed with filling the sleeves using the same T-shirt color. To ensure proper layering. I need to send the bicep part behind the sleeve. For this I will use the shortcut control down arrow to move the bicep backward followed by the sleeve.I will repeat the same process for the other hand, first filling the color, then sending the bicep behind the sleeve, and finally moving the sleeve behind the rest of the body.Next, I will remove any unnecessary overlapping parts using the Delete Anchor Points tool, which helps in refining the shape. Once done, I will use the selection tool to adjust the fill color if needed, ensuring that there are no visible glitches around the shoulder area.Now I need to bring the head forward, positioning it above the neck. To do this, I will simply select the head group and press Control Up arrow to move it forward in the layer order. This step ensures that the neck remains properly positioned behind the head, creating a clean and well-structured character.Now it's time to fill the body color inside the legs.First, I will carefully cut and paste the sock line.Then break it apart to convert it into an individual drawing. Once done, I will proceed to fill the color inside the leg area. I will repeat the same process for the other leg, ensuring both sides are colored consistently.Next I will fill the body color inside the thighs.After that I will pick the pant color from the reference image and fill it inside the pant group.To ensure the pants appear correctly layered, I will use control up arrow to bring them forward.Now I will fill the pelvis with the same pant color and send it behind, ensuring proper layering.After that, I will delete the unwanted outline of the thigh and adjust the fill shape to maintain a smooth transition. 😘 To enhance the overlapping line on the pants, I will add a color patch. For this, I will draw a rectangle, remove its outline, and carefully match its shape with the outline.To match the overlapping line exactly with reference image, I will slightly adjust its position, aligning it perfectly with the characters design.Now we will fill the socks with color and then proceed to color the shoes. With this step, our character Orvin is now fully colored and ready for animation.Next we will convert each group into a symbol to make the character easier to animate.We start by creating a symbol for the entire character.Press F8 on the keyboard, name the symbol orvin front and set the registration point at the bottom.Now double Click to enter the symbol and break the group by pressing control B so that we can access all the dissected parts individually. Then we will convert each group into a symbol 1 by 1 starting with the head, press F8, rename it as Orvin head and set the registration point at the middle bottom.Immediately, we will adjust the pivot point. To do this, move the head to the right to bring the pivot point to the center of the neck. Then enter the symbol and move the head back to its original position.Next, I will break apart the groups inside the head symbol, which contains all the facial elements like hair, eyebrows, eyes, ears, nose and lips. First, I will select the hair group and convert it into a symbol. Press F8, name it Orvin Front hairs and set the registration point to the Center for balanced movement.Now I will select the right ear, press F8, name it Orvin front, right ear and set the registration point to the right middle. Similarly, I will convert the left ear into a symbol, name it Orvin front left ear and set the registration point to the left middle. 😘 Moving on to the eyebrows, I will first convert the right eyebrow into a symbol, name it Orvin front right eyebrow and set the registration point to the left bottom corner.Similarly, I will convert the left eyebrow, name it Orvin front left eyebrow and set the registration point to the right bottom corner.Next is the nose. Press F8, name it Orvin front nose and set the registration point at the top middle.Then I will convert the lips into a symbol, name it Orvin front lips and set the registration point at the Center for precise control while animating expressions.Now we will convert the neck into a symbol. I select the neck, press F8 and name it Orvin Front Neck. The pivot point is set at the bottom middle, allowing it to rotate naturally from the base.Next I move on to the torso. Selecting the torso, I press F8, name it Orvin front torso and position the pivot point at the bottom middle.Now I begin converting the right arm parts into symbols, starting with the right biceps. I select it, press F8, name it Orvin, front right biceps. I keep the registration point at the top right corner.Then I move to the right forearm and then the right hand. I follow the same process.Now we need to adjust the symbol shape to exactly match the shoulder angle. To do this, I select the group inside the symbol. Next, I rotate the symbol to a straight 90° angle and drag it slightly to the right and carefully match it perfectly with the original pivot point position.Once aligned, I rotate the symbol back to its original position and ensure it matches the outline accurately.This step is crucial for maintaining the volume of the symbol. If any horizontal or vertical adjustments are needed, they can be done equally at this stage. 😘 However, when working with the forearm symbol, stretching is not possible directly because the drawings angle does not match the body's angle. To fix this, I go inside the symbol, rotate the drawing and align it properly with the pivot point.Then I rotate and reposition the symbol back to match the original illustration. This step ensures smooth edits during animation, making it easier to stretch and squash the forearms and biceps without distortion.Now we repeat the same process for the hand symbol to ensure consistency in movement and alignment. Next, we move on to creating symbols for the left arm of the character. First, I convert the sleeve and bicep into symbols.Following the same pivot point adjustment technique, I rotate the symbol, adjust the pivot point and carefully match it with the original drawing.Then I apply the same method for the forearm and hand. Now we proceed to the lower body and convert both thighs and legs along with the color patch into symbols. For the right shoe, I keep the registration point at the top right corner.To correctly adjust the pivot point of the shoe, I shift the shoe to the left, aligning the pivot point properly. Then I go inside the symbol, move the shoe back to the right, and ensure it matches the illustration perfectly.This adjustment allows the shoe to rotate naturally from the middle of the leg, maintaining a proper pivot during animation.Finally, I repeat the same process for the left shoe, ensuring both shoes have accurate pivot points and smooth rotation behavior.Now, inside the character symbol, I select all groups by pressing Control A. 😘 However, in the Properties panel under the Objects tab, it still appears as mixed, indicating that one group is yet to be converted into a symbol which is the pelvis.To complete this step, I select the pelvis, press F8, rename it accordingly and set the registration point to the middle top.Now, if I select all objects, I can see graphics in the Properties panel confirming that every group has been successfully converted into a symbol. Next, we need to distribute each symbol to its separate layer. To do this, I select all symbols, right click and choose Distribute to Layers.Now each part of the character's body is placed on its own separate layer.To verify, I switched to outline mode, allowing me to check the structure and ensure everything is correctly placed.Now we will make a slight adjustment to the layers. First I select the hand and forearm layers, then press Control Alt X to cut them. Next I enter the bicep symbol, create a new layer and press Control Alt V to paste the forearm and hand symbols inside it. So we get these layer inside the biceps symbol. After pasting, I reposition them to perfectly match the bicep outline.Similarly, I select the hand symbol, press Control Alt X to cut it and then delete the hand layer. Now I go inside the forearm symbol, add a new layer and press Control Alt V to paste the hand symbol inside it.Once pasted, I align it carefully with the illustration.With this process, we now rotate a complete hand symbol, and forearm and palm can be rotated independently inside the symbol, allowing for smooth movement and better animation control.Now we will repeat the same process for the right side. 😘 First I cut the forearm and hand symbols, then enter the bicep symbol, create a new layer and paste them inside it. After pasting, I align them properly with the illustration.Next, I cut the hand symbol, delete the hand layer and then enter the forearm symbol.I add a new layer, paste the hand symbol and reposition it to match the illustration.Once this is done, I delete any empty layers from both the forearm and hand layers, making the workspace cleaner and easier to manage. Now I exit the symbol and return to scene 1. Here I hide the model sheet layer and rename the main layer to Orvin front rigged.To ensure proper organization, I checked the library to confirm that all symbols are correctly renamed. If needed, I update their names, like renaming a symbol to Orvin front head for clarity.Renaming symbols properly is crucial, especially by adding front three, fourth, or back in the name, since multiple angles of the character might be used in the same file while animating. This practice prevents duplicate names and keeps the workflow organized. Additionally, to better manage symbols, you can create folders for each angle in the library and store the respective symbols in their designated folder.With this, our character Orvin is now fully dissected and rigged. Hope you found this tutorial helpful. Thanks for watching and see you in the next tutorial.