In this tutorial we are going to animate a cracking window pane.As you can see we already have an animation of a ball hitting the window pane. What we have to do is animate the glass cracking which is the part of a visual effect. Now we add a new layer just above our BG layer and we call it crack. Then we add a keyframe on frame 11 using F6 on the crack layer and we hide the ball animation as we need to focus on the glass cracking animation now.We choose a dark blue fill from the colour palette. As seen in the video. The colour palette is located in Properties, Tool, Colour and Style Fill. We draw a rectangle using the Rectangle tool. The shortcut is R We start to modify the shape of our rectangle into a crack using the selection tool. The shortcut is V and we hold down the Alt key during the modifications.Please follow the video for a good reference of the shape of the crack in the glass.
Once our shape is done, we select it and convert it into a symbol using F8 and name it crack. We now add a layer 3 inside the crack symbol. Our mask will reveal the crack to us in keyframes. You will see that as we go ahead in the tutorial, we'll probably use just two keyframes to reveal the crack, as crack like this appear almost instantly on impact. We now lock layer one and layer 3. we draw a rectangle using the Rectangle tool.
We delete the outlines and again using the selection tool, the shortcut for which is V We start modifying the shape of a rectangle holding down the Alt key so that it masks the crack shape properly. Please see the video for reference.
😘
Once we are halfway through, we add a keyframe at frame 2 on layer 3, which is the mask layer, and then, as you can see in the video on this frame we modify the shape of the mask so that it covers the entire crack. Please keep up with the video.Once this is done, we right click on the layer 3 and choose Mask Here from the drop down menu as seen in the video.We can now see a quick preview of our animation. It's just the crack showing in 2 frames. It's not much animation, but that's how it should be. Now we exit the symbol by clicking on the Scene 1 tab as seen in the video. Once outside the symbol, we have a better view of our animation here as it includes the ball hitting the window pane. We are now going to add a camera shake exactly at the frame the ball hits the window pane.To do this we are going to have to add the camera shade to three layers, the window background, the animation layer and the mask layer. We start doing this by going to the BG layer and adding a keyframe at frame 11. We then make sure that the BG layer, the animation layer and the mask layer are unlocked and the rest of the layers are locked. Then we select all the unlocked layers using control A and move all these elements down using the arrow key as seen in the video. Next, we are a keyframe on frame 12, and again we move the selected elements slightly to the right. We add another keyframe on frame 13, and we move all the selected elements up a little using the arrow keys. And finally, we add the last keyframe of the camera shake on frame 14 and move all the selected elements a little to the left using the arrow keys. Once this is done, we'll do a few adjustments to this camera shape movement.Please follow the video.
We now export an SWF to do a preview using control enter. The animation looks fine. Hope you found this tutorial helpful. Thank you.
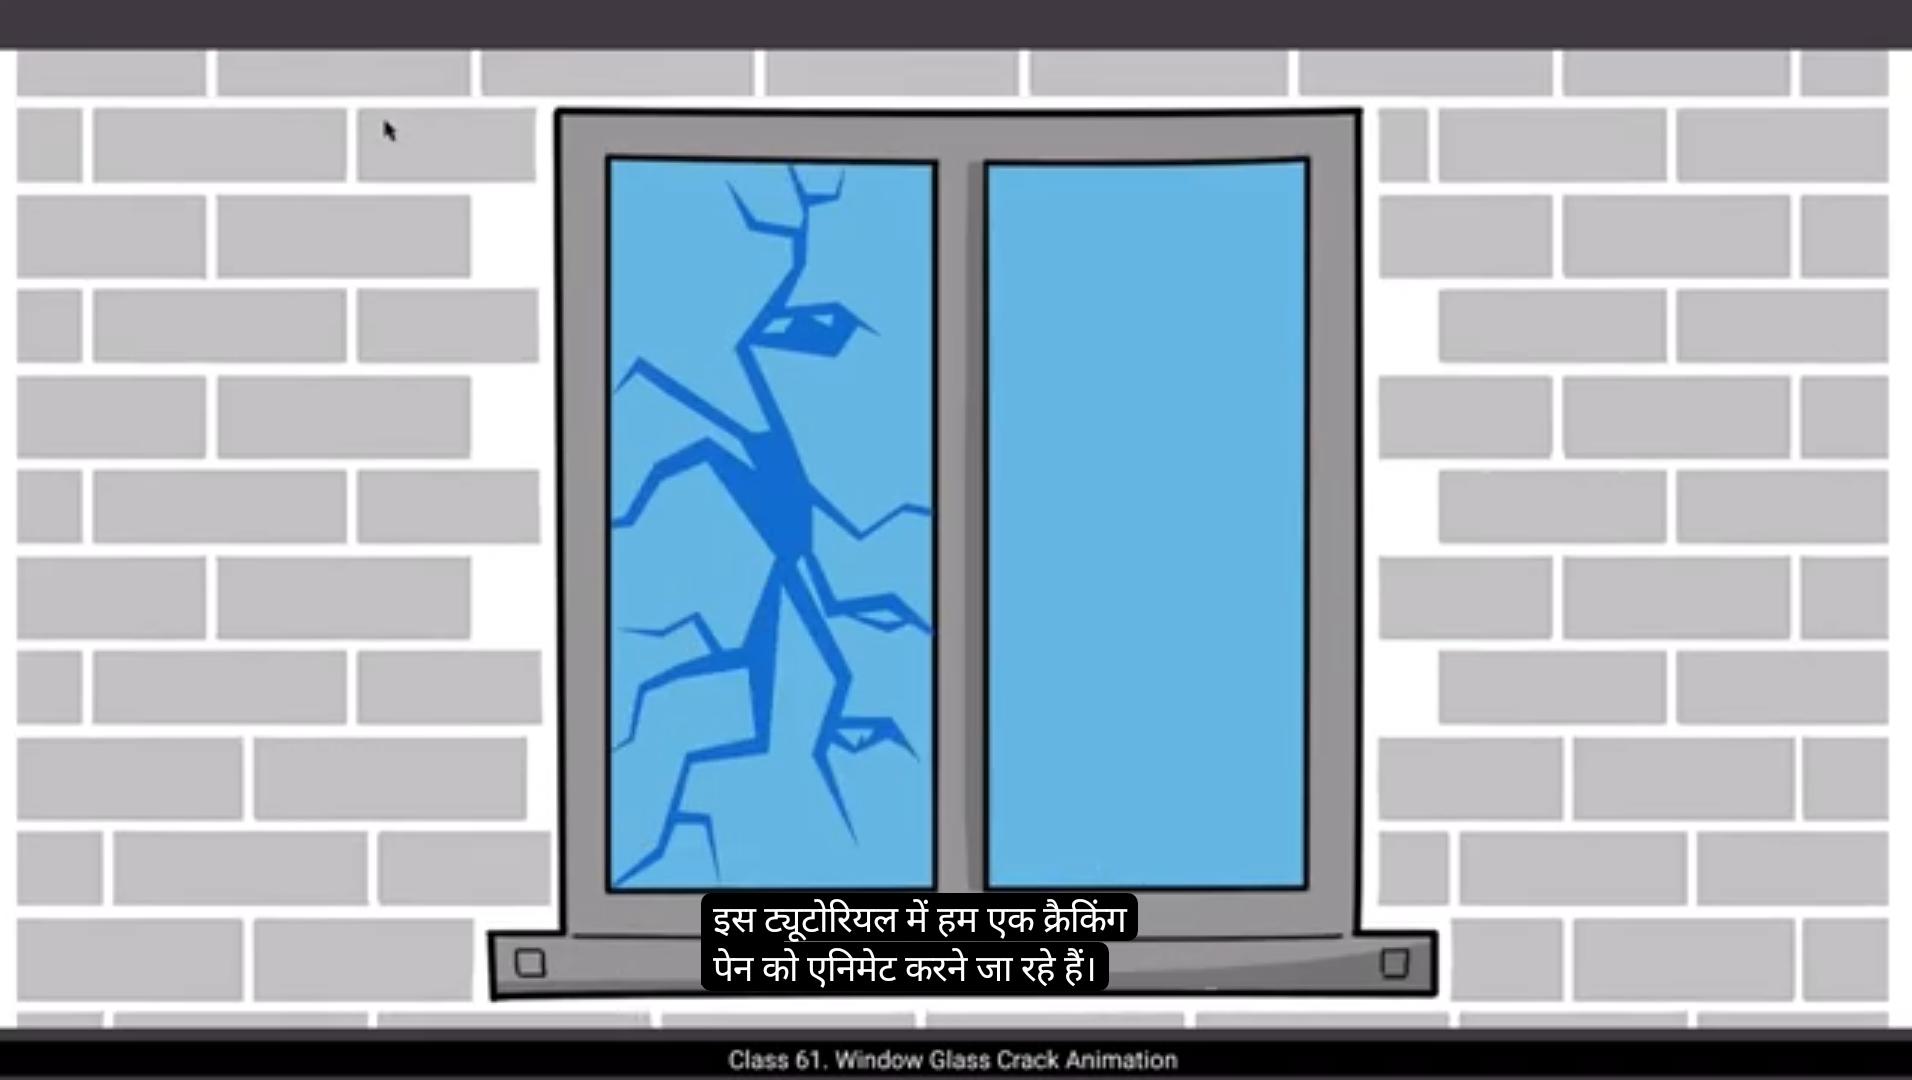
इस ट्यूटोरियल में हम एक क्रैकिंग विंडो पेन को एनिमेट करने जा रहे हैं। जैसा कि आप देख सकते हैं हमारे पास पहले से ही एक बॉल के विंडो पेन को हिट करने का एनिमेशन है।
हमें जो करना है वह है ग्लास क्रैकिंग एनिमेट करना जो एक विज़ुअल इफ़ेक्ट का हिस्सा है। अब हम अपने BG लेयर के ऊपर एक नई लेयर ऐड करते हैं और हम इसे क्रैक कहते हैं।
फिर हम फ्रेम 11 पर क्रैक लेयर पर F6 का इस्तेमाल करके एक कीफ्रेम ऐड करते हैं और हम बॉल एनिमेशन को हाइड कर देते हैं क्योंकि हमें अब ग्लास क्रैकिंग एनिमेशन पर फोकस करना है।
हम कलर पैलेट से एक डार्क ब्लू फिल चुनते हैं। जैसा कि वीडियो में देखा गया है। कलर पैलेट प्रॉपर्टीज, टूल, कलर और स्टाइल फिल में लोकेटेड है।
हम रेक्टैंगल टूल का इस्तेमाल करके एक रेक्टैंगल ड्रॉ करते हैं। इसका शॉर्टकट R है। हम अपने रेक्टैंगल के शेप को क्रैक में मोडिफाई करना शुरू करते हैं सिलेक्शन टूल का इस्तेमाल करके। इसका शॉर्टकट V है और हम Alt की को होल्ड डाउन रखते हैं मॉडिफिकेशन के दौरान।
कृपया वीडियो को फॉलो करें ताकि आपको ग्लास में क्रैक के शेप का अच्छा रेफरेंस मिले।
जब हमारा शेप तैयार हो जाता है, हम इसे सिलेक्ट करते हैं और F8 का इस्तेमाल करके इसे एक सिंबल में कन्वर्ट करते हैं और इसे क्रैक नाम देते हैं।
अब हम क्रैक सिंबल के अंदर लेयर 3 ऐड करते हैं। हमारा मास्क कीफ्रेम्स में हमें क्रैक को रिवील करेगा। आप देखेंगे जैसे-जैसे हम ट्यूटोरियल में आगे बढ़ते हैं, हम शायद सिर्फ दो कीफ्रेम्स का इस्तेमाल करेंगे क्रैक को रिवील करने के लिए, क्योंकि ऐसे क्रैक इम्पैक्ट पर लगभग तुरंत दिखाई देते हैं।
अब हम लेयर 1 और लेयर 3 को लॉक कर देते हैं। हम रेक्टैंगल टूल का इस्तेमाल करके एक रेक्टैंगल ड्रॉ करते हैं।
हम आउटलाइन को डिलीट कर देते हैं और फिर से सिलेक्शन टूल का इस्तेमाल करके, जिसका शॉर्टकट V है, हम Alt की को होल्ड डाउन रखते हुए रेक्टैंगल के शेप को मोडिफाई करना शुरू करते हैं ताकि यह क्रैक शेप को सही तरह से मास्क करे।
कृपया रेफरेंस के लिए वीडियो देखें।
😘
अब हम आधे रास्ते में हैं, हम लेयर 3 पर फ्रेम 2 में एक कीफ़्रेम जोड़ते हैं, जो मास्क लेयर है, और फिर, जैसा कि आप वीडियो में देख सकते हैं, इस फ्रेम पर हम मास्क के आकार को संशोधित करते हैं ताकि यह पूरी क्रैक को कवर कर दे। कृपया वीडियो के साथ चलते रहें। एक बार यह हो जाने के बाद, हम लेयर 3 पर राइट क्लिक करते हैं और ड्रॉप डाउन मेनू से Mask Here चुनते हैं जैसा कि वीडियो में देखा गया है। अब हम अपनी एनीमेशन का एक त्वरित प्रीव्यू देख सकते हैं। यह सिर्फ 2 फ्रेम्स में क्रैक दिखा रहा है। यह ज्यादा एनीमेशन नहीं है, लेकिन ऐसा ही होना चाहिए। अब हम Scene 1 टैब पर क्लिक करके सिंबल से बाहर निकलते हैं जैसा कि वीडियो में देखा गया है। सिंबल के बाहर आने पर, हमें अपनी एनीमेशन का बेहतर दृश्य मिलता है क्योंकि इसमें बॉल का विंडो पेन से टकराना शामिल है। अब हम कैमरा शेक जोड़ने जा रहे हैं, बिलकुल उसी फ्रेम पर जहां बॉल विंडो पेन से टकराती है। ऐसा करने के लिए हमें तीन लेयर्स पर कैमरा शेक जोड़ना होगा, विंडो बैकग्राउंड, एनीमेशन लेयर और मास्क लेयर। हम BG लेयर में फ्रेम 11 पर एक कीफ़्रेम जोड़कर यह करना शुरू करते हैं। उसके बाद हम सुनिश्चित करते हैं कि BG लेयर, एनीमेशन लेयर और मास्क लेयर अनलॉक हों और बाकी लेयर्स लॉक रहें। फिर हम सभी अनलॉक्ड लेयर्स को control A से चुनते हैं और वीडियो में दिखाए अनुसार इन सभी एलिमेंट्स को एरो की का उपयोग करके नीचे की ओर मूव करते हैं। अगले चरण में हम फ्रेम 12 पर एक और कीफ़्रेम जोड़ते हैं, और फिर से चयनित एलिमेंट्स को थोड़ा दाईं ओर मूव करते हैं। हम फ्रेम 13 पर एक और कीफ़्रेम जोड़ते हैं, और एरो की का उपयोग करके सभी चयनित एलिमेंट्स को थोड़ा ऊपर की ओर मूव करते हैं। और आखिर में, हम कैमरा शेक के अंतिम कीफ़्रेम को फ्रेम 14 पर जोड़ते हैं और सभी चयनित एलिमेंट्स को एरो की का उपयोग करके थोड़ा बाईं ओर मूव करते हैं। यह कार्य पूरा होने के बाद, हम इस कैमरा शेक मूवमेंट में कुछ समायोजन करेंगे। कृपया वीडियो का पालन करें। अब हम control enter का उपयोग करके एक SWF निर्यात करते हैं ताकि प्रीव्यू देख सकें। एनीमेशन ठीक दिख रही है। आशा है आपको यह ट्यूटोरियल मददगार लगा। धन्यवाद।