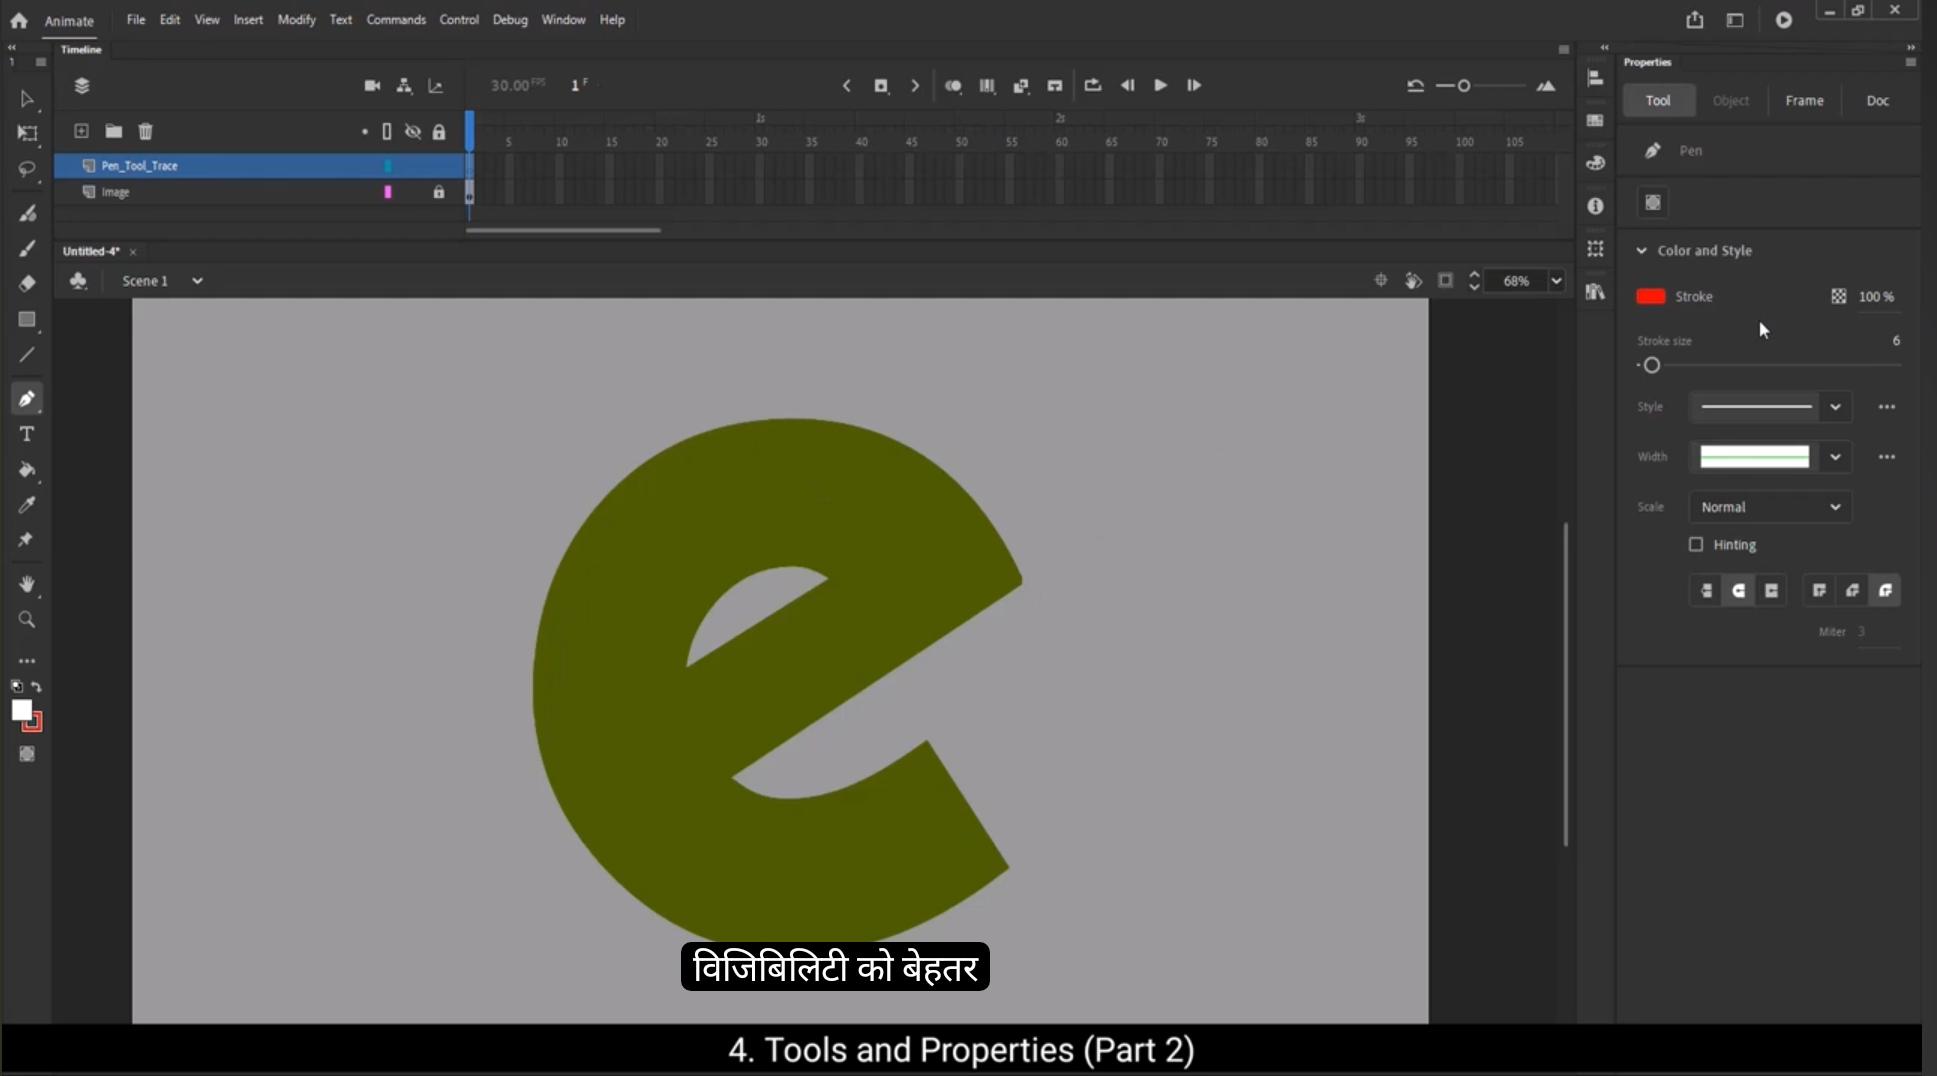
The next tool which we have is Pwillen tool. The shortcut for this is P The use of this tool is much like the line tool, only here we plot nodes which are connected with lines, lines that can be curved using the node handles as you can see. Let's now look at the properties of the pen tool. We have the object drawing mode. We can draw an object using this tool.Next we move on to the color and style. As you can see in the video, we can change the stroke color anytime while drawing the object.The next option again is the checkered box, which is the alpha option. We can control the opacity here and our stroke reflect it.The next one is stroke size and stroke style. You will notice that the drop down menu gives us several options for the strokes. Then we have the scaling options which allow us to control the size and at the end we have the hinting option. There are several options for the nodes to choose from.Let's now select our object using Control A and delete it. Now let's look at the Sub tool under the Pen tool. We go and right click on the Pen tool icon. We see the three subtools pop out.The second one is Add Anchor Point tool. To look at this tool, let's go back and draw a rectangle. The shortcut for this is R.Now let's go back to the pen tool, right click and then click on the Add Anchor Point tool. We can now add an anchor point or note to the rectangle that we have drawn, and we can edit that particular line any way we want.You've got a really strange shape now. Next we go back to the pen tool and go to the next sub tool called the Delete anchor point. This allows us to remove any anchor point. So let's test this on the anchor points which we have added. The next tool is Convert anchor point. We can make changes to the shape using the two handles that come out of the anchor point.To better understand the pen tool, let's go through an example. We'll start by importing an image, go to File, select Import, and then choose Import to stage. For this demonstration, I'm using an image of the letter E.Once the image appears on the stage, adjust its position using the free transform tool and the arrow keys for precision. This will help align the image perfectly. Now double click on the layer to rename it.After renaming, lock this layer to prevent any accidental changes and then add a new layer by clicking on the plus sign.Rename this new layer to something like Pen Tool Trace.On this layer we start drawing using pen tool. For that select the pen tool from the toolbar.For better visibility, set the stroke color to red.And increase the stroke size to 7.With the pen tool active, we'll begin tracing the shape of the letter E.1st just Click to set starting point.Then select another point by clicking.And drag the point to form a desire curve.Press and hold central on your keyboard. This lets you fine tune the anchor points.Next I'll place another point here and click and drag to form a curve.It might seem tricky the first time you try it, but with practice you'll get the hang of it. Overtime you'll learn how to position the points and determine how far and in which direction to drag the handles to achieve the desired shape.I will place next pointer here at the edge.Now here if I choose this pointer instead of straight line we get a curved line.To fix this, press and hold the Alt key, then drag the pointer. This allows you to edit one side of the curve handle independently, providing greater control over the shape.When drawing, ensure that each new point you create connects smoothly to the previous one. If you want to continue from the last point, make sure to click on it before starting the next segment. Again press alt key And dragged to form a straight line. Once you're close to completing the outline, move your cursor back to the starting point of the shape. You'll notice a small circle appear near the pen tool icon. This indicates that the path can be closed. Click on this starting point to complete your drawing.If the shape also has inner areas to trace, repeat the same steps for those sections. Adjust the anchor points as needed, using the Alt key to refine the curves and edges.This is how we can trace any shape using pen tool. For a cleaner view of your tracing, switch to outline mode and turn off the visibility of the image layer. This will show your traced path clearly. That's how you can trace any shape efficiently using the pen tool with minimal nodes and maximum precision.The next tool we'll discuss is the text tool, and its shortcut key is T.Once you select the text tool and click anywhere on the stage, a small text box will appear. In this box you can start typing directly. Let's add some text here.Now, if you look at the Properties tab, you'll notice that you can change the text type to either Dynamic text or Input text. These types are primarily used for web formats. However, in animation we generally stick to static text.So for this tutorial, we will use static text. After creating the text, switch to the selection tool. With this tool, you'll see multiple options for adjusting the text. You can reposition the text on the stage.Here you can modify the width of the text box. However, note that you cannot scale the text itself from these position and size options. If you want to scale the text, you'll need to adjust the font size in the character tab.In the Character tab, you can select a font by clicking the drop down arrow where you'll find all your installed fonts.Here you'll find formatting options like regular, bold and italic similar to those in Word documents.You can also change the size of the text here. By dragging the size slider. You can increase the font size up to 96. If you want the font size to go beyond 96, let's say 120, you'll need to type it manually in the size field. If you need to increase the size of the text box itself, go back to the Position and Size section and adjust it from there.To align your text, use the align panel.Use align horizontal and align vertical to align the text to the stage.Here you can adjust the spacing between the letters.Next, let's talk about colors. In the fill section, you can change the text color. Simply click on the color box and a color picker will appear. From here, you can choose from a wide range of colors.For animation purposes, always ensure the render quality is set to anti aliased to maintain smooth edges. This setting is the most suitable for animations. While there are options to customize anti aliasing, it's best to leave it at the default unless you have specific technical requirements.Moving on, the Character tab includes options similar to those in Microsoft Word. For instance, you can apply subscript and superscript formatting here.Additionally, in the paragraph tab you can adjust alignment left, center, right, or justify and add indents.Finally, you can apply filters to the text to enhance its appearance. For example, add a drop shadow. This gives the text a sense of depth, making it stand out from the background. Blur the text for a soft effect. You can easily control the blur intensity using the slider or input precise values for a tailored look.Add a glow for a dramatic look.Customize the glow by selecting a color that complements your design and adjusting its intensity and spread to achieve the perfect highlight. Filters like these can help you customize your text for creative animations. So that's an overview of the text tool. Remember, the shortcut key for the text tool is T.Next, we move on the Paint bucket tool. The shortcut for this tool is K. This tool lets us fill closed shape with a single click. As you can see, we have drawn a shape using the pen tool. We then go to the pen bucket tool. We can go to the properties and under color and style we can choose a different color if we like. Now we click inside the object that we've drawn.An important point to remember here is that if the outline of any object that we want to color using the paint bucket tool is broken.And the object is not closed, the bucket tool will not work.Next we move to the ink bottle tool. The shortcut for this is South. Go to the coloring style under properties and let's change the color of the stroke and click on the outline of two shapes that are seen on the screen. Now you will notice that they change color. We now move on to the next tool. This is called Eyedropper tool.Now let's delete the earlier rectangle and draw a new one which has no fill. Let's then go to the eyedropper tool.Select the color that the odd shape has using the eyedropper tool. Once the color is selected, you will notice that the cursor icon has changed to a paint bucket tool with a small padlock on it. Now we move the cursor to the new rectangle without a color fill and click on it. We notice that the rectangle is filled with the color we've chosen from the other shape using the eyedropper tool.The next tool is the Acid Wrap tool. Before we go to this tool, let's draw a rectangle. We then double click on our asset, which is the rectangle. We can now see a mesh has been created over our asset, which is the rectangle. You will notice that a white circle has been formed wherever we click on the mesh. We can then click on the circle and drag it. We can see that the mesh is distorted. We can go to properties, choose the fixed option under Wrap.It would be a good idea if you played around with it to understand exactly what it does.We can now go to the next tool, which is the hand tool. The shortcut is H as you can see in the video. We can move anywhere in the document using this tool. There's another shortcut for this tool. We can press and hold down the space bar, which takes us to the hand tool till the space bar is held down. We can move to the area we want to go and then let go of the space bar. This is very convenient for a quick move around without pressing.The keys. Now let's see that sub tools here. The one right under the hand tool is the hand rotation tool.The shortcut for this is Shift H We can rotate the entire document using this tool. The next sub tool on the line is the Time Scrub tool. This tool helps us move over the timeline without actually going there.Next we come to the Zoom tool. Using this we can go closer into a specified area.And to zoom out again, we use a magnifying glass with a minus sign at the end of the toolbar. And now we come to the last tool of the toolbar. It's the width tool. The shortcut for this is you. Now let's draw a rectangle so we can use the width tool. Then we select the width tool and click the outline of the rectangle we've just drawn and pull on that. We can see that the width of the outline is getting thicker in places.We've now covered all the tools and I hope you've understood how they work.In the upcoming tutorials, we'll start using these tools to create some exciting animations.Thank you and see you in the next tutorial.