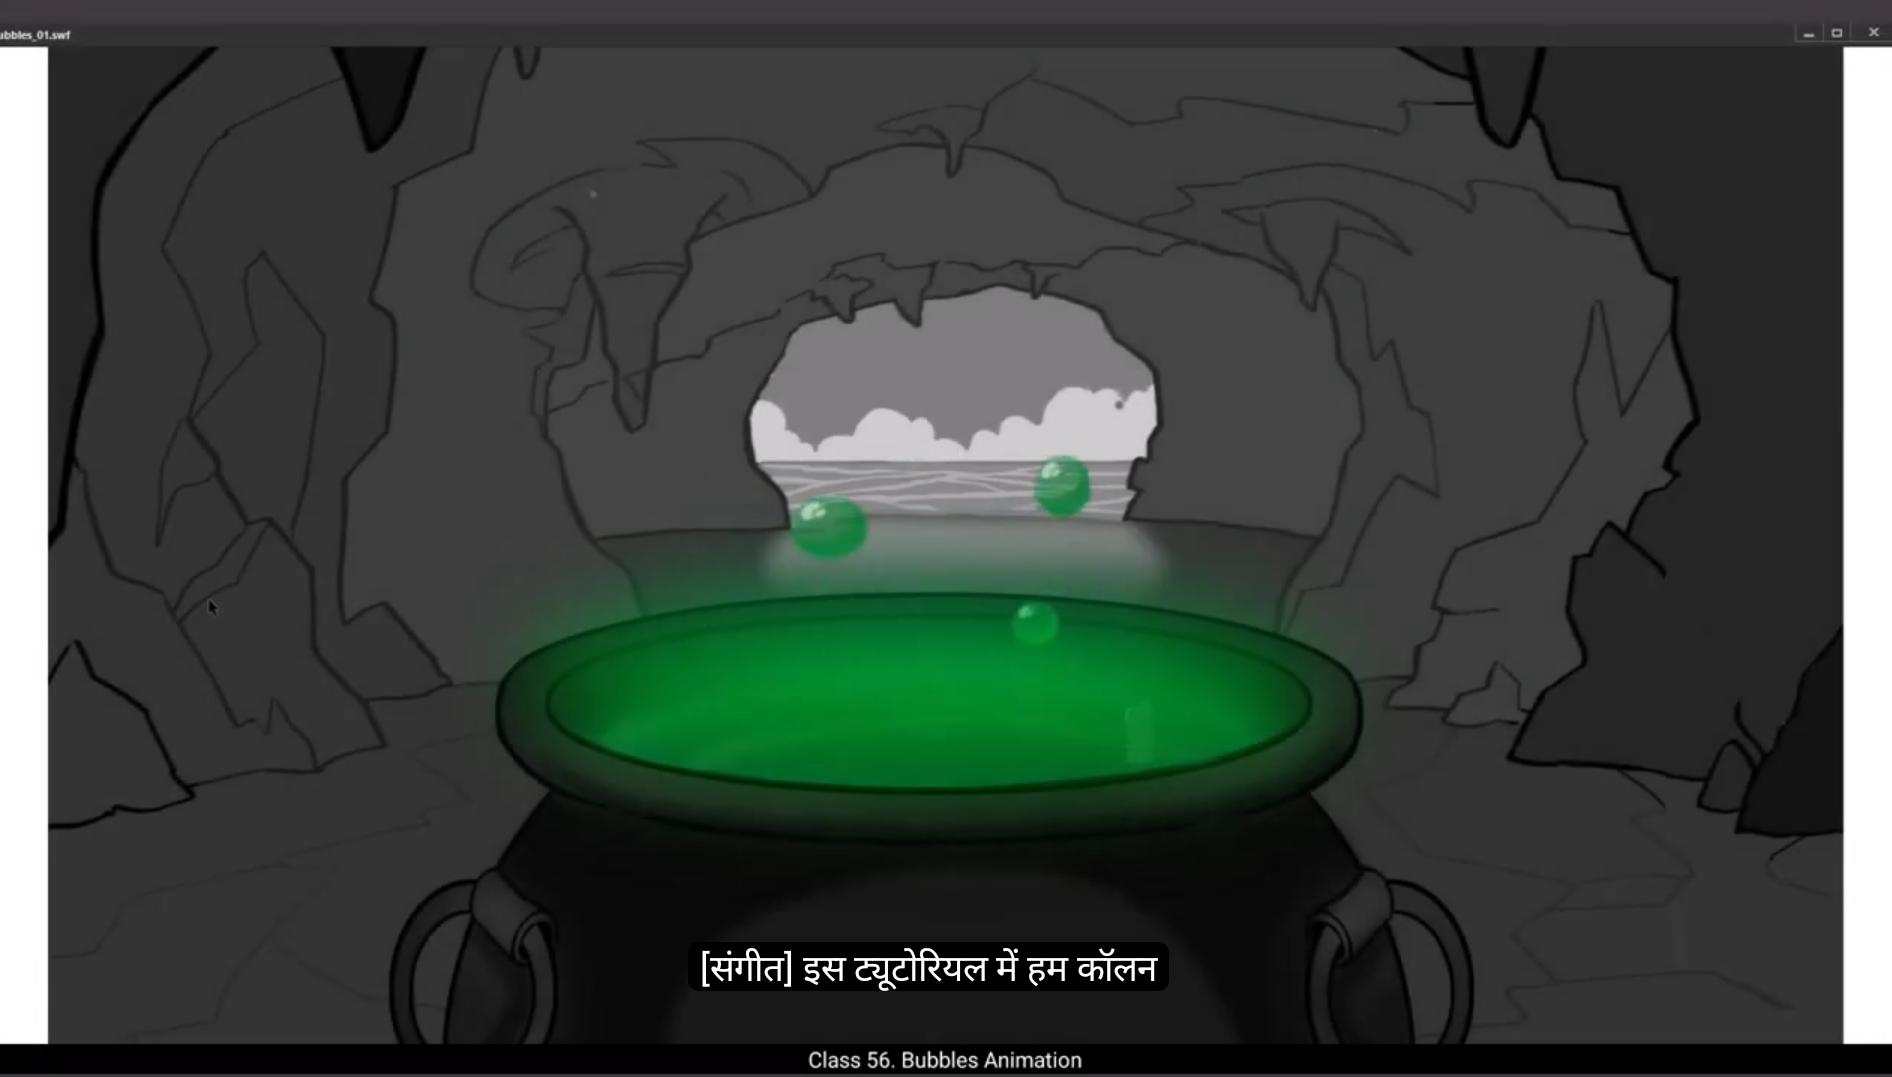
In this tutorial we are going to animate bubbles coming out of the cauldron.We have 3 layers with us here. The third layer is called Overlay which has a green mist on it covering the top of the cauldron. We can see the mist clearly now when we hide the other layers.The second is the animation layer which accommodates our bubble animation, and the first is the background layer which has the rocky interior of a cave and the cauldron sitting on it. We have also fixed the length of 70 frames for our animation. Let's start. We are going to have a white outline for the bubbles, so we go to the stroke on the right tab, which is in properties, tool, color and style, and choose white from the palette. Once this is done, we start drawing our first.We hold down the shift key and draw the circle using the Oval tool. The shortcut is O. Once we have the circle, we select the fill of the circle and delete it by pressing the delete key on the keyboard. We now select our circle that has a white outline, drag it down closer to the cauldron, select it and using F8 we convert it into a symbol and call it Bubble burst. We now double Click to enter the symbol. We are now going to make the outline of the bubble a little thicker so we zoom In on the bubbles, as you can see in the video, select the outline and go to the tab on the right of the work area and use the slider under stroke size which is in the properties Object color and style move the slider till the stroke size is 6 as seen in the video.We now add a blank keyframe on frame 3 using F7. We then switch on the onion skin button. Please see the video to locate it. Then we go to fill and choose white on the fill tab at the right of our work area which is in properties tool colouring style.
Then start drawing the bubble bursting animation in the key drawings.Once the drawing is done. We add another blank keyframe on frame 5 and do The next drawing.After this drawing is done, we add another blank keyframe on frame 7. We can have a quick preview of this by pressing the Enter key. Next we exit the symbol by clicking on the Scene 1 tab. As seen in the video. We are now going to animate our bubble coming out of the cauldron. We first hide the overlay layer which has a mist on it.We then move our bubble or the circle for now Lower and closer to the mouth of the cauldron as seen in the video. Next we scale it down to 70% using the Scale and Rotate tool. The shortcut is Control Alt S.
We now select the bubble and convert it into a symbol by pressing the F8 key and call this one bubble. We then double click on the bubble to enter the symbol and then select frame 70 and add frames using F5. Next we add a new layer 2 and we drag this layer so that it's placed under the layer one. Now we select game frame one. From layer one we drag it ahead on the timeline to frame 28 as seen in the video.We then go to the looping option to properties object and looping. We go to the third switch under looping which is a play single frame for the graphic and click it on so that our animation inside the symbol will not play. For now we now lock layer one. We are now going to animate the formation of a bubble using drawn keyframes like it's done in the traditional animation. We are going to use the brush tool to make our key drawing so we select it using the shortcut B. Then we select the keyframe one of layer 2. Make sure that the fill of your brush is white and the size of your brush is 1.
We've already seen where to locate these settings earlier in the tutorial.
Now we start drawing. Please follow the video to refer to the drawings and try to match them as much as possible so that the end result will be close to what we see in the video.Once the drawing on the keyframe is done, we add a blank keyframe on frame 3 using F7. We turn on the onion skin again. We've seen where to locate this several times in this tutorial earlier. When the drawing on keyframe 3 is done, we add blank keyframe on frame 7 using F7. You will notice that we are showing each key drawing for 2 frames. In traditional animation, this is referred as keeping your animation in twos.Please keep up with the video for the keyframe drawings and try to match them as well as you can. As seen in the video, when you finish drawing 4 keyframes, we can switch off the onion skin button and do a quick preview of what these keys look like in action by pressing the Enter key. We will need to do some in between frames for some of our keys to make the animation smoother and the timing more interesting. So we switch the onionskin on again and go to frame 2 and draw the in between exactly As it is shown in the video.Similarly, we do the next few in betweens as shown in the video.
We have now finished the animation for the bubble formation. This is still frame 21. We now need to go back and make sure that our animation is on tools like we had decided earlier. Now they are all on ones which means one key drawing is showing only one frame. This means we need to add an extra frame after every drawing we have now. We do this by selecting each keyframe and pressing the F5 key to add a frame after each keyframe.
Once we are done with this, our animation is back on twos again. We've now reached frame 41 and our animation is still this frame only. We add a blank keyframe here using F7.We now adjust the position of our bubble, which is a complete circle As seen in the video. Then we switch on the onion skin button so that we can see the last key of the formation and the first key of the fully formed bubble, which is free to fly up both together.
We now lock the layer 2 and unlock layer one.
Then using the free transform tool, the shortcut for which is Q, we squash our bubble a little as seen in the video. We then add a keyframe on frame 45 and again use the free transform tool. The shortcut is Q. We select the pivot point of the circle, which is a very thin white circle exactly in the center of our bubble and drag it down and place it over the outline on the lower side of the circle. Please follow the video exactly for this. We then move the bubble up using the arrow keys as seen In in the video. Then we start working on the next keyframes of the bubble animation as seen in the video. You will notice that we are holding each keyframe for four frames.
We Do this so that we can add one in between every two keyframes we are working on now. Please follow the video for the position and shape of the bubble on each keyframe. You are now adding some squash and stretches to the bubble as it floats up, so please catch up with this in the video.Once we've added keyframes, still frame 69, we are going to stop our bubble from floating up at this frame. So we go to tab to the right of our work area and click the Play Graphic once button. It's a middle switch in properties object looping.
Please see the video to locate this. Let's do a quick preview once so that we know we are doing OK. Now let's select a few random frames on layer one.Right click on anyone and choose Create Classic Tween from the drop down menu.Once we do this, the in betweens for our keyframes are added by the program. Just one last thing before we move ahead, please make sure that the pivot point for all the bubbles on our keyframes are moved down over the outline like we have done for the first keyframe. The next thing we do is cut our timeline short a bit as there is nothing happens After frame 90. So we select frame 90 and using shift F5 we remove the frames after this one.
Then we exit the symbol by clicking on the scene 1 tab as seen in the video.Here we are going to need to extend our frames till frame 90. So we click frame 90 and use F5. We add frames so that our timeline is extended till frame 90. Let's see what our animation looks like by pressing the enter key. Looks like we are doing OK. We then move on to the color of a bubble. We double click on the bubble and go to frame 41 as seen in the video and double click it to enter the symbol.We add a new layer 2, then drag it down South that it sits under the layer one.Then we click on the green inside the cauldron which takes us to properties tool, color and style. Fill and color palette pops out when we click on it. We make a selection from the palette as seen in the video. Then we go to the checkered box next to the fill box and add a value of 49 there. Then we go to size under classic brush option which is in the properties tools and set it to 15 on the slider there.Then we start filling our bubble drawings with color using the brush tool.We switch off the outline layer to check if the fill is OK.
We then add a new layer 3 and add some tones to the bubble. After that's done, we add some highlights. Please follow the video.
Then Add blank keyframes at frame 3 on both the layers 2 and three. We then unhide and unlock layer one and we go to keyframe 2 and three on layer one and colored the key drawings of the bubble bursting animation. We also change the outline color and add details like some highlights to it as seen in the video.
Once the coloring is done, we exit the symbol by clicking on the bubble on the small tab at the top left corner as seen in the video. Inside this symbol, we go to layer 2 and start filling the bubble formation key drawing with color.We then go to fill and choose the color for the highlights. We choose the same color we had used for the floating bubbles and paint the highlights on the key drawings of the bubble formation.
Let's do a quick preview of our animation once the coloring is done. So we exit the symbol by clicking on the Scene 1 tab as seen in the video and press the Enter key. Our bubble animation looks nice.We'll now add more bubbles to make the scene more interesting. We select the bubble symbol on the animation layer and convert it to a symbol and a second time call it main bubbles. We then enter the symbol and extend the length of the timeline till 90 frames by selecting frame 90 and using F5 to add frames. Then we add a new layer 2 and we copy the bubble animation symbol which is on layer one up to layer two. We move the copied symbol over to frame 15 so that there will be a difference in the starting time of these two bubbles. We then lock layer one and move the symbol over to a different place as seen in the video.
We then scale up the symbol up to 120% as seen in the video again so that the bubbles that we duplicate will look different and more realistic. Now Let's drag our copied symbol on layer 2 to frame 25, and then let's do a quick preview. You will notice in preview that our second bubble does not reach the end of this animation by frame 90, which is the end of our timeline. We'll try to fix this so that we get to see all the bubbles reach their full length and we also get to see them burst. So we drag our keyframe on layer 2 back to frame one by holding down the Alt key As seen in the video, we then go to the last frame and enter the symbol here by double clicking the bubble. You will notice that our bubble animation stops at frame 66 here.
So we exit the symbol and go back to the first keyframe on layer two, select the bubble symbol and go to looping options in properties objects. Here in the first box we change the value from 1 to 67. This will play our animation in loop. Now we are going to make several copies of the bubble symbol so that we'll be able to see a nice effect coming out of the cauldron.
Able to see a nice effect coming out of the cauldron. So we start by adding a new layer three. Select and drag A-frame from layer 2 over the new layer, holding down the Alt key. Remove the key over to frame 17 as seen in the video, and then they move over the symbol to the left as seen in the video and we scale it up again by 120% as we had done for the earlier symbol. We go to the last frame, double click on the bubble bursting animation and enter the Symbol. You will notice that this animation ends at frame 75, just like the animation in the symbol before this ended at frame 65. We then exit the symbol by clicking on main bubbles on the tab at the top left corner of the work area, right Next to the scene 1 as seen in the video.
We then go back to the first keyframe on layer two, select the bubble symbol and go to looping option there in properties object. Here in the first box, we change the value from 1 to 75. This will play our animation in a loop. Now a quick preview. By pressing enter, we can see three bubbles coming up from the cauldron at different timings. It's coming out quite nicely. We move to add another one, So we followed the process exactly as we've done till now. Then move and scale up the newly copied symbol by 120% on layer four. We can also change the timings of some of the duplicate bubbles symbol that are floating up to add more randomness to them. So we go to frame 45 on layer 4 where we placed the copied symbol. We select the bubble, right click on it and choose duplicate symbol. Then we call this bubble one. We duplicate the symbol again so that any changes done here will not affect the earlier symbols. We then enter the symbol by double clicking the bubbles as seen in the video. We remove some of the frames on layer 2 at random as seen in the video again. We then move back the keys on layer one to Fill the gap created by removing random frames on layer two. Please follow the video carefully.
Then we exit the symbol by clicking Main bubbles on the tab at the top left corner, just above the work area.
We can now add some random nested bubbles so that they all don't look like same. We do this by duplicating the bubble symbol as we had earlier, entering the symbols by double clicking on the bubble and then by removing or deleting keyframes in between the frames at random. You can keep your eyes on this video so you have some reference on how to go ahead with this.
What we are going to do Now is make some of the bubbles burst before they take off in the air. We do this by duplicating the symbol naming it bubble 4. Then we enter the symbol by double clicking on it. We then go to layer one and select all the frames except the last frame and press shift F6 to delete it. Now we select the last keyframe that we did not delete and drag it to frame 27 as seen in the video. Then we select that bubble on frame 27 and bring it down and place it closer to the formation keys. Please follow the video carefully.We then turn on the onion skin switch so that we can see Through other key drawings and are able to understand their position.
We right click on our symbol duplicated and name it bubble burst 1. Double Click to enter the duplicated symbol and delete layer two and three and select the keyframes on layer one and move them in such a way so that the first keyframe is placed on frame one. Please follow the video carefully. Now we exit the symbol and we can see our bubble burst before it goes in the air.
We've now finished animating the bubbles. Let's now exit the symbol by clicking on the Scene 1 tab as seen in the video. So let's unhide the overlay which has the mist on it. It would be a good idea to add blur to the bubbles so they are built more interestingly. So we select the animation layer. Then we go to filters, which is in properties frame. Under the filter, we choose blur from the drop down menu. We keep the quality high and Values for the X&Y axis will be two. Now let's see the preview using control enter.
The bubble animation is looking really nice. Hope you found this tutorial helpful. Thank you for watching.
इस tutorial में हम cauldron से बाहर आती हुई bubbles को animate करने जा रहे हैं। हमारे पास यहाँ 3 layers हैं। तीसरी layer को Overlay कहा जाता है जिसमें एक हरा mist है जो cauldron के ऊपर को cover कर रहा है। हम mist को अब clearly देख सकते हैं जब हम दूसरी layers को hide करते हैं। दूसरी animation layer है जिसमें हमारी bubble animation accommodate की जाएगी, और पहली background layer है जिसमें cave का rocky interior और उस पर रखा हुआ cauldron है। हमने अपने animation के लिए 70 frames की length भी fix कर दी है। चलिए शुरू करते हैं। हम bubbles के लिए सफेद outline रखने जा रहे हैं, इसलिए हम properties, tool, color और style में दाएँ वाले tab में stroke पर जाते हैं और palette से white choose करते हैं। एक बार यह हो जाने के बाद, हम अपना पहला bubble draw करना शुरू कर देते हैं। हम shift key को hold करके Oval tool का उपयोग करते हुए circle draw करते हैं। इसका shortcut O है। एक बार हमारे पास circle आ जाने पर, हम circle के fill को select करते हैं और keyboard पर delete key दबाकर उसे delete कर देते हैं। अब हम अपने circle को select करते हैं जिसमें सफेद outline है, उसे cauldron के और करीब drag करते हैं, select करते हैं और F8 का उपयोग करके उसे symbol में convert करते हैं और उसे Bubble burst कहते हैं। अब हम symbol में enter करने के लिए double click करते हैं। अब हम bubble की outline को थोड़ा मोटा बनाने जा रहे हैं इसलिए हम bubble पर zoom in करते हैं जैसा कि आप वीडियो में देख सकते हैं, outline को select करते हैं और work area के right side वाले tab में जाते हैं और stroke size के नीचे वाले slider का उपयोग करते हैं जो properties, object, color और style में होता है, slider को तब तक move करते हैं जब तक stroke size वीडियो में दिखाए अनुसार 6 न हो जाए। अब हम frame 3 पर F7 का उपयोग करके एक blank keyframe add करते हैं। फिर हम onion skin button को on करते हैं। कृपया इसे locate करने के लिए वीडियो देखें। फिर हम fill पर जाते हैं और work area के right वाले fill tab में जो properties, tool colouring style में होता है, white choose करते हैं।
फिर की ड्रॉइंग्स में बबल बर्स्टिंग एनीमेशन ड्रॉ करना शुरू करो। जैसे ही ड्रॉइंग कम्प्लीट हो जाए। हम फ्रेम 5 पर एक और ब्लैंक कीफ्रेम ऐड करते हैं और नेक्स्ट ड्रॉइंग बनाते हैं। इस ड्रॉइंग के पूरा होने के बाद, हम फ्रेम 7 पर एक और ब्लैंक कीफ्रेम ऐड करते हैं। हम एंटर की दबाकर इसका क्विक प्रीव्यू देख सकते हैं। फिर हम सीन 1 टैब पर क्लिक करके सिंबल से बाहर आते हैं। जैसा वीडियो में दिखाया गया है। अब हम अपने बबल को कॉडल्रन से बाहर आते हुए ऐनिमेट करने वाले हैं। सबसे पहले हम ओवरले लेयर को हाइड करते हैं जिस पर मिस्ट है। फिर हम अपने बबल या सर्कल को नीचे और कॉडल्रन के माउथ के पास ले जाते हैं, जैसा वीडियो में दिखाया गया है। फिर हम स्केल और रोटेट टूल का इस्तेमाल करके इसे 70% तक स्केल डाउन करते हैं। इसका शॉर्टकट कंट्रोल ऑल्ट S है। अब हम बबल को सिलेक्ट करके F8 दबाते हैं और इसे एक सिंबल में कन्वर्ट करके इसका नाम बबल रखते हैं। फिर हम बबल पर डबल क्लिक करके सिंबल में एंटर होते हैं और फ्रेम 70 सिलेक्ट करके F5 से फ्रेम्स ऐड करते हैं। फिर हम एक नई लेयर 2 ऐड करते हैं और इसे ड्रैग करके लेयर 1 के नीचे रखते हैं। अब हम गेम फ्रेम 1 सिलेक्ट करते हैं। लेयर 1 से हम इसे टाइमलाइन पर आगे ड्रैग करके फ्रेम 28 तक ले जाते हैं, जैसा वीडियो में दिखाया गया है। फिर हम प्रॉपर्टीज ऑब्जेक्ट में लूपिंग ऑप्शन पर जाते हैं। हम लूपिंग के नीचे तीसरे स्विच पर जाते हैं जो ग्राफिक के लिए प्ले सिंगल फ्रेम होता है और इसे ऑन करते हैं ताकि सिंबल के अंदर की एनीमेशन प्ले न हो। अब के लिए हम लेयर 1 को लॉक कर देते हैं। अब हम ट्रैडिशनल एनीमेशन की तरह ड्रॉन कीफ्रेम्स का इस्तेमाल करके बबल की फॉर्मेशन ऐनिमेट करने वाले हैं। हम ब्रश टूल का इस्तेमाल करके की ड्रॉइंग बनाएंगे, इसलिए शॉर्टकट B से इसे सिलेक्ट करते हैं। फिर हम लेयर 2 का कीफ्रेम 1 सिलेक्ट करते हैं। ध्यान रखें कि ब्रश का फिल सफेद हो और ब्रश का साइज 1 हो।
हमने पहले ही इस ट्यूटोरियल में देखा है कि इन सेटिंग्स को कहाँ लोकेट करना है। अब हम ड्रॉइंग शुरू करते हैं। कृपया ड्रॉइंग्स के लिए वीडियो फॉलो करें और जितना हो सके उतना मैच करने की कोशिश करें ताकि एंड रिज़ल्ट वीडियो जैसा दिखे। जैसे ही कीफ्रेम पर ड्रॉइंग हो जाए, हम फ्रेम 3 पर F7 का इस्तेमाल करके एक ब्लैंक कीफ्रेम ऐड करते हैं। हम फिर से अनियन स्किन ऑन करते हैं। हमने ट्यूटोरियल में कई बार देखा है कि इसे कहाँ लोकेट करना है। जब कीफ्रेम 3 पर ड्रॉइंग हो जाए, हम फ्रेम 7 पर F7 का इस्तेमाल करके ब्लैंक कीफ्रेम ऐड करते हैं। आप नोटिस करेंगे कि हम हर की ड्रॉइंग को 2 फ्रेम्स तक दिखा रहे हैं। ट्रेडिशनल एनीमेशन में इसे टूज़ पर ऐनिमेशन रखना कहते हैं। कृपया कीफ्रेम ड्रॉइंग्स के लिए वीडियो के साथ चलते रहें और जितना हो सके उतना मैच करें। वीडियो में दिखाया गया है कि जब आप 4 कीफ्रेम्स ड्रॉ कर लें, तो हम अनियन स्किन बटन को ऑफ कर सकते हैं और एंटर दबाकर जल्दी से प्रीव्यू देख सकते हैं कि ये कीज़ ऐक्शन में कैसी लग रही हैं। हमें अपनी कुछ कीज़ के लिए कुछ इनबिटवीन फ्रेम्स बनाने होंगे ताकि एनीमेशन स्मूथ हो और टाइमिंग ज़्यादा दिलचस्प बने। तो हम फिर से अनियन स्किन ऑन करते हैं और फ्रेम 2 पर जाकर वीडियो में दिखाए गए अनुसार बिल्कुल वैसा ही इनबिटवीन ड्रॉ करते हैं। इसी तरह, हम आगे के कुछ इनबिटवीन्स भी वीडियो में दिखाए अनुसार बनाते हैं। हम अब बबल फॉर्मेशन की एनीमेशन खत्म कर चुके हैं। यह अभी फ्रेम 21 है। अब हमें वापस जाकर यह सुनिश्चित करना है कि हमारी एनीमेशन टूज़ पर हो जैसे हमने पहले तय किया था। अभी ये सब वन पर हैं, जिसका मतलब है कि हर की ड्रॉइंग सिर्फ एक फ्रेम दिख रही है। इसका मतलब है कि हमें अब हर ड्रॉइंग के बाद एक एक्स्ट्रा फ्रेम ऐड करना होगा। हम ऐसा हर कीफ्रेम को सिलेक्ट करके और उसके बाद F5 दबाकर एक फ्रेम ऐड करके करते हैं।
जैसे ही हम यह कर लेते हैं, हमारी एनीमेशन फिर से टूज़ पर आ जाती है। हम अब फ्रेम 41 पर पहुँच चुके हैं और हमारी एनीमेशन अभी भी इसी फ्रेम पर है। हम यहाँ F7 का इस्तेमाल करके एक ब्लैंक कीफ्रेम ऐड करते हैं। अब हम अपने बबल की पोज़िशन एडजस्ट करते हैं, जो एक पूरा सर्कल है जैसा वीडियो में दिखाया गया है। फिर हम अनियन स्किन बटन ऑन करते हैं ताकि हम फॉर्मेशन का आखिरी की और पूरी तरह बने हुए बबल का पहला की एक साथ देख सकें। अब हम लेयर 2 को लॉक करते हैं और लेयर 1 को अनलॉक करते हैं। फिर फ्री ट्रांसफॉर्म टूल का इस्तेमाल करके, जिसका शॉर्टकट Q है, हम अपने बबल को थोड़ा सा स्क्वैश करते हैं जैसा वीडियो में दिखाया गया है। फिर हम फ्रेम 45 पर एक कीफ्रेम ऐड करते हैं और फिर से फ्री ट्रांसफॉर्म टूल का इस्तेमाल करते हैं, शॉर्टकट Q। हम सर्कल के पिवट पॉइंट को सिलेक्ट करते हैं, जो कि बबल के बिल्कुल सेंटर में एक पतली सफेद सी लाइन है, और इसे नीचे ड्रैग करके सर्कल की आउटलाइन के लोअर साइड पर रखते हैं। कृपया वीडियो को बिल्कुल सही तरीके से फॉलो करें। फिर हम बबल को वीडियो में दिखाए अनुसार एरो कीज़ का इस्तेमाल करके ऊपर मूव करते हैं। फिर हम वीडियो में दिखाए अनुसार बबल एनीमेशन के अगले कीफ्रेम्स पर काम करना शुरू करते हैं। आप नोटिस करेंगे कि हम हर कीफ्रेम को चार फ्रेम्स तक होल्ड कर रहे हैं। हम ऐसा इसलिए करते हैं ताकि हर दो कीफ्रेम्स के बीच एक इन-बिटवीन ऐड कर सकें। कृपया हर कीफ्रेम पर बबल की पोज़िशन और शेप के लिए वीडियो फॉलो करें। अब आप बबल में कुछ स्क्वैश और स्ट्रेच ऐड कर रहे हैं जैसे वह ऊपर फ्लोट होता है, इसलिए वीडियो के साथ कैच अप करते रहें। जब तक हम फ्रेम 69 तक कीफ्रेम्स ऐड कर लेते हैं, हम इस फ्रेम पर अपने बबल को ऊपर फ्लोट होना रोक देंगे। तो हम वर्क एरिया के राइट साइड पर टैब में जाकर प्ले ग्राफ़िक वन्स बटन पर क्लिक करते हैं। यह प्रॉपर्टीज ऑब्जेक्ट लूपिंग में बीच वाला स्विच होता है।
कृपया वीडियो में इसे लोकेट करना देखें। चलो एक बार क्विक प्रीव्यू कर लेते हैं ताकि पता चले कि हम ठीक कर रहे हैं। अब लेयर 1 पर कुछ रैंडम फ्रेम्स सिलेक्ट करते हैं। किसी भी एक पर राइट क्लिक करें और ड्रॉप डाउन मेनू से Create Classic Tween चुनें। जैसे ही हम यह करते हैं, प्रोग्राम हमारे कीफ्रेम्स के लिए इन-बिटवीन्स ऐड कर देता है। आगे बढ़ने से पहले बस एक आख़िरी चीज़, कृपया सुनिश्चित करें कि सभी कीफ्रेम्स पर बबल का पिवट पॉइंट नीचे आउटलाइन पर उसी तरह शिफ्ट किया गया हो जैसे हमने पहले कीफ्रेम में किया था। अगला काम है हमारी टाइमलाइन को थोड़ा छोटा करना क्योंकि फ्रेम 90 के बाद कुछ नहीं होता। तो हम फ्रेम 90 को सिलेक्ट करते हैं और shift + F5 का इस्तेमाल करके इसके बाद के फ्रेम्स हटा देते हैं। फिर हम वीडियो में दिखाए अनुसार Scene 1 टैब पर क्लिक करके सिंबल से बाहर आते हैं। यहाँ हमें अपने फ्रेम्स को फ्रेम 90 तक एक्सटेंड करने की ज़रूरत है। तो हम फ्रेम 90 पर क्लिक करके F5 दबाते हैं और फ्रेम्स ऐड करते हैं ताकि टाइमलाइन फ्रेम 90 तक बढ़ जाए। एंटर दबाकर देखते हैं कि हमारी एनीमेशन कैसी लग रही है। लगता है हम ठीक जा रहे हैं। फिर हम बबल के रंग पर काम करना शुरू करते हैं। हम बबल पर डबल क्लिक करते हैं और फ्रेम 41 पर जाते हैं जैसा वीडियो में दिखाया गया है और डबल क्लिक करके सिंबल में एंटर होते हैं। हम एक नई लेयर 2 ऐड करते हैं, फिर इसे ड्रैग करके लेयर 1 के नीचे रखते हैं। फिर हम कढ़ाही के अंदर के हरे हिस्से पर क्लिक करते हैं जिससे properties tools में color और style खुल जाता है। फिल और कलर पैलेट उस पर क्लिक करने पर पॉप-आउट होता है। हम पैलेट से एक रंग सिलेक्ट करते हैं जैसा वीडियो में दिखाया गया है। फिर हम फिल बॉक्स के बगल में चेकर्ड बॉक्स में जाकर 49 का वैल्यू डालते हैं। फिर हम properties tools में classic brush option के अंतर्गत size पर जाते हैं और स्लाइडर को 15 पर सेट करते हैं। फिर हम ब्रश टूल से बबल ड्रॉइंग्स को कलर फिल करना शुरू करते हैं। फिल सही है या नहीं चेक करने के लिए हम outline layer ऑफ करते हैं।
हम फिर लेयर 3 में एक नया लेयर जोड़ते हैं और बबल में कुछ टोनस ऐड करते हैं। उसके बाद, हम कुछ हाइलाइट्स भी जोड़ते हैं। कृपया वीडियो को फॉलो कीजिए। फिर हम फ्रेम 3 पर लेयर्स 2 और 3 दोनों पर ब्लैंक कीफ्रेम्स ऐड करते हैं। उसके बाद हम लेयर 1 को अनहाइड और अनलॉक करते हैं और कीफ्रेम 2 और 3 पर जाकर बबल बर्स्टिंग एनीमेशन के की ड्रॉइंग्स को कलर करते हैं। हम आउटलाइन कलर भी चेंज करते हैं और कुछ हाइलाइट्स जैसे डिटेल्स भी ऐड करते हैं जैसा कि आपने वीडियो में देखा है। कलरिंग होने के बाद, हम सिंबल से बाहर निकलते हैं और ऊपर लेफ्ट कॉर्नर में छोटे टैब पर बबल पर क्लिक करते हैं जैसा कि वीडियो में दिखाया गया है। इस सिंबल के अंदर, हम लेयर 2 में जाते हैं और बबल फॉर्मेशन की की ड्रॉइंग्स को कलर से भरना शुरू करते हैं। फिर हम फिल में जाते हैं और हाइलाइट्स के लिए कलर चुनते हैं। हम वही कलर चुनते हैं जो हमने फ्लोटिंग बबल्स के लिए यूज़ किया था और बबल फॉर्मेशन की की ड्रॉइंग्स पर हाइलाइट्स पेंट करते हैं। कलरिंग खत्म होने पर, चलिए हमारी एनीमेशन का एक क्विक प्रीव्यू देखते हैं। तो हम सिंबल से बाहर निकलते हैं, Scene 1 टैब पर क्लिक करके जैसा कि वीडियो में देखा गया है और Enter की दबाते हैं। हमारी बबल एनीमेशन बहुत अच्छी लग रही है। अब हम सीन को और इंटरेस्टिंग बनाने के लिए और बबल्स ऐड करेंगे। हम एनीमेशन लेयर पर बबल सिंबल को सिलेक्ट करते हैं और उसे सिंबल में कन्वर्ट करते हैं और दूसरी बार इसे main bubbles नाम देते हैं। हम सिंबल में एंटर करते हैं और टाइमलाइन की लेंथ को 90 फ्रेम्स तक बढ़ाते हैं, फ्रेम 90 सिलेक्ट करके और F5 यूज़ करके फ्रेम्स ऐड करते हैं। फिर हम एक नया लेयर 2 ऐड करते हैं और लेयर 1 पर मौजूद बबल एनीमेशन सिंबल को लेयर 2 तक कॉपी करते हैं। हम कॉपी किए गए सिंबल को फ्रेम 15 पर मूव कर देते हैं ताकि इन दो बबल्स की स्टार्टिंग टाइम में फर्क रहे। फिर हम लेयर 1 को लॉक करते हैं और सिंबल को वीडियो में दिखाए गए अनुसार किसी अलग जगह पर मूव कर देते हैं।
हम फिर सिंबल को 120% तक स्केल करते हैं जैसा कि वीडियो में दिखाया गया है ताकि जो बबल्स हम डुप्लिकेट करेंगे वो अलग और ज़्यादा रियलिस्टिक दिखें। अब चलिए लेयर 2 पर कॉपी किए गए सिंबल को फ्रेम 25 पर ड्रैग करते हैं, और फिर एक क्विक प्रीव्यू देखते हैं। प्रीव्यू में आप नोटिस करेंगे कि हमारा दूसरा बबल फ्रेम 90 तक, जो कि हमारी टाइमलाइन का एंड है, इस एनीमेशन के एंड तक नहीं पहुंचता। हम इसे ठीक करने की कोशिश करेंगे ताकि हम सारे बबल्स को उनकी फुल लेंग्थ तक जाते और बर्स्ट होते हुए देख सकें। इसलिए हम Alt की दबाकर लेयर 2 पर कीफ्रेम को वापस फ्रेम 1 पर ड्रैग करते हैं जैसा कि वीडियो में दिखाया गया है, फिर हम आखिरी फ्रेम पर जाते हैं और बबल पर डबल क्लिक करके सिंबल में एंटर करते हैं। आप नोटिस करेंगे कि हमारा बबल एनीमेशन यहां फ्रेम 66 पर रुक जाता है।
अब हम सिंबल से बाहर निकलते हैं और वापस लेयर 2 के पहले कीफ्रेम पर जाते हैं, बबल सिंबल को सिलेक्ट करते हैं और प्रॉपर्टीज ऑब्जेक्ट्स में लूपिंग ऑप्शन्स पर जाते हैं। यहाँ पहले बॉक्स में हम वैल्यू 1 से बदलकर 67 कर देते हैं। इससे हमारी एनीमेशन लूप में प्ले होगी। अब हम बबल सिंबल की कई कॉपीज़ बनाने वाले हैं ताकि हम कौल्ड्रन से निकलता हुआ एक अच्छा इफ़ेक्ट देख सकें।
तो हम लेयर 3 ऐड करके शुरू करते हैं। Alt की दबाकर लेयर 2 से एक फ्रेम सेलेक्ट करके नए लेयर पर ड्रैग करते हैं। कीफ्रेम को वीडियो में दिखाए अनुसार फ्रेम 17 पर मूव करते हैं, और फिर सिंबल को वीडियो में दिखाए अनुसार लेफ्ट साइड पर मूव करते हैं और उसे फिर से 120% तक स्केल करते हैं जैसे हमने पहले वाले सिंबल के साथ किया था। अब हम आखिरी फ्रेम पर जाते हैं, बबल बर्स्टिंग एनीमेशन पर डबल क्लिक करके सिंबल में एंटर करते हैं। आप नोटिस करेंगे कि यह एनीमेशन फ्रेम 75 पर खत्म होती है, ठीक वैसे ही जैसे पिछले सिंबल की एनीमेशन फ्रेम 65 पर खत्म हुई थी। हम फिर सिंबल से बाहर निकलते हैं, टॉप लेफ्ट पर main bubbles टैब पर क्लिक करके, जो scene 1 के ठीक बगल में है जैसा कि वीडियो में दिखाया गया है।
हम फिर लेयर 2 के पहले कीफ्रेम पर वापस जाते हैं, बबल सिंबल को सिलेक्ट करते हैं और प्रॉपर्टीज ऑब्जेक्ट में लूपिंग ऑप्शन पर जाते हैं। यहाँ पहले बॉक्स में हम वैल्यू 1 से बदलकर 75 कर देते हैं। इससे हमारी एनीमेशन लूप में प्ले होगी। अब एक क्विक प्रीव्यू करते हैं। एंटर दबाकर हम देख सकते हैं कि कौल्ड्रन से तीन बबल्स अलग-अलग टाइमिंग पर ऊपर आ रहे हैं। यह काफी अच्छा दिख रहा है। अब हम एक और बबल ऐड करने के लिए आगे बढ़ते हैं, तो हम अभी तक जो प्रोसेस किया है, ठीक वही फॉलो करते हैं। फिर लेयर 4 पर नए कॉपी किए गए सिंबल को मूव और 120% तक स्केल करते हैं।
हम कुछ डुप्लिकेट बबल सिंबल्स की टाइमिंग भी बदल सकते हैं ताकि उनमें और भी रैंडमनेस दिखे। इसके लिए हम लेयर 4 पर फ्रेम 45 पर जाते हैं जहाँ हमने कॉपी किया हुआ सिंबल रखा था। हम बबल को सिलेक्ट करते हैं, उस पर राइट क्लिक करते हैं और डुप्लिकेट सिंबल चुनते हैं। फिर हम इसे bubble 1 नाम देते हैं। हम सिंबल को फिर से डुप्लिकेट करते हैं ताकि यहाँ किए गए बदलाव पहले वाले सिंबल्स को प्रभावित न करें। फिर हम वीडियो में दिखाए अनुसार बबल्स पर डबल क्लिक करके सिंबल में एंटर करते हैं। हम लेयर 2 पर कुछ रैंडम फ्रेम्स को वीडियो में दिखाए अनुसार हटाते हैं। फिर हम लेयर 1 पर कीज को वापस मूव करते हैं ताकि लेयर 2 पर हटाए गए रैंडम फ्रेम्स से बने गैप को पूरा किया जा सके। कृपया वीडियो ध्यान से फॉलो करें।
फिर हम सिंबल से बाहर निकलते हैं, वर्क एरिया के ऊपर टॉप लेफ्ट कॉर्नर में main bubbles टैब पर क्लिक करके। अब हम कुछ रैंडम नेस्टेड बबल्स ऐड कर सकते हैं ताकि वे सभी एक जैसे न दिखें। हम यह बबल सिंबल को पहले की तरह डुप्लिकेट करके, सिंबल में एंटर करके और फिर फ्रेम्स के बीच में रैंडम कीफ्रेम्स हटाकर करते हैं। आप इस वीडियो पर नज़र रख सकते हैं ताकि आपको आगे कैसे बढ़ना है इसका रेफरेंस मिलता रहे।
अब हम क्या करने वाले हैं कि कुछ बबल्स हवा में उड़ने से पहले ही फट जाएँगे। हम यह सिंबल को डुप्लिकेट करके और उसका नाम bubble 4 रखकर करते हैं। फिर हम उस पर डबल क्लिक करके सिंबल के अंदर जाते हैं। अब हम लेयर वन में जाते हैं और आख़िरी फ्रेम को छोड़कर बाकी सभी फ्रेम्स को सिलेक्ट करते हैं और shift + F6 दबाकर डिलीट कर देते हैं। अब हम उस आख़िरी कीफ्रेम को सिलेक्ट करते हैं जिसे हमने डिलीट नहीं किया और उसे फ्रेम 27 तक ड्रैग करते हैं जैसा कि वीडियो में दिखाया गया है। फिर हम फ्रेम 27 पर उस बबल को सिलेक्ट करते हैं और उसे नीचे लाकर formation keys के पास रखते हैं। कृपया वीडियो ध्यान से फॉलो करें। अब हम onion skin बटन ऑन करते हैं ताकि हम दूसरी key drawings को देख सकें और उनकी पोजीशन समझ सकें। हम अपने डुप्लिकेट किए हुए सिंबल पर राइट क्लिक करके उसका नाम bubble burst 1 रखते हैं। डबल क्लिक करके सिंबल में एंटर करें और लेयर 2 और 3 को डिलीट कर दें और लेयर वन के कीफ्रेम्स को इस तरह मूव करें कि पहला कीफ्रेम फ्रेम 1 पर आ जाए। कृपया वीडियो ध्यान से फॉलो करें। अब हम सिंबल से बाहर आते हैं और देख सकते हैं कि हमारा बबल हवा में जाने से पहले ही फट जाता है। हमने अब बबल्स की एनीमेशन पूरी कर ली है। अब Scene 1 टैब पर क्लिक करके सिंबल से बाहर आ जाते हैं जैसा कि वीडियो में दिखाया गया है। अब हम overlay को अनहाइड करते हैं जिसमें mist है। यह अच्छा होगा कि हम बबल्स पर blur जोड़ दें ताकि वे और भी दिलचस्प दिखें। तो हम animation layer को सिलेक्ट करते हैं। फिर हम properties frame में filters पर जाते हैं। filters के अंदर ड्रॉपडाउन मेन्यू से blur चुनते हैं। हम quality को high रखते हैं और X & Y axis की values को 2 रखते हैं। अब control + enter दबाकर preview देखते हैं। बबल एनीमेशन बहुत अच्छी लग रही है। आशा है आपको यह ट्यूटोरियल helpful लगा होगा। देखने के लिए धन्यवाद।