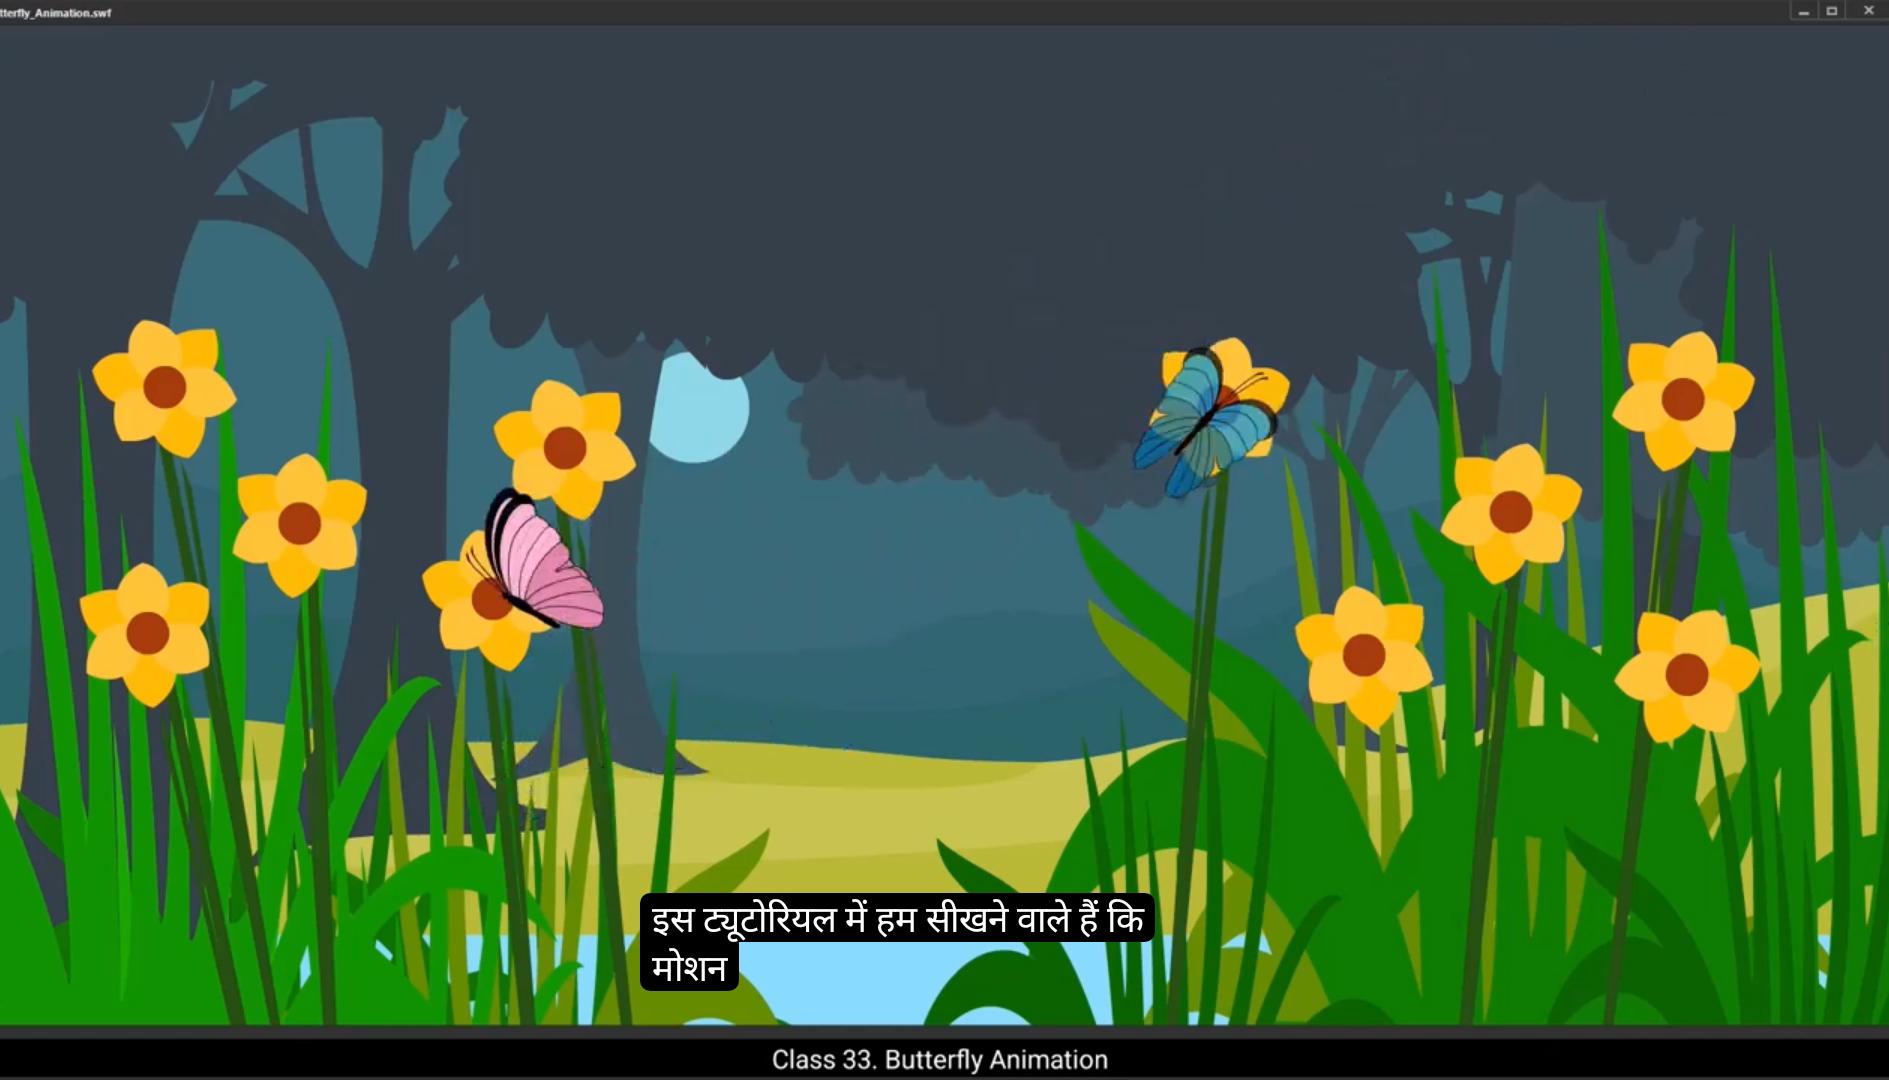
Inside the butterfly symbol there are three layers, the left wing, right wing, and body.Lock the body layer to keep it in place and on frame 5 add a keyframe to all the layers by pressing F6.At frame three, add another keyframe to all the layers. This creates a second point of reference for the wing animation. Next, on this keyframe, use the free transform tool to adjust the wings. Hold down shift while clicking and dragging on the keyframes to resize the wings evenly. This will give the illusion that the wings are getting closer to the body as the butterfly flaps.Since the wings are flapping upward, we'll also adjust the angle of the wings.To match the perspective of their movement.This completes the basic setup for the butterflies flapping animation. To make the wings movement smooth, add a classic tween between the keyframes.Next, add a keyframe at frame 2. To do this, press F6 to insert a keyframe on both wings layers. Once the keyframe is added, go to the Properties panel and under the object section adjust the color and effects to alpha.Set the alpha value to 70%. This creates A slight transparency effect, making the wings appear softer and more dynamic as they flap.Similarly at frame 4.Insert another keyframe by pressing F6 again in the properties panel under the object, change the color and effect to alpha and set the alpha value to 70%. Now let's check how the animation looks so far. Go to the main timeline and enable the looping option and play the animation to preview it.The flapping effect of the wings looks great, but the butterfly is moving too fast across the frame.To slow down the butterfly's motion, increase the number of frames. Drag the last keyframe to two more seconds, extending the timeline until frame 125. ********************* This gives the butterfly a smoother, slower motion as it moves along its path. Select the blue butterfly layer, right click on the timeline, and choose Synchronize Symbols. This option ensures that the 1st frame is correctly matched with each keyframe, keeping the movement consistent across The animation. Let's check the animation again to see how it looks.God. We can see that the speed is now more suitable, but the butterfly's position on the path looks a bit off.To fix this, select the 1st frame and using the free transform tool, rotate the butterfly to match the path's angle. This adjustment will make the butterfly face the correct direction along the motion path. On the 1st frame, select the keyframe and go to the Properties panel. Under the Frame section within Tweening, enable the Orient to Path option.Now, with the Orient to Path option turned on, the butterfly will rotate automatically to match the curve of the path. This ensures the butterfly's movement looks more organic as it moves through the scene. Next, we need to edit the path of the animation to make it smoother. To do this, unlock the Butterfly guide layer.Then use the sub selection tool to edit the path.Adjust the curve, making it more fluid and curvy so the butterfly's movement will look more natural and less rigid.Now rotate the butterfly slightly again to ensure its position and orientation are perfect along the path. After rotating, let's preview the animation to make sure the butterfly follows the path correctly and smoothly. With that done, this will conclude the first part of the animation.Now for the second part of the animation, the butterfly will settle on the flower For about 1 half to 2 seconds, so our next animation will start from frame #170.On both the guide and butterfly blue layers, add a keyframe. This will mark the point where the butterfly will pause before the next movement starts. ******************* Now add blank frames on the guide layer from 126 to frame 170. By pressing F7. We no longer need this path from frame 126 onwards, so clear it out and start fresh with a new guideline for the next phase of the butterfly's motion. To create the new path, first delete the old guideline.Then on frame 170 of the guide layer, use the Line tool to draw a new line that will act as the new path for the butterfly's animation.Add a slight curve to this new guideline to make the path more dynamic and better suited for the butterfly's movement.Then lock the guide layer and unlock the butterfly layer.Now on frame 271, add a keyframe by pressing F6 to mark the next important point in the butterfly's movement. Use the selection tool to move the butterfly to its new position, which is on the next flower. Once the butterfly is in position, rotate it to match the angle of its movement along the new path.Then add a classic tween between the keyframes to smoothly animate the butterfly along this new path.Go back to frame 170 and add sign ease in out effect to the butterfly's movement. Also ensure that the Orient to path option is checked so the butterfly rotates correctly as it follows the path.Notice that the animation is taking too long to complete. To speed it up, reduce the duration by shifting the last keyframe from frame 271 to frame 241. Synchronize symbols to ensure 1st frame matches with all keyframes.For the next phase of the animation, add a keyframe on frame 271.Since we won't need the path between frames 242 and 271, we'll insert a blank keyframe in that range. Starting from frame 271, we will add new guideline for the butterfly's path. First, unlock the guide layer and modify the existing path by moving the endpoint to the next flower. **************************** By doing this, the first point of the path will keep align with the butterfly.Now we'll curve the path to suit the butterfly's flight.Next, we will increase the duration of the animation to around 14 seconds. Select all the frames at frame 420 and press F5 on the keyboard. To add frames on frame 375, add a keyframe on the butterfly layer by pressing F6. This marks the point where the butterfly will be positioned on the new flower.Now unlock the butterfly layer and lock the guide layer to avoid accidental edits. Using the selection tool, move the butterfly along the new path to the next flower and rotate it to match the angle of the path.Once the butterfly is in position, add a classic tween between frame 271 and frame 375 to smoothly animate the butterfly's movement along the path.To make the movement even smoother, ensure the Orient to Path option is checked. Also choose the Ease In and Ease Out options with the sine curve for a gentle acceleration and deceleration.This completes the blue butterfly animation. Now, we'll create a similar animation for the pink butterfly, but from a profile angle to give it a different perspective. Before proceeding with the pink butterfly animation, let's save the current work. Next, unlock the pink butterfly layer to start working on its animation.On frame 150, add a keyframe on the pink butterfly layer. To focus on this butterfly, hide the blue butterfly's guide and symbol layer.We want to start the animation one second later to create an offset, so we will move the starting frame to frame 30.After that, we'll position the butterfly to the right side of the screen and rotate the pink butterfly to match its intended flight direction. ********************** To adjust its profile appearance, enter the pink butterfly symbol where the left wing, right wing, and body are on separate layers. To create a profile view, select the left wing, right click on it and go to Transform and select Horizontally Flip. This merrors the wings with the appropriate Create side for a side facing view. After flipping, adjust the left wing's position to align it with the butterfly's body. Similarly, adjust the right wing's position to ensure both wings appear correct in the profile view.By flipping one wing and aligning the other, we achieve the desired profile view of the pink butterfly.This subtle transformation makes it look like the butterfly is flying sideways. Next, just as with the blue butterfly, we will create the flapping motion for the pink butterfly. Add a keyframe to all layers at frame #5 using the shortcut F6, lock the body layer and on frame three, add another keyframe on all layers.Then skew the right wing to achieve the desired flipping motion.Also skew the left wing slightly and adjust its position.Once the wings positions are set, add a classic tween between the keyframes.Next on frame 2, insert a keyframe on both wings layer. Then go to the properties panel object and in the color and effect select alpha and alpha value to 70%. Do the same at frame 4, add a keyframe and select alpha.Go to Main Timeline. Now add a motion guide for the pink butterfly. To do this, right click on the pink butterfly layer and add a classic motion guide. This automatically creates a guide layer linked to the pink butterfly layer.In the newly created guide layer, on frame 30, insert a keyframe using F7 to prepare the path, then lock the pink butterfly layer to work exclusively on the guide layer.On this layer, draw a line using line tool to create a path. ********************** To define the butterflies flight path, modify the line into a curve, shaping it according to the motion we want.Then snap the pink butterfly symbol to the path to ensure it follows the guideline accurately.Let's modify the path to another flower for the butterfly movement. Select frame 30 on Guide layer, then adjust the path and refine curves so that the butterfly moves towards and settles on this flower.Next, snap butterfly symbol accurately to the guideline.On frame 150.Adjust the position of the pink butterfly along the path and rotate it slightly using the free transform tool. From frame 151 onward, the current guideline isn't needed anymore, so add a blank keyframe to the guide layer from this frame. Then on the pink butterfly layer, add a classic tween for smooth motion along the path to enhance the animation, add ease in.And ease out effect with the Sign option in the Properties panel. Also enable the Orient to Path option.If necessary, make further adjustments to the butterfly's rotation to maintain realistic movement. Will adjust its position slightly for a perfect landing.The butterfly will remain on the flower for approximately 1.5 seconds to prepare for its next movement. Insert a keyframe on frame 195 on the pink butterfly layer and the guide layer to create a new motion path for the butterfly. To start creating the new path, lock the pink butterfly symbol layer and unlock the guide layer. Then on frame 195 of the guide layer, draw a new line using the line tool to define the butterfly's next motion.Add a slight curve to the newly drawn path on the guide layer to make the butterfly's motion more natural.Next, lock the guide layer and unlock the pink butterfly layer and on frame 260 insert a keyframe and move the butterfly towards the next Flower. ******************** Use the free transform tool to rotate the butterfly slightly for alignment. And on frame 195 add a classic tween to the animation for a smooth transition. In the properties panel, add an ease in and ease out effect with the sign option and also check the Orient to path option so the butterfly rotates naturally along the curve.Once the butterfly reaches the flower, it will remain settled there for 1.5 seconds. From frame 261 onward, the guide path will no longer be needed, so insert a blank keyframe on the guide layer at frame 261 by pressing F7. On frame 305, select both the guide layer and the pink butterfly layer and insert a keyframe to define the next stage of motion.Now I want the butterfly to move to another flower. For this, add a keyframe on frame 400 for both the guide and pink butterfly layers. Also shift the keyframe on the guide layer by 1 frame to ensure the guide path remains visible until frame 400. Returning to frame 305, lock the pink butterfly layer and unlock the guide layer to create the path for the butterfly's next motion.Add a new path on the guide layer for the butterfly to move towards another flower.Refine the path by adding a curve to make the motion more natural.Next, on frame 400, adjust the position of the butterfly to the next flower.And flip it horizontally by right clicking on it and selecting the flip horizontal option.Apply a classic tween and let's check the animation so far. The butterfly is flipping at the middle of the path, which doesn't look natural.To fix this, remove the classic tween and make some adjustments. At frame 307, add a keyframe and flip the butterfly horizontally. ******************* And on frame 306 insert a keyframe again by pressing F6.Then duplicate the butterfly symbol by right clicking on it and selecting duplicate symbol.Rename it as Butterfly Pink Flip IB. IB stands for in between.Enter the newly created symbol on frame 4. Within the symbol, flip the right wing horizontally by right clicking on it, selecting Transform and then choosing Flip Horizontal. Exit the symbol.On frame 306, rotate the butterfly slightly to match the new position.Turn on the onion skin feature, which helps visualize the animation flow and adjust the rotation.This way you can manually add in betweens for more precise control. From frame 307, apply a classic tween to the butterfly motion, apply an ease in, ease out effect with the Sign option and check the Orient to Path option to ensure smooth transitions.Adjust the butterfly's position on frames 306 and 307 for a seamless flip animation.We'll specifically apply the sign ease out effect to make the transition even smoother.Unhide the blue butterfly layer for a clearer view of the animation.Let's preview the changes to ensure everything flows perfectly. To create bette perspective, we will resize the blue butterfly starting from frame 125, scale it down to 75% for a smaller and more realistic appearance. To maintain consistency, reduce its size by 25% on each keyframe, ensuring smooth resizing throughout the animation.Let's preview the final animation.And that's it, we've successfully completed our butterfly animation with smooth transitions, proper scaling, and a touch of creativity. I hope you learned something new today. Thank you so much for watching and see you in the next tutorial. *************** इस ट्यूटोरियल में हम सीखने वाले हैं कि Motion Guide Tool का इस्तेमाल करके Butterfly Animation कैसे बनाई जाती है। ये एक Advanced Animation Technique है, लेकिन चिंता मत करो — हमने अपने शुरुआती ट्यूटोरियल्स में Motion Guides की बेसिक्स पहले ही कवर कर ली हैं। अगर तुम्हें उन कॉन्सेप्ट्स को दोबारा समझने की ज़रूरत महसूस हो, तो बेझिझक उन लेसन्स को फिर से देख सकते हो ताकि और क्लियर समझ मिल सके। ठीक है, तो चलो ऐनिमेशन शुरू करते हैं। शुरुआत के लिए, मेरे पास पहले से तैयार एक Background File है जिस पर हम काम करने वाले हैं। ये फाइल Downloadable Materials में शामिल है ताकि तुम इसे डाउनलोड करके आसानी से साथ-साथ काम कर सको। हमारे पास कुल तीन मुख्य Layers हैं — सबसे नीचे है Background Layer, जो हमारी ऐनिमेशन का सीनरी (scenery) प्रदान करती है। दूसरी है Blue Butterfly Layer, जो अपनी अलग लेयर पर रखी गई है। और तीसरी है Pink Butterfly Layer, जो अपनी अलग लेयर पर है। हम पहले Blue Butterfly को ऐनिमेट करेंगे, और जब वो पूरा हो जाएगा, तब Pink Butterfly पर काम शुरू करेंगे। अब चलो ऐनिमेशन की Timeline Setup करते हैं। क्योंकि मैं चाहता हूँ कि ऐनिमेशन लगभग 12 Seconds तक चले, तो हम सभी लेयर्स को Frame #360 तक एक्सटेंड करेंगे। इसके लिए सभी लेयर्स पर Frame 360 को सिलेक्ट करो और कीबोर्ड पर F5 दबाओ ताकि फ्रेम्स की ड्यूरेशन बढ़ जाए। अब हम Blue Butterfly को ऐनिमेट करना शुरू करते हैं। सबसे पहले, Blue Butterfly Layer को Unlock करो ताकि वो एडिटेबल हो जाए। अनलॉक करने के बाद, Frame Number 75 पर जाओ और वहाँ एक Keyframe ऐड करो। इसके लिए Blue Butterfly Layer पर Frame 75 सिलेक्ट करो और कीबोर्ड पर F6 दबाओ ताकि एक Keyframe जुड़ जाए। ये Keyframe बटरफ्लाई की दूसरी पोज़िशन को दर्शाएगा — यानी उसके मूवमेंट के दौरान का अगला पॉइंट। अब Frame 1, यानी ऐनिमेशन के शुरुआती पॉइंट पर जाओ और Selection Tool की मदद से Butterfly को स्क्रीन के बिलकुल बाएँ साइड (off-screen left) पर ड्रैग करो। इसके बाद, Frame 1 पर ही Butterfly को हल्का सा Rotate करो। *********************** इसके लिए Free Transform Tool का इस्तेमाल करो। अब हम Butterfly को एक रास्ते (path) पर ऐनिमेट करने वाले हैं, जिसके लिए हम Motion Guide Tool का उपयोग करेंगे। इसके लिए, Timeline में Blue Butterfly Layer पर Right Click करो। फिर Context Menu से Add Classic Motion Guide वाला ऑप्शन चुनो। जैसे ही तुम ऐसा करते हो, Blue Butterfly Layer के ठीक ऊपर एक नई लेयर दिखाई देगी। यह नई लेयर का नाम होगा — Guide Butterfly Blue। फिलहाल यह Guide Layer पूरी तरह खाली है — यही वह लेयर है जहाँ हम Butterfly की मूवमेंट का Path ड्रॉ करेंगे। आगे बढ़ने से पहले, Blue Butterfly Layer को Lock कर दो ताकि गलती से कोई एडिट न हो जाए। अब अपना ध्यान Guide Layer पर शिफ्ट करो ताकि हम मूवमेंट पाथ बना सकें। Guide Layer पर Line Tool का इस्तेमाल करके एक Straight Line ड्रॉ करो। अब इस लाइन को ज़्यादा Natural और Flowing बनाने का समय है। इसके लिए हम इस सीधी लाइन को एक Curved Path में बदलेंगे। सबसे पहले, Toolbar से Selection Tool चुनो। अब Alt Key दबाकर लाइन पर क्लिक करो — इससे लाइन दो हिस्सों में टूट जाएगी। फिर हम लाइन को Butterfly के Pivot Point की दिशा में बढ़ाएँगे। अगर हम Butterfly Layer को अनलॉक करें, तो Properties Panel में उसके Pivot Point को देखा जा सकता है। Right-hand side पर, Dock Tab के नीचे तुम्हें Snap to Object बटन दिखाई देगा। अलाइनमेंट को आसान बनाने के लिए यह सुनिश्चित करो कि Snap to Object ऑप्शन On हो। यह सेटिंग Butterfly को Motion Guide Path पर स्नैप (जुड़ने) में मदद करेगी। अब Butterfly की पोज़िशन को Path के Curve के अनुसार Rotate करो ताकि वो रास्ते की दिशा में उड़े। फिर से Butterfly Layer को Lock कर दो और लाइन के कर्व को एडजस्ट करो ताकि बटरफ्लाई की उड़ान स्मूद और नेचुरल दिखे। इसके लिए हम Sub Selection Tool का इस्तेमाल करेंगे, जो हमें Path के Anchor Points और Direction Handles को अलग-अलग Manipulate (Adjust) करने की सुविधा देता है। ******************* Path को सेलेक्ट करके और उसके Points को थोड़ा-सा मूव करके हम कर्व को और बेहतर बना सकते हैं — ताकि लाइन Smooth और Natural Flow में दिखे। Sub Selection Tool से Handles को एडजस्ट करो, इससे Butterfly की मूवमेंट और ज़्यादा Organic लगेगी। अब मैं Butterfly को सीन के अंदर एक नई पोज़िशन पर शिफ्ट करना चाहता हूँ। इसके लिए फिर से Sub Selection Tool का इस्तेमाल करो। अब Shift + Down Arrow दबाओ ताकि पूरा Motion Path नीचे की तरफ मूव हो जाए, और Butterfly सीन के Corner के थोड़ा पास पोज़िशन हो जाए। इससे ऐसा लगेगा कि ऐनिमेशन किसी Defined Space (यानी सीमित एरिया) के अंदर हो रहा है। अगर तुम्हें लगे कि मूवमेंट उतनी Smooth नहीं है, तो तुम कभी भी Path की Direction या Position को एडजस्ट कर सकते हो। जब Path सेट हो जाए, तो अब Butterfly Symbol को सीन में सही तरीके से Align करना होगा। सबसे पहले Selection Tool चुनो, फिर Butterfly Symbol Layer को Unlock करो। यह ध्यान रखो कि Snap to Object Option Enabled हो, क्योंकि इससे Butterfly एकदम Perfectly Guideline से Snap (Attach) हो जाएगी। अब जब Butterfly सही तरीके से Guideline से जुड़ जाए, तो Butterfly Guide Layer को फिर से Lock कर दो। अब Butterfly Blue Layer पर जाओ और Frame 1 पर जाओ। फिर उस पर Classic Tween लगाओ। अभी तक हमने जो Motion सेट किया है, वो पूरी तरह Path से मैच नहीं कर रहा। इसे ठीक करने के लिए, Last Frame पर जाकर Butterfly Symbol को सही Path Position पर Snap करो। इसके बाद, Butterfly Symbol को थोड़ा Rotate करो ताकि उसकी Position और Angle पूरे Motion Path के साथ मैच करें। अब Motion को और Smooth बनाने के लिए, Properties Panel में जाओ → Tweening Option के अंदर Ease In / Ease Out (Sign) इफ़ेक्ट लगाओ। इससे Butterfly की मूवमेंट एकदम Natural और Fluid लगेगी — ना बहुत झटकेदार शुरुआत होगी और ना ही अचानक रुकावट। अब हम Butterfly Wings की Animation पर काम करेंगे। *********************** Butterfly Symbol के अंदर तीन Layers हैं — Left Wing, Right Wing, और Body। सबसे पहले Body Layer को Lock कर दो, ताकि वो अपनी जगह पर स्थिर रहे। अब Frame 5 पर जाओ और सभी लेयर्स पर एक साथ Keyframe ऐड करो — इसके लिए F6 दबाओ। इसके बाद Frame 3 पर जाओ और फिर से सभी लेयर्स पर Keyframe (F6) ऐड करो। इससे Wing Animation के लिए दूसरा Reference Point बन जाएगा। अब इस Keyframe (Frame 3) पर Free Transform Tool का इस्तेमाल करो। Shift Key दबाकर रखो और Wings को थोड़ा-सा Resize करो — इससे ऐसा लगेगा कि Wings Body के करीब आ रहे हैं जब Butterfly अपने पंख फड़फड़ा रही है। क्योंकि Wings ऊपर की दिशा में फड़फड़ा रहे हैं, तो हम उनके Angle को भी थोड़ा एडजस्ट करेंगे ताकि उनकी Movement का Perspective सही दिखे। इससे हमारा Butterfly Flapping Animation का Basic Setup पूरा हो जाता है। अब Wing Movement को Smooth बनाने के लिए, इन Keyframes के बीच एक Classic Tween लगाओ। अगला स्टेप — Frame 2 पर जाओ और दोनों Wings Layers पर एक और Keyframe ऐड करो (F6)। अब Properties Panel में जाओ → Object Section के अंदर Color & Effects में जाओ → Alpha सेलेक्ट करो और Alpha Value को 70% सेट कर दो। इससे Wings में हल्का Transparency Effect आएगा, जो पंखों को और Soft और Dynamic लुक देगा जब वो Flap होंगे। इसी तरह Frame 4 पर भी एक Keyframe (F6) ऐड करो, फिर से Properties Panel → Object → Color & Effect → Alpha 70% सेट करो। अब चलो ऐनिमेशन को चेक करते हैं — Main Timeline पर वापस जाओ, Looping Option को Enable करो, और Play दबाओ। अब तुम देखोगे कि Wings Flapping Effect बहुत अच्छा लग रहा है, लेकिन Butterfly बहुत तेज़ी से Frame के पार जा रही है। इसे Slow Down करने के लिए Frames की Duration बढ़ानी होगी। Last Keyframe को पकड़कर करीब 2 सेकंड आगे Drag करो — यानी टाइमलाइन को बढ़ाकर Frame 125 तक एक्सटेंड कर दो। अब Butterfly की मूवमेंट और Wing Flapping दोनों Balanced और Natural दिखेंगे। *********************** इससे Butterfly की मूवमेंट और भी Smooth और Slow हो जाती है, जब वो अपने Path पर उड़ती है। अब Blue Butterfly Layer को सेलेक्ट करो, Timeline पर Right Click करो, और Synchronize Symbols ऑप्शन चुनो। ये ऑप्शन यह सुनिश्चित करता है कि हर Keyframe के साथ First Frame सही तरीके से Sync हो, ताकि पूरी ऐनिमेशन में Movement Consistent रहे। अब ऐनिमेशन को फिर से Play करके देखो — बहुत अच्छा! अब Speed बिल्कुल सही लग रही है, लेकिन Butterfly की Position अपने Path पर थोड़ी-सी गड़बड़ दिख रही है। इसे Fix करने के लिए, First Frame को सेलेक्ट करो और Free Transform Tool का इस्तेमाल करते हुए Butterfly को थोड़ा Rotate करो ताकि वो Path के Angle से मैच करे। इस एडजस्टमेंट से Butterfly अब सही दिशा में Path के साथ फेस करेगी। अब First Frame पर Keyframe को सेलेक्ट रखो, फिर Properties Panel में जाओ → Frame Section → Tweening → Orient to Path ऑप्शन को Enable करो। इससे जब Butterfly मूव करेगी, तो वो अपने आप Path की Curve Direction के अनुसार Rotate हो जाएगी। इससे उसकी मूवमेंट और भी Natural और Organic दिखेगी। अब हमें Animation Path को थोड़ा और Smooth बनाना है। इसके लिए Butterfly Guide Layer को Unlock करो। फिर Sub Selection Tool लो और Path के Curve को एडजस्ट करो — थोड़ा Fluid और Curvy बना दो ताकि Butterfly की Flight और भी Natural लगे, न कि Rigid या Mechanical। अब Butterfly Symbol को थोड़ा और Rotate करो ताकि उसकी Position और Orientation पूरी तरह से Path के अनुसार फिट हो जाए। ये सब करने के बाद Animation को Preview करो — अब Butterfly पूरी तरह से Path को स्मूथली फॉलो कर रही है। इसके साथ हमारा Animation का पहला हिस्सा पूरा हो गया। अब Second Part में, Butterfly थोड़ी देर के लिए Flower पर रुकेगी, लगभग 1.5 से 2 सेकंड तक। तो अब हमारी अगली ऐनिमेशन Frame #170 से शुरू होगी। Guide Layer और Blue Butterfly Layer — दोनों पर Frame 170 पर एक-एक Keyframe (F6) ऐड करो। ये वो पॉइंट होगा जहाँ Butterfly रुककर ठहरेगी, अगले Movement Start होने से पहले। ***†******†**********†* अब Guide Layer पर Frame 126 से Frame 170 तक Blank Frames ऐड करो — इसके लिए F7 दबाओ। अब हमें 126वें फ्रेम के बाद पुराना Path नहीं चाहिए, तो उसे क्लियर कर दो और नए मोशन गाइड पाथ के लिए एक Fresh Guideline बनाओ। सबसे पहले, पुरानी Guideline को Delete कर दो। फिर Guide Layer के Frame 170 पर जाकर Line Tool का इस्तेमाल करो और एक नई लाइन ड्रॉ करो — यही लाइन Butterfly Animation के अगले फेज का नया पाथ बनेगी। इस नई गाइडलाइन में थोड़ी-सी Curve ऐड करो ताकि पाथ ज़्यादा Dynamic लगे और Butterfly की Movement के हिसाब से Natural Flow बनाए। अब Guide Layer को Lock कर दो और Butterfly Layer को Unlock करो। अब Frame 271 पर जाओ और F6 दबाकर एक Keyframe ऐड करो — ये Butterfly के अगले Movement Point को मार्क करेगा। Selection Tool से Butterfly को उसकी नई Position पर ले जाओ, जहाँ वो अगले फूल (Next Flower) पर बैठेगी। अब Butterfly को थोड़ा Rotate करो ताकि उसकी Direction नए Path के Angle से मैच करे। फिर Keyframes के बीच में Classic Tween लगाओ ताकि Butterfly की Motion स्मूद और कंटीन्यूअस दिखे। अब वापस Frame 170 पर आओ और Properties Panel में Sign Ease In-Out Effect अप्लाई करो, ताकि Butterfly की Motion स्मूदली Start और Stop हो। साथ ही यह भी ध्यान रखो कि Orient to Path Option Checked हो, ताकि Butterfly मूव करते समय Path की Direction के अनुसार अपने आप Rotate होती रहे। अब देखो — ऐनिमेशन थोड़ा लंबा चल रहा है, तो हमें इसे थोड़ा फास्ट करना होगा। इसके लिए Last Keyframe (Frame 271) को Frame 241 तक Shift कर दो, ताकि Duration कम हो जाए और Speed Perfect लगे। अब Synchronize Symbols करो ताकि First Frame सभी Keyframes के साथ Match हो जाए। अब ऐनिमेशन के Next Phase के लिए Frame 271 पर एक नया Keyframe (F6) ऐड करो। क्योंकि हमें Frame 242 से 271 के बीच का पुराना Path नहीं चाहिए, तो उस रेंज में Blank Keyframe (F7) इंसर्ट करो। अब Frame 271 से नया Guideline Path ऐड करेंगे। इसके लिए Guide Layer को Unlock करो और Existing Path को Modify करो — उसके End Point को अगले फूल (Next Flower) तक Move कर दो। ****†************†************ ऐसा करने से Path का पहला पॉइंट Butterfly के साथ सही तरीके से Align रहेगा। अब हम Path को Curve करेंगे ताकि वो Butterfly की Flight Motion के हिसाब से और भी Natural लगे। इसके बाद हमें Animation Duration लगभग 14 seconds तक बढ़ानी है। इसके लिए Frame 420 तक सभी Layers के Frames को सेलेक्ट करो और Keyboard पर F5 दबाओ ताकि सभी लेयर्स पर Frames Extend हो जाएँ। अब Frame 375 पर Butterfly Layer में एक Keyframe (F6) ऐड करो। ये वो पॉइंट है जहाँ Butterfly नई Flower Position पर पहुँचेगी। अब Butterfly Layer को Unlock करो और Guide Layer को Lock कर दो, ताकि कोई Accidental Edit न हो। फिर Selection Tool से Butterfly को New Path के साथ अगले फूल (Next Flower) की तरफ मूव करो और उसका Angle Path की Direction से मैच करने के लिए थोड़ा Rotate करो। जब Butterfly सही Position में आ जाए, तो Frame 271 और Frame 375 के बीच एक Classic Tween अप्लाई करो, ताकि Butterfly की Movement Smoothly Path पर Flow करे। अब Motion को और Natural बनाने के लिए, यह सुनिश्चित करो कि Orient to Path Option Checked हो। फिर Properties Panel → Tweening Section में Ease In – Ease Out (Sine Curve) इफेक्ट अप्लाई करो, ताकि Butterfly की Acceleration और Deceleration धीरे और स्मूथ तरीके से हो। इसके साथ हमारा Blue Butterfly Animation पूरा हो गया। 🎉 अब हम Pink Butterfly Animation बनाएँगे, लेकिन इस बार इसे Side Profile Angle से ऐनिमेट करेंगे, ताकि एक Different Perspective मिले। इससे पहले कि हम आगे बढ़ें, अपना Current Work Save कर लो। 💾 अब Pink Butterfly Layer को Unlock करो ताकि उस पर काम शुरू किया जा सके। Frame 150 पर Pink Butterfly Layer में एक Keyframe (F6) ऐड करो। अब सिर्फ Pink Butterfly पर फोकस करने के लिए, Blue Butterfly की Guide और Symbol Layers को Hide कर दो। हम चाहते हैं कि Pink Butterfly Animation थोड़ी देर बाद शुरू हो — लगभग 1 second later, ताकि दोनों Butterflies एक साथ न उड़ें और Offset Timing क्रिएट हो। इसके लिए Starting Frame को Frame 30 तक शिफ्ट करो। अब Pink Butterfly को Screen के Right Side पर पोज़िशन करो और Free Transform Tool से उसे Rotate करो, ताकि वो अपने Flight Direction के हिसाब से बिल्कुल सही Angle में हो। *****†************** अब Pink Butterfly की Profile Appearance को एडजस्ट करने के लिए, Pink Butterfly Symbol के अंदर जाओ — जहाँ Left Wing, Right Wing, और Body तीनों अलग-अलग लेयर्स में हैं। अब Profile View बनाने के लिए, Left Wing को सेलेक्ट करो, फिर उस पर Right Click करो → Transform → Flip Horizontally चुनो। इससे Left Wing Mirror हो जाएगा, और अब वो Side Facing View के लिए सही दिशा में दिखाई देगा। Flip करने के बाद, Left Wing की Position को थोड़ा एडजस्ट करो ताकि वो Butterfly के Body Layer से ठीक से Align हो जाए। इसी तरह, Right Wing की Position भी एडजस्ट करो ताकि दोनों पंख Profile View में बिलकुल Natural और Symmetrical दिखें। इस तरह, एक विंग को Flip करने और दूसरे को Align करने से हमने Pink Butterfly का Profile View तैयार कर लिया है। 🦋 अब Butterfly ऐसे लगेगा जैसे वो Side से उड़ रहा हो। अब, जैसे हमने Blue Butterfly के लिए किया था, वैसे ही अब हम Pink Butterfly के Wings Flapping Motion बनाएँगे। सबसे पहले, सभी लेयर्स पर Frame #5 पर एक Keyframe (F6) ऐड करो। फिर Body Layer को Lock कर दो, और Frame 3 पर सभी लेयर्स पर एक और Keyframe (F6) ऐड करो। अब Right Wing को सेलेक्ट करो और Free Transform Tool से उसे थोड़ा Skew करो ताकि वो Flapping Motion जैसा लगे। Left Wing को भी थोड़ा Skew करो और उसकी Position को हल्का एडजस्ट करो ताकि दोनों Wings की Movement Balance लगे। अब इन Keyframes के बीच एक Classic Tween अप्लाई करो, जिससे Wings का Flapping Animation स्मूथ बनेगा। इसके बाद Frame 2 पर दोनों Wings Layers पर एक-एक Keyframe (F6) ऐड करो। फिर Properties Panel → Object → Color & Effect → Alpha में जाओ और Alpha Value = 70% सेट करो, जिससे Wings में हल्का Transparency Effect आएगा। इसी तरह Frame 4 पर भी एक Keyframe (F6) ऐड करो और Alpha Value फिर से 70% रखो। अब Main Timeline में वापस आओ। अब हमें Pink Butterfly के लिए एक Motion Guide बनाना है। इसके लिए, Pink Butterfly Layer पर Right Click करो और Add Classic Motion Guide ऑप्शन चुनो। इससे अपने आप Pink Butterfly Layer से जुड़ी हुई एक नई Guide Layer बन जाएगी। अब इस नई Guide Layer में Frame 30 पर जाओ और F7 दबाकर एक Blank Keyframe ऐड करो। यह Keyframe हमारे Path Drawing के लिए तैयार रहेगा। अब Pink Butterfly Layer को Lock कर दो ताकि कोई गलती से एडिट न हो, और सिर्फ Guide Layer पर काम करो। अब Line Tool का इस्तेमाल करो और इस Guide Layer पर Butterfly के Path के लिए एक Line Draw करो — यही लाइन Pink Butterfly की उड़ान का रास्ता बनेगी। ***************†****** 🩷✨ *****†*************† अब हम Butterfly के Alignment और अगले Motion Path को सेट करेंगे 🦋 सबसे पहले, Free Transform Tool का इस्तेमाल करके Butterfly को हल्का Rotate करो ताकि वो Path के साथ Perfectly Align हो जाए। अब Frame 195 पर एक Classic Tween ऐड करो ताकि Butterfly का Transition Smooth दिखे। Properties Panel में जाकर, Ease In और Ease Out इफेक्ट Sine (Sign) ऑप्शन के साथ अप्लाई करो, और Orient to Path ऑप्शन को Check करो ताकि Butterfly अपने Curve Path के साथ Natural तरीके से Rotate हो सके। जब Butterfly Flower तक पहुँच जाए, तो उसे लगभग 1.5 Seconds तक वहीं रुके रहने दो, ताकि Landing Realistic लगे। अब Frame 261 से आगे हमें ये पुराना Guide Path नहीं चाहिए, तो Guide Layer पर Blank Keyframe (F7) ऐड करो Frame 261 पर। अब Frame 305 पर जाओ और Guide Layer व Pink Butterfly Layer दोनों पर Keyframe (F6) ऐड करो, ताकि अगले Motion Stage को Define किया जा सके। अब हम चाहते हैं कि Butterfly एक अगले Flower की ओर उड़े। इसके लिए Frame 400 पर Guide Layer और Pink Butterfly Layer दोनों पर एक-एक Keyframe (F6) ऐड करो। फिर Guide Layer का Keyframe 1 Frame आगे (यानि Frame 401) शिफ्ट करो, ताकि Path पूरी तरह Visible रहे जब तक Animation Frame 400 तक पहुँचे। अब वापस Frame 305 पर आओ। यहाँ Pink Butterfly Layer को Lock करो और Guide Layer को Unlock करो ताकि हम नया Path बना सकें। Guide Layer पर Line Tool से एक नई Path Line Draw करो, जिससे Butterfly अगले Flower की तरफ मूव** कर सके। अब उस Path को Curve में Modify करो, ताकि उसका मूवमेंट Natural और Smooth लगे। फिर Frame 400 पर जाओ, Butterfly को Next Flower की Position पर Move** करो, और Right Click → Transform → Flip Horizontal सिलेक्ट करो, ताकि Butterfly की Direction सही लगे। अब Classic Tween अप्लाई करो और Animation Preview करो। अगर तुम ध्यान दोगे, तो Butterfly Path के बीच में Flip हो रही है, जो थोड़ा Unnatural दिखता है। इसे Fix करने के लिए, पहले Classic Tween Remove करो, फिर Frame 307 पर जाओ और वहाँ Keyframe (F6) ऐड करो। अब Frame 307 पर Butterfly को Flip Horizontally करो। इस तरह, Butterfly अब Path के बीच में अचानक नहीं पलटेगी, बल्कि Natural Direction Change करेगी, जिससे Animation ज़्यादा Smooth और Realistic लगेगा 🩷✨ ****************. अब हम Butterfly Animation के Final Touches और Smooth Flip Transition पर काम करेंगे 🦋✨ सबसे पहले, Frame 306 पर जाओ और F6 दबाकर Keyframe Insert करो। अब Butterfly Symbol पर Right Click करो, और Duplicate Symbol सिलेक्ट करो। इस नए Symbol को नाम दो — "Butterfly Pink Flip IB", जहाँ IB का मतलब है “In Between”। अब Frame 4 पर जाओ और नए बने Symbol (Butterfly Pink Flip IB) के अंदर Enter करो। यहाँ, Right Wing को Flip करना है, तो उस पर Right Click → Transform → Flip Horizontal सिलेक्ट करो। इससे Butterfly की Wing उल्टी होकर Profile Flip Effect देगी। अब Symbol से Exit करो। वापस Frame 306 पर आकर Butterfly को हल्का Rotate करो ताकि उसकी Position नई दिशा से Match करे। अब Onion Skin Feature On करो, ताकि तुम Animation Flow को Clearly Visualize कर सको और Rotation को Fine Tune कर सको। इस तरह, तुम Manually In-Betweens जोड़ सकते हो जिससे Motion और भी Precise और Realistic लगे। अब Frame 307 से Classic Tween Apply करो और Properties Panel में Ease In / Ease Out Effect Sign (Sine) Option के साथ चुनो। साथ ही, Orient to Path Option को Check रखो ताकि Butterfly Curve Path के साथ Natural तरीके से Move और Rotate करे। Frames 306 और 307 पर Butterfly की Position और Rotation को थोड़ा Adjust करो ताकि Flip Transition Seamless दिखे। और Ease Out (Sign) Effect Apply** करो ताकि Motion Exit और भी Smooth लगे। अब Blue Butterfly Layer Unhide करो ताकि दोनों Butterflies का Overall Animation एक साथ Preview किया जा सके। अब एक Perspective Improvement Step: Frame 125 से Blue Butterfly को Select करो और उसका Size 75% तक Scale Down करो, ताकि वो Distance में छोटी दिखे। फिर हर Keyframe पर 25% Size Reduce करते जाओ, ताकि Scaling Transition Smooth बने। अब पूरी Animation को Preview करो 🎬 और देखो कैसे दोनों Butterflies Natural Motion, Soft Rotation और Perfect Timing के साथ Scene में सुंदरता से उड़ रही हैं! 🦋🌸 और बस! हमारी Butterfly Animation Tutorial अब पूरी तरह तैयार है — Smooth Transitions, Proper Scaling, और Creative Detailing के साथ। 💬 “मुझे उम्मीद है कि आज आपने कुछ नया सीखा होगा। Thank you so much for watching, and see you in the next tutorial!” 🌺✨