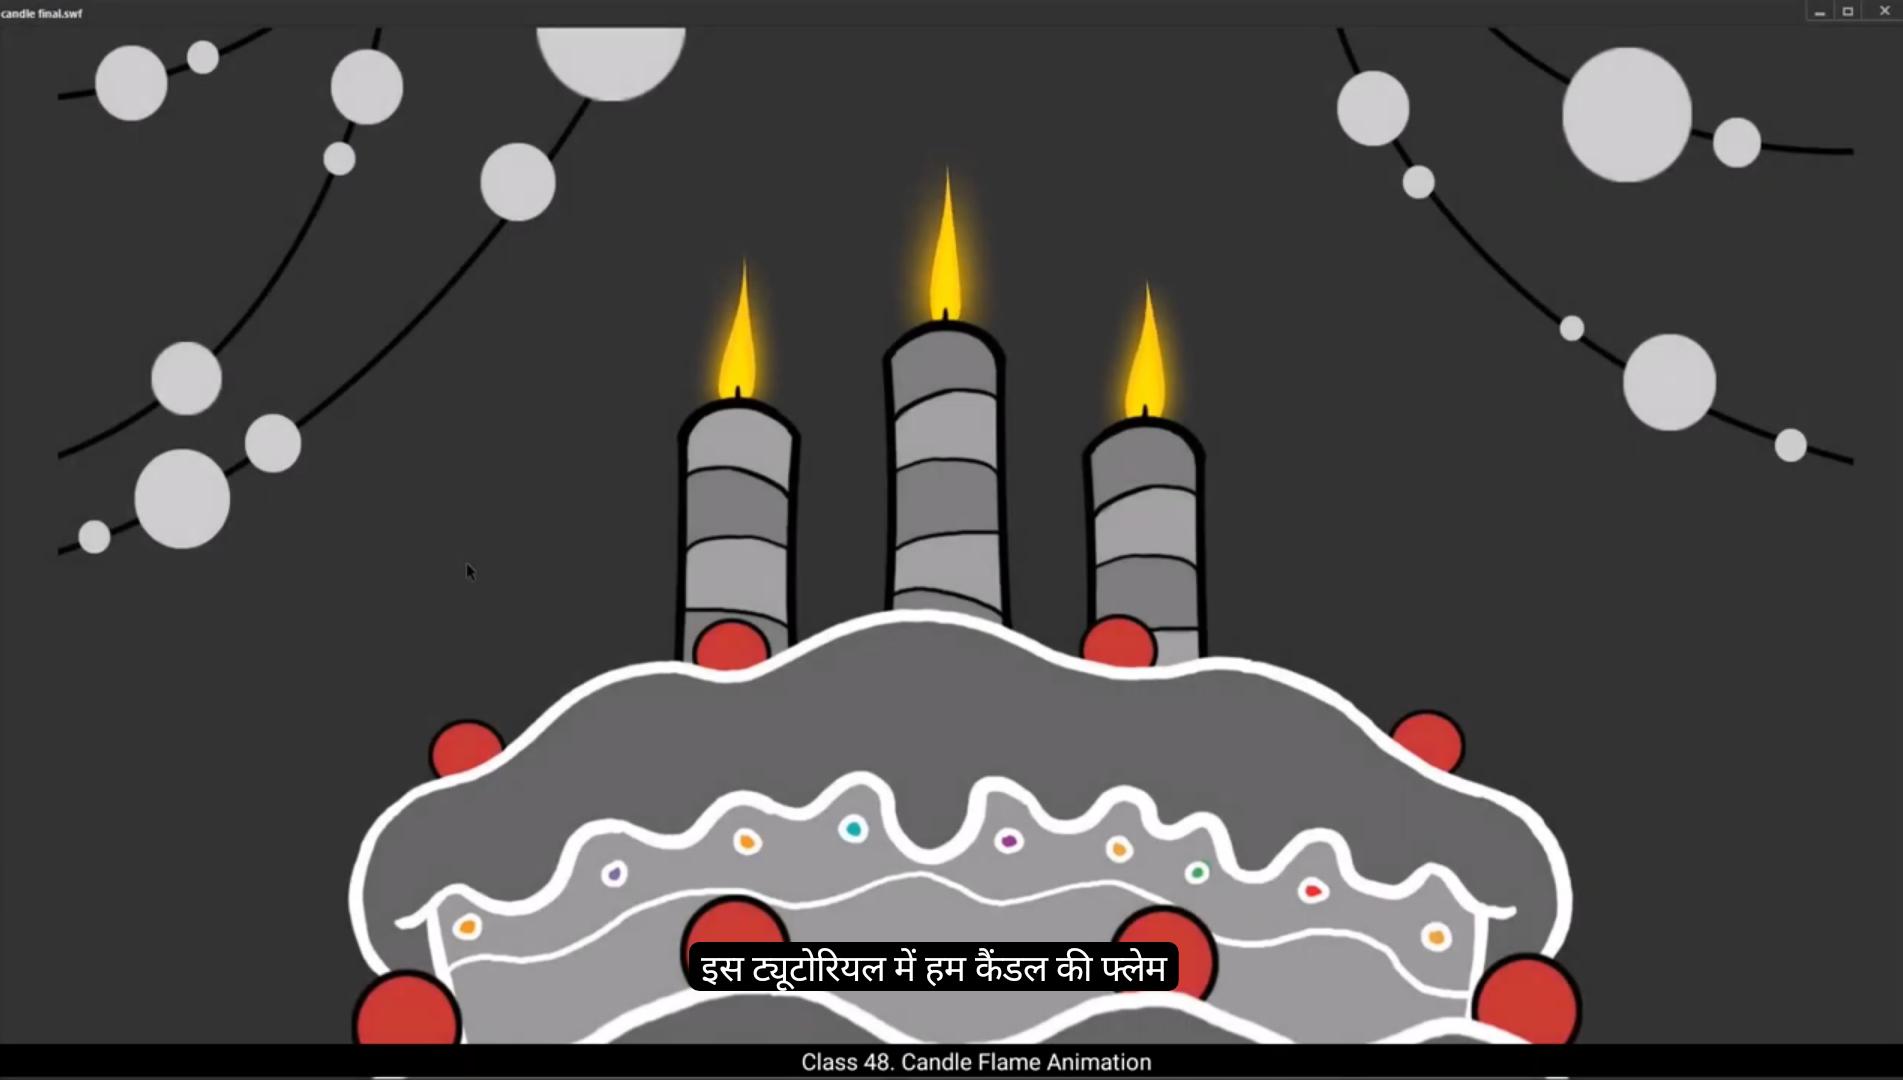
In this tutorial we are going to animate the flame of a candle.As we can see we have two layers with US. One is the background which has a cake with three candles on it. Under the background layer we are going to have our animation layer. We can also see that we have already added frames to our timeline till frame 40.Now to animate the flame, we are going to start with an elliptical shape and we are going to use the Oval tool for that, for which the shortcut key is O.We draw a circle holding down the shift key so that the circle will be a perfect circle and we have a yellow fill to it since we are animating a flame.As you can see, we deleted the outline on the circle. Let's hide the background layer and now make some space to work on our animation. We bring the circle to the center on our work area. Now we are going to work on changing the shape of a circle to that of a flame using the selection tool. The shortcut key for the selection tool is V. It's look like we are quite close to the shape we want for our flame. Next we are going to make the shape smoother by deleting some nodes using the sub selection tool. The shortcut for this is a.We click on the edge of a flame shape and you will see that we can see some nudes appear. The squares that are sitting on the green outline are the nodes. Now please select and delete the nodes by clicking on them and then pressing the delete key exactly as it has been done in the video. According to the video, we should have 4 nodes left. Now we adjust the node handles and tweak them to get our nice flame shape as you can see in the video.Once we have the shape right, we select our shape and convert it to a symbol by pressing F8 and we name it flame one.Now let's enter the symbol by double clicking on the shape. 😘 We then go to frame 40 and use F5 to add frames.Now we start animating our flame. We are going to use keys and shape tween to get the result we want. Let's start by laying out our keys. The 1st is of course on frame one. The second will be on frame 5. We add this by selecting frame 5 and using F6 to add keyframes there.As you can see, we have changed the shape of the flame on keyframe 5. The changes are going to be very subtle since candle frame doesn't move like a campfire. Our next keyframe will be on frame 10.We again make changes to our shape here, as you can see in the video.Now we are going to add keyframes every 5th frame. And we are going to copy our flame from keyframe 1 to keyframe 40. This will give us a smooth seamless loop. Now that all our keyframes have been added, we select the frames in between keyframe 1 and keyframe 40 as seen in the video and we right click on the selection. A pop up menu appear where we select Create Shape Tween.When we look at our animation, we realize that we need to make some changes to our keys.So we go to keyframe 1 and make our changes.After we make our changes to Keyframe one, we press down the Alt and drag the Keyframe 1 to Keyframe 40. Keyframe 1 and Keyframe 40 are the same. We now exit the symbol by clicking on Scene one on the tab at the left top of our work area as seen in the video. Select the symbol by clicking on the shape and convert it to a new symbol again.We name this symbol Candle flame. Now we enter the symbol by double clicking on our flame shape. Again we go to frame 40 and add frames using F5 as we have done before. We add a new layer and we copy our symbol using control plus C and place it in place on the new layer using control press Shift plus V Now we select this symbol and we are going to change the color. 😘 Here we go to properties, object, color effect and tint.We make the tint a lighter shade than our earlier yellow. Next we scale down the symbol using the scale and rotate to. The shortcut is Control plus Alt plus S We input a value of 70 which means we scale our symbol down by 30%. We then move it down as seen in the video. We are now going to change the timing of the symbol that we have copied on the layer 2.We go to the properties object looping options.In the box next to 1st, we input 8. We exit the symbol by clicking on scene 1 as seen in the video. Then we unhide our background layer. We move our candle flame animation symbol so that it is placed just under the Wick of the candle as seen in the video. We are now scaling down our symbol a little so that it looks good in proportion over the candle.Now we are going to work on flame for the next candle. Here we are going to make some changes to the shape so that all the flames don't look alike.Now that our second flame shape is complete, we are converting it to a symbol and naming it flame two. We then enter the symbol by double clicking on the flame shape. We now make the same keyframe on every 5th frame as we had done before.We will modify the shape on the keyframes we are adding and we will add shape tween. We come out and convert the new flame into symbol again by pressing F8. We enter the symbol by double clicking it.We again add frames by using F5 till frame 40 as we've done several times in earlier symbols. We add a new layer and copy the first keyframe from the old layer to the new one so that our entire animation inside the symbol will be copied to the new layer. Now we are going to change the color of this one again. 😘 Again it's the same process. We go to properties, object, colour effect, tint. We are using the same.Shade of yellow which we had used in the first flame. We again scale it down just like we had done in the first flame and move it down as seen in the video. And next we adjust the timing again by going to properties, object looping options. Just follow the video after that.Once that is done, we exit the symbol by clicking the Scene 1 tab as seen in the video.Now we copy this animation and paste it on a new layer as seen in the video.We hide the background for a bit, drag this copied animation up.Unhide the background and position it so that it matches the Wick of the candle on the right.It can now see all three flames placed in their positions. The flames on the left and right look a bit too big compared to the one in the middle. They should be a bit smaller. So we select them both and using the Scale and Rotate tool. The shortcut is Control plus Alt S and scale it both down to 90%.We then move them back to the right positions again.Then we are going to change the timing for the flame animation of the right candle which we have just placed. We go back to properties, objects, looping options and input 20 in the first box. Just like in the video. It would really add a value to the look of the flames if we add a little blur and glow to all the flames. Let's do that. Now we go into our main symbol by double clicking the flame over the candle in the middle.Then we select the animation on layer 2, go to the properties, frames, filters and click on the plus sign next to the filter and select Blur from the drop down menu. Choose High from the quality menu and the values of X&Y axis will be two for both.Now we select the animation on layer 1 and go to properties, Frames, filters and click on the plus sign next to the filters and select Glow from the drop down menu. 😘 We select orange from the colour as seen in the video. Again we choose high from the quality menu and values of X&Y axis will be 40 both and we input 150 in this strength box.Now we exit the symbol by clicking the Scene 1 tab as seen in the video.Here we can see both the blur and the glow effect. Next we are going to add the same effect to the other two candles. The process is the same as you can see in the video.Once.The blur and glow effect is added to all the three flames are animation is done. We can see how that looks when we hit the enter key, and then we can see it even better when we export an SWF by pressing Control plus enter.Hope you found this tutorial helpful. Thank you for watching. इस ट्यूटोरियल में हम candle की flame को animate करना सीखेंगे। जैसा कि आप देख सकते हैं, हमारे पास दो लेयर्स हैं — एक background layer, जिसमें एक केक है और उस पर तीन candles लगी हुई हैं, और दूसरी layer है animation layer, जिस पर हम flame को animate करेंगे। Timeline में हमने पहले से ही frame 40 तक frames जोड़ रखे हैं। अब flame को animate करने के लिए हम elliptical shape से शुरुआत करेंगे। इसके लिए हम Oval Tool का इस्तेमाल करेंगे, जिसका shortcut key “O” है। अब Shift key को दबाकर एक perfect circle ड्रॉ करें ताकि shape एकदम गोल बने। हम इस circle को yellow fill color देंगे क्योंकि हम flame को animate कर रहे हैं। आप देख सकते हैं कि हमने circle की outline को delete कर दिया है। अब background layer को hide करें ताकि हमारे पास काम करने के लिए पर्याप्त जगह हो। Circle को work area के center में लाएँ ताकि shape पर आराम से काम किया जा सके। अब हम Selection Tool (shortcut key “V”) का इस्तेमाल करके circle के shape को flame जैसा बनाएँगे। कुछ points को adjust करते हुए आप देखेंगे कि हमारा shape धीरे-धीरे flame जैसा बनने लगा है। अब इस shape को और smooth बनाने के लिए हम Subselection Tool का उपयोग करेंगे, जिसका shortcut “A” है। Edge पर क्लिक करने पर आपको कुछ nodes दिखाई देंगे — ये वो छोटे squares होते हैं जो green outline पर बैठे होते हैं। अब वीडियो में दिखाए गए तरीके से, extra nodes को select करके delete करें ताकि shape साफ और smooth हो जाए। वीडियो के अनुसार, अंत में हमारे पास चार nodes बचने चाहिए। इसके बाद हम node handles को adjust करेंगे ताकि flame की curves natural और सुंदर लगें — ठीक वैसे ही जैसे वीडियो में दिखाया गया है। जब हमारा shape तैयार हो जाए, तो पूरे shape को select करें और F8 दबाकर उसे symbol में convert करें। Symbol का नाम रखें “Flame_1”। अब shape पर double click करके symbol के अंदर enter करें, जहाँ हम flame animation पर आगे काम करेंगे। 😘 अब हम frame 40 पर जाते हैं और F5 दबाकर वहाँ तक frames जोड़ते हैं। अब समय है हमारी flame को animate करने का। इसके लिए हम keyframes और shape tween का इस्तेमाल करेंगे ताकि हमें एक smooth और natural animation मिल सके। सबसे पहले हम अपने keyframes सेट करेंगे — पहला keyframe frame 1 पर रहेगा। दूसरा keyframe हम frame 5 पर जोड़ेंगे। इसके लिए frame 5 select करें और F6 दबाएँ ताकि वहाँ नया keyframe बन जाए। अब keyframe 5 पर flame के shape में थोड़ा बदलाव करें। ध्यान रखें कि candle की flame बहुत subtle तरीके से हिलती है, campfire की तरह तेज़ नहीं। अगला keyframe frame 10 पर जोड़ें और वहाँ भी flame के shape में थोड़ा बदलाव करें, जैसा कि वीडियो में दिखाया गया है। इसी तरह, हर 5वें frame पर एक नया keyframe जोड़ते जाएँ। जब सभी keyframes बन जाएँ, तो keyframe 1 से लेकर keyframe 40 तक की पूरी flame animation तैयार होगी। अब हम keyframe 1 की flame को copy करके keyframe 40 पर paste करेंगे, ताकि हमारी animation एक smooth seamless loop में चल सके। अब सभी keyframes सेट हो चुके हैं, तो हम frame 1 और frame 40 के बीच के सारे frames को select करते हैं, फिर right-click करके Create Shape Tween option चुनते हैं। अब जब हम animation play करते हैं, तो हमें flame की movement दिखाई देती है। अगर कहीं कोई बदलाव चाहिए, तो हम वापस keyframe 1 पर जाकर flame के shape को सुधार सकते हैं। फिर हम Alt दबाकर keyframe 1 को drag करके keyframe 40 पर छोड़ते हैं, ताकि दोनों keyframes बिल्कुल एक जैसे हों और loop perfect बने। अब हम symbol से बाहर निकलने के लिए ऊपर बाएँ कोने में Scene 1 टैब पर क्लिक करते हैं। अब flame के symbol को select करें, और उसे एक नए symbol में convert करें (F8 दबाएँ) और उसका नाम रखें “Candle_Flame”। इसके बाद symbol को double click करके फिर से उसके अंदर जाएँ। अब frame 40 तक F5 दबाकर frames जोड़ें। इसके बाद एक नई layer बनाएँ, और flame symbol को Ctrl + C से copy करें और फिर Ctrl + Shift + V से उसी जगह paste करें ताकि वह perfectly aligned रहे। अब इस नए symbol को select करें और इसका color change करें ताकि flame में depth और glow का प्रभाव नज़र आए। 😘 अब हम Properties Panel में जाते हैं और वहाँ Object → Color Effect → Tint चुनते हैं। यहाँ हम tint का color पहले वाले yellow से थोड़ा हल्का shade रखते हैं ताकि flame में हल्की चमक का effect आए। इसके बाद हम symbol को scale down करेंगे। इसके लिए Scale and Rotate Tool (shortcut: Ctrl + Alt + S) का इस्तेमाल करते हैं और Scale value 70% डालते हैं, यानी हमने symbol को 30% छोटा कर दिया है। अब हम इसे नीचे की ओर थोड़ा move करते हैं, जैसा कि वीडियो में दिखाया गया है। अब हम layer 2 पर जो copied symbol है, उसकी timing change करने जा रहे हैं। इसके लिए Properties Panel → Object → Looping Options में जाते हैं और जहाँ 1st लिखा है, उस box में 8 टाइप करते हैं। इससे animation थोड़ा delay के साथ शुरू होगी और पहले वाले flame से अलग दिखेगी। अब हम symbol से बाहर निकलने के लिए ऊपर बाएँ कोने में Scene 1 पर क्लिक करते हैं। इसके बाद हम background layer को unhide करते हैं। अब हमारी candle flame animation को candle की wick के ठीक ऊपर position करते हैं, जैसा कि वीडियो में दिखाया गया है। अगर ज़रूरत लगे, तो flame को थोड़ा scale down करें ताकि वह candle के proportion में natural लगे। अब हम दूसरी candle की flame पर काम करने जा रहे हैं। यहाँ हम shape में कुछ बदलाव करेंगे ताकि सारी flames एक जैसी न लगें। जब दूसरी flame की shape तैयार हो जाए, तो उसे select करके symbol में convert करें (F8 दबाएँ) और उसका नाम रखें “Flame_2”। अब इस symbol को double click करके उसके अंदर जाएँ। फिर पहले की तरह ही हर 5वें frame पर keyframe जोड़ें और प्रत्येक keyframe पर flame की shape में subtle बदलाव करें। इसके बाद सभी keyframes के बीच shape tween apply करें ताकि smooth motion मिले। जब animation तैयार हो जाए, तो symbol से बाहर आकर इसे फिर से select करें और F8 दबाकर इसे एक नए symbol में convert करें। फिर double click करके इस symbol के अंदर जाएँ। अब पहले की तरह frame 40 तक F5 दबाकर frames जोड़ें। इसके बाद एक नई layer बनाकर, पुराने layer के पहले keyframe को copy करें और नई layer में paste करें ताकि पूरी animation नई layer में duplicate हो जाए। अब इस duplicate flame का color फिर से बदलें, ताकि यह बाकी flames से अलग और visually interesting दिखे। 😘 अब फिर से वही process दोहराते हैं — सबसे पहले हम Properties → Object → Color Effect → Tint में जाते हैं। यहाँ हम वही yellow shade इस्तेमाल कर रहे हैं जो हमने पहली flame में किया था। इसके बाद हम इस flame को भी पहली flame की तरह scale down करते हैं और फिर इसे थोड़ा नीचे move करते हैं, जैसा कि वीडियो में दिखाया गया है। अब हमें timing adjust करनी है, इसके लिए फिर से Properties → Object → Looping Options में जाकर सेटिंग करते हैं और बाकी स्टेप्स को वीडियो के अनुसार follow करते हैं। जब यह step पूरा हो जाता है, तो हम Scene 1 tab पर क्लिक करके symbol से बाहर निकलते हैं। अब हम इस पूरी animation को copy करते हैं और एक नई layer पर paste करते हैं, जैसा कि वीडियो में दिखाया गया है। इसके बाद हम background को temporarily hide करते हैं, और इस copied animation को ऊपर की ओर drag करते हैं। फिर background को unhide करके flame को ऐसे position करते हैं कि यह candle की right wick के साथ perfectly align हो जाए। अब आप देख सकते हैं कि तीनों flames अपनी जगह पर आ चुकी हैं। लेकिन left और right वाली flames थोड़ी बड़ी लग रही हैं, इसलिए हम उन्हें थोड़ा छोटा करेंगे। दोनों flames को select करें और Scale and Rotate Tool (Ctrl + Alt + S) का इस्तेमाल करके उन्हें 90% तक scale down करें। फिर उन्हें वापस उनकी सही positions पर adjust करें। अब हम right candle की flame animation की timing बदलेंगे। इसके लिए Properties → Object → Looping Options में जाएँ और 1st box में “20” input करें, जैसा कि वीडियो में दिखाया गया है। इससे right flame बाकी दोनों से थोड़ा अलग timing पर चलेगी, जिससे animation और natural लगेगी। अब flame को और realistic और attractive बनाने के लिए हम थोड़ा blur और glow effect जोड़ेंगे। इसके लिए हम main symbol के अंदर जाते हैं — यानी middle candle की flame पर double click करते हैं। अब layer 2 की animation select करें, फिर Properties → Frames → Filters में जाएँ। वहाँ plus (+) icon पर क्लिक करें और drop-down menu से Blur चुनें। Quality में High select करें और X और Y दोनों axis के values 2 रखें। इसके बाद layer 1 की animation select करें, फिर Properties → Frames → Filters में जाएँ, plus (+) पर क्लिक करें और इस बार Glow चुनें। इससे flame को हल्की glowing light effect मिलेगी, जो उसे और सुंदर बनाएगी। 😘 अब हम color options में जाकर orange color select करते हैं, जैसा कि वीडियो में दिखाया गया है। इसके बाद quality menu से फिर से High option चुनते हैं, और X और Y axis दोनों के values 40 रखते हैं। फिर strength box में 150 input करते हैं ताकि glow थोड़ा ज़्यादा prominent दिखे। इसके बाद हम Scene 1 tab पर क्लिक करके symbol से बाहर निकलते हैं, जैसा कि वीडियो में दिखाया गया है। अब आप देख सकते हैं कि flame पर blur और glow दोनों effects clearly दिख रहे हैं — जिससे animation बहुत smooth और realistic लगती है। अगला step है — बाकी दो candles पर भी वही effect लगाना। इसका process बिल्कुल वही है जो हमने पहले किया था। बस हर flame के अंदर जाकर वही blur और glow filters apply करें। जैसे ही ये effects तीनों flames पर लगा दिए जाते हैं, हमारी animation पूरी तरह से तैयार हो जाती है। अब जब हम Enter key दबाते हैं, तो आप देख सकते हैं कि flames बड़ी smooth और natural तरीके से जल रही हैं। और अगर आप इसे और अच्छे से देखना चाहते हैं, तो SWF format में export करें — इसके लिए बस Ctrl + Enter दबाएँ। अब आपकी पूरी candle flame animation चलने लगेगी। आशा है कि आपको ये tutorial मददगार लगा होगा। धन्यवाद देखने के लिए — और practice करते रहें, keep animating!