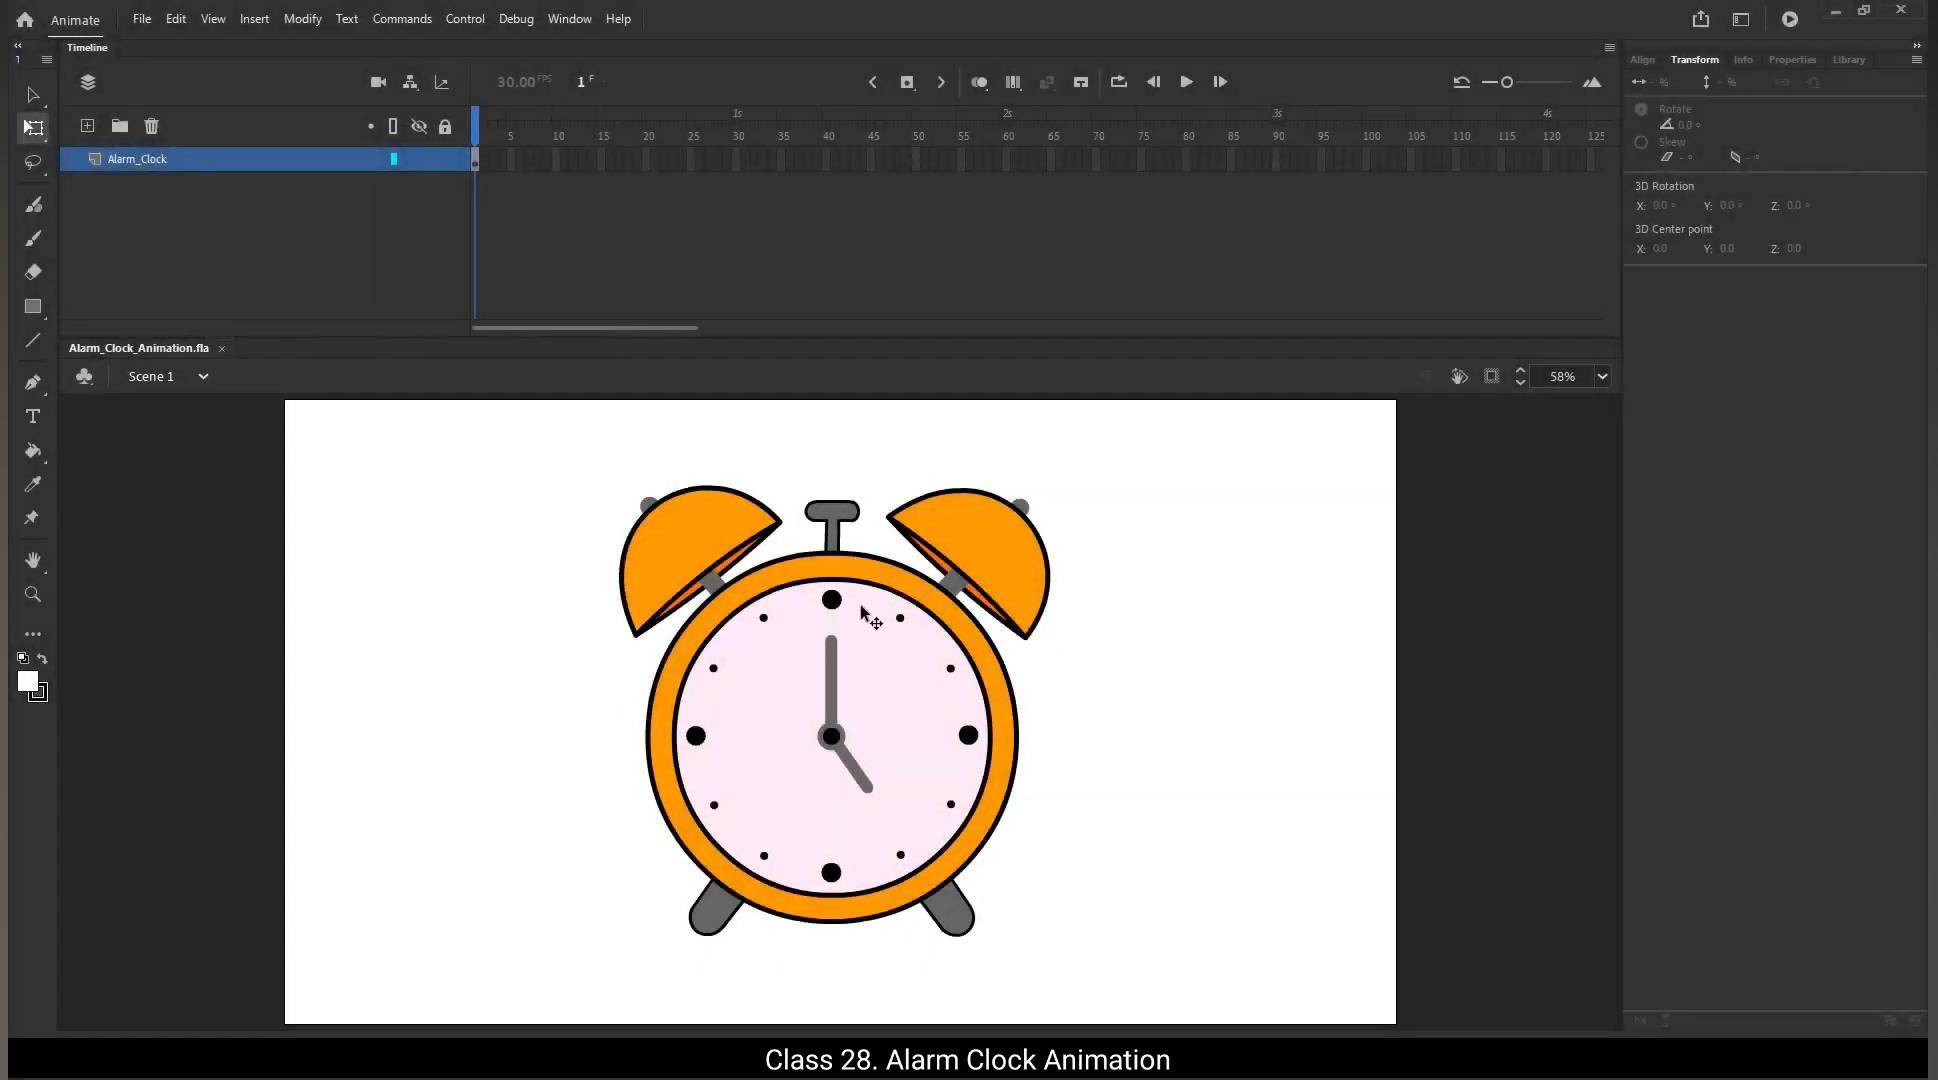
Hello students, welcome to the digital tutors. In this video, we'll dive into creating an alarm clock animation in Adobe Animate. Let's get started.To make things easy, I've already prepared a vector file of an alarm clock. You can see it here on the stage. All the elements of the alarm clock are rigged and distributed on separate layers. To verify this, you can check by toggling the visibility options in the Layers panel. You'll find this vector file included in the downloadable materials provided with this tutorial. Make sure to download it so you can follow along and create this animation yourself.We will start with extending timeline. We will make this animation 6 seconds long.For this, let's increase the frames to frame 180.Go to Insert Timeline and choose Frame. The shortcut to add frames is F5.Now we'll double Click to enter the clock symbol. Increase the frames to 180 for all layers, just like we did on the main timeline. Shortcut key is F5.Next, double Click to enter clock hand symbol and increase the frames to 180 for both layers. This ensures that the animation timeline is consistent across all elements.Time to animate the minute and hour hands. At frame 60 we'll insert a keyframe for both hands. Shortcut key is F6.Now let's rotate the hour hand to point towards 6:00 PM, which will represent our alarm time.To ensure precision, set the rotation to exactly 90°.Add a classic tween between the keyframes on both layer.Now let's animate the minute hand. Before we start, drag the minute hand layer above the hour hand layer to keep the stacking order correct. Next, go to the 1st frame of the minute hand layer.In the Properties panel, find the Rotate option and select Clockwise. Set the rotation count to 1.This will make the minute hand rotate a full 360°, perfectly simulating the smooth movement of a real clock.Once we're done with the minute hand, click outside the symbol to exit.Now let's prepare for the next animation. Lock the Hands, Clock Hands, and Clock Base layers in the Layers panel.It's time to animate the bells to make them ring at frame 60 and frame 62. Insert a keyframe for both the Bell one and Bell 2 layers.Then at frame 62, move the bell slightly upwards and outwards using the arrow keys. This will simulate the ringing motion.To ensure smooth animation, enable the Onion Skin tool by pressing Alt Shift O. The Onion Skin feature allows you to visualize the motion between keyframes by showing a faint overlay of the previous and next frames. This helps you adjust the position and motion more accurately, ensuring a natural looking animation. Now it's time to copy paste the keyframes. First, select both keyframes on frame 60, hold down the Alt key and drag them to frame 64.Next, select the keyframes on frame 62, hold the Alt key and drag them to frame 66. Repeat this process to create a continuous ringing motion for the bells.Continue duplicating the keyframes in this way until you reach frame 180.This will ensure a smooth and repetitive ringing animation for the bells throughout the timeline.Exit the clock symbol by clicking outside of it. This will take you back to the main timeline.Now let's make the entire clock bounce slightly for a fun effect.At frame 60, insert a keyframe.Next go to View Guides and make sure Show Guides option is checked.Then click on Rulers option.Now, for better reference, let's drag a guideline from the ruler to the base of the clock.You can change the color of this guideline for better visibility. Simply right click on the ruler, go to Guides and select Edit Guides.A window will pop up where you can set any color you prefer for the guideline.Additionally, you can lock the guide by checking the Lock Guides option. Once locked, the guide won't move, ensuring it stays in place as you work. If you ever need to unlock it, just right click on the guide and select Unlock.For now, I'll keep the guide locked.Next, let's add another guideline to mark the center of the clock.Select Frame 60, then in the Properties panel under the Object section, find the looping options. Select the Play Graphic once option. This ensures that our animation will play once from the start based on the keyframes we've set and will not loop.Add a keyframe on frame 62.And move the clock slightly to the right of the guideline.Next, add a keyframe on frame 64.And move the clock slightly to the left of the guideline and also slightly upwards.Then add another keyframe on frame 66 and move the clock upwards.Now add a keyframe on frame 68 and bring the clock down near the guideline.Afterward, select frame 60, hold the Alt key on your keyboard and drag it to frame 70.This will create a 10 frame animation and will repeat this animation to create a looping effect for the clock movement.Now select all the key frames we've created, hold the Alt key on your keyboard and drag them to frame 70. Since our first and last keyframes are the same, we need to paste the keyframes at the last keyframe to avoid repeating the 1st frame.Repeat this process for the entire sequence by dragging the keyframes until you reach frame 180. To ensure smooth playback, select all the keyframes from frame 60 to frame 180 and insert a classic tween.Then right click on the timeline and select Synchronize symbol to align the movements perfectly.Now remove the classic tween.Finally, ensure that the first and last frames match with the looping 1st frame. For example, on the timeline we are on frame 60 and the looping section should also start from frame 60. This ensures a smooth transition and continuous animation without any jumps or inconsistencies at the start and end of the loop.Now let's preview the animation by pressing control Enter.And there it is, our alarm clock animation is ready.Now let's bring our alarm clock animation to life with sound. I'll start by creating a new layer and renaming it to Alarm clock Sound.Next, on frame 1 of this layer, I'll import the audio file. To do this, I'll go to the File menu, choose Import, and then select Import to Library. From here I'll locate and select the audio file I want to use.Once imported, you'll notice the audio isn't visible on the timeline yet. To make it appear, I'll go to the Properties panel under the Frame section and in the sound panel I'll select the Alarm Clock Sound MP3 file from the drop down.Now let's check if the sound syncs with our animation.Play the animation to ensure everything is perfectly aligned.With that done, it's time to save the file. I'll press Control plus Enter to preview the final animation.And there it is, Our alarm clock animation is complete with sound effects. It's that simple. You've successfully created a smooth bouncing alarm clock with rotating hands. I hope you enjoyed the process and I'll see you in the next tutorial. हेलो स्टूडेंट्स, इस वीडियो में हम एडोबी एनीमेट में एक अलार्म क्लॉक एनीमेशन क्रिएट करना सीखेंगे। चलो शुरू करते हैं। काम आसान बनाने के लिए, मैंने पहले से ही एक अलार्म क्लॉक की वेक्टर फाइल तैयार कर रखी है। आप इसे यहाँ स्टेज पर देख सकते हैं। अलार्म क्लॉक के सारे एलिमेंट्स को रिग किया गया है और अलग-अलग लेयर्स में डिस्ट्रीब्यूट किया गया है। इसे चेक करने के लिए, आप लेयर्स पैनल में विज़िबिलिटी ऑप्शंस को टॉगल करके देख सकते हैं। ये वेक्टर फाइल इस ट्यूटोरियल के साथ दिए गए डाउनलोडेबल मटेरियल्स में इनक्लूड की गई है। इसे डाउनलोड ज़रूर करें ताकि आप साथ में फॉलो करके ये एनीमेशन खुद बना सकें। हम टाइमलाइन को एक्सटेंड करने से शुरुआत करेंगे। हम इस एनीमेशन को 6 सेकंड लंबा बनाएंगे। इसके लिए, फ्रेम्स को बढ़ाकर 180 तक कर देंगे। इंसर्ट टाइमलाइन में जाएं और फ्रेम ऑप्शन चुनें। फ्रेम्स ऐड करने का शॉर्टकट F5 है। अब हम क्लॉक सिंबल में एंटर करने के लिए डबल क्लिक करेंगे। सभी लेयर्स के फ्रेम्स को 180 तक बढ़ाएं, जैसे हमने मेन टाइमलाइन पर किया था। शॉर्टकट की है F5। इसके बाद, क्लॉक हैंड सिंबल पर डबल क्लिक करें और दोनों लेयर्स के फ्रेम्स को 180 तक बढ़ाएं। इससे यह सुनिश्चित होगा कि एनीमेशन टाइमलाइन सभी एलिमेंट्स पर समान रहे। अब मिनट और ऑवर हैंड को एनीमेट करने का टाइम है। फ्रेम 60 पर हम दोनों हैंड्स के लिए एक कीफ्रेम इंसर्ट करेंगे। शॉर्टकट की है F6। अब ऑवर हैंड को 6:00 PM की तरफ घुमाएं, जो हमारा अलार्म टाइम रिप्रेज़ेंट करेगा। एक्ज़ैक्टनेस के लिए रोटेशन को 90° पर सेट करें। दोनों लेयर्स के कीफ्रेम्स के बीच एक क्लासिक ट्वीन ऐड करें। अब मिनट हैंड को एनीमेट करते हैं। शुरू करने से पहले, मिनट हैंड लेयर को ऑवर हैंड लेयर के ऊपर ड्रैग करें ताकि स्टैकिंग ऑर्डर सही रहे। अब मिनट हैंड लेयर के पहले फ्रेम पर जाएं। प्रॉपर्टीज पैनल में रोटेट ऑप्शन ढूंढें और क्लॉकवाइज़ सिलेक्ट करें। रोटेशन काउंट को 1 पर सेट करें। इससे मिनट हैंड पूरा 360° घूमेगा, जिससे एक रियल क्लॉक की स्मूथ मूवमेंट जैसा इफेक्ट मिलेगा। मिनट हैंड पूरा करने के बाद, सिंबल से बाहर निकलने के लिए बाहर क्लिक करें। अब अगली एनीमेशन की तैयारी करते हैं। लेयर्स पैनल में हैंड्स, क्लॉक हैंड्स और क्लॉक बेस लेयर्स को लॉक करें। अब बेल्स को रिंग करवाने का टाइम है, फ्रेम 60 और फ्रेम 62 पर। बेल 1 और बेल 2 दोनों लेयर्स पर एक कीफ्रेम इंसर्ट करें। फ्रेम 62 पर, बेल को थोड़ा ऊपर और बाहर की तरफ मूव करें एरो कीज़ का इस्तेमाल करके। इससे रिंगिंग मोशन का इफेक्ट बनेगा। स्मूथ एनीमेशन के लिए, Alt + Shift + O दबाकर ओनियन स्किन टूल को ऑन करें। ओनियन स्किन फीचर आपको पिछले और अगले फ्रेम्स का हल्का ओवरले दिखाकर मोशन को विजुअलाइज़ करने में मदद करता है। इससे आप पोज़िशन और मोशन को और एक्यूरेटली एडजस्ट कर सकते हैं, जिससे एनीमेशन नैचुरल दिखे। अब कीफ्रेम्स को कॉपी-पेस्ट करने का टाइम है। पहले, फ्रेम 60 के दोनों कीफ्रेम्स को सिलेक्ट करें, Alt की दबाए रखें और उन्हें फ्रेम 64 तक ड्रैग करें। फिर फ्रेम 62 के कीफ्रेम्स को सिलेक्ट करें, Alt की दबाकर उन्हें फ्रेम 66 तक ड्रैग करें। इस प्रोसेस को रिपीट करें ताकि बेल्स के लिए कंटीन्यस रिंगिंग मोशन बने। इसी तरह कीफ्रेम्स को डुप्लिकेट करते रहें जब तक आप फ्रेम 180 तक न पहुंच जाएं। इससे पूरी टाइमलाइन में बेल्स के लिए स्मूथ और रिपीटिव रिंगिंग एनीमेशन बनेगी। क्लॉक सिंबल से बाहर निकलने के लिए उसके बाहर क्लिक करें। इससे आप मेन टाइमलाइन पर वापस आ जाएंगे। अब पूरे क्लॉक को हल्का बाउंस करवाते हैं ताकि एक फन इफेक्ट मिले। फ्रेम 60 पर एक कीफ्रेम इंसर्ट करें। अब View Guides में जाएं और सुनिश्चित करें कि Show Guides ऑप्शन चेक्ड है। फिर Rulers ऑप्शन पर क्लिक करें। अब बेहतर रेफरेंस के लिए, रूलर से एक गाइडलाइन को क्लॉक के बेस तक ड्रैग करें। बेहतर विज़िबिलिटी के लिए आप इस गाइडलाइन का रंग बदल सकते हैं। सिर्फ रूलर पर राइट क्लिक करें, Guides में जाएं और Edit Guides सिलेक्ट करें। एक विंडो खुलेगी जहाँ आप अपनी पसंद का कोई भी रंग सेट कर सकते हैं गाइडलाइन के लिए। इसके अलावा, Lock Guides ऑप्शन चेक करके आप गाइड को लॉक भी कर सकते हैं। लॉक करने के बाद, गाइड मूव नहीं होगी और आपकी वर्किंग के दौरान अपनी जगह पर रहेगी। अगर आपको कभी इसे अनलॉक करने की ज़रूरत पड़े, तो बस गाइड पर राइट क्लिक करें और अनलॉक सिलेक्ट करें। फिलहाल, मैं गाइड को लॉक ही रखूंगा। अब क्लॉक के सेंटर को मार्क करने के लिए एक और गाइडलाइन ऐड करते हैं। फ्रेम 60 सिलेक्ट करें, फिर प्रॉपर्टीज पैनल में ऑब्जेक्ट सेक्शन के अंदर लूपिंग ऑप्शंस ढूंढें। Play Graphic once ऑप्शन सिलेक्ट करें। इससे हमारी एनीमेशन स्टार्ट से एक बार चलेगी और लूप नहीं होगी। फ्रेम 62 पर एक कीफ्रेम ऐड करें। और क्लॉक को गाइडलाइन के थोड़ा दाईं ओर मूव करें। फिर फ्रेम 64 पर एक कीफ्रेम ऐड करें। और क्लॉक को गाइडलाइन के थोड़ा बाईं ओर और थोड़ा ऊपर मूव करें। फिर फ्रेम 66 पर एक और कीफ्रेम ऐड करें और क्लॉक को ऊपर की तरफ मूव करें। अब फ्रेम 68 पर एक कीफ्रेम ऐड करें और क्लॉक को गाइडलाइन के पास नीचे ले आएं। इसके बाद, फ्रेम 60 सिलेक्ट करें, कीबोर्ड पर Alt की दबाकर उसे फ्रेम 70 तक ड्रैग करें। इससे 10 फ्रेम की एक एनीमेशन बनेगी और इसे रिपीट करके क्लॉक मूवमेंट के लिए लूपिंग इफेक्ट तैयार होगा। अब हमने जो सारे कीफ्रेम बनाए हैं उन्हें सिलेक्ट करें, कीबोर्ड पर Alt की दबाकर उन्हें फ्रेम 70 तक ड्रैग करें। क्योंकि हमारा पहला और आखिरी कीफ्रेम एक जैसा है, इसलिए हमें लास्ट कीफ्रेम पर कीफ्रेम्स पेस्ट करने होंगे ताकि पहला फ्रेम रिपीट न हो। इसी प्रोसेस को पूरी सीक्वेंस के लिए रिपीट करें और कीफ्रेम्स को ड्रैग करते हुए फ्रेम 180 तक ले जाएं। स्मूथ प्लेबैक के लिए, फ्रेम 60 से फ्रेम 180 तक सभी कीफ्रेम्स को सिलेक्ट करें और एक क्लासिक ट्वीन इंसर्ट करें। फिर टाइमलाइन पर राइट क्लिक करें और Synchronize Symbol सिलेक्ट करें ताकि मूवमेंट्स परफेक्टली अलाइन हों। अब क्लासिक ट्वीन को हटा दें। आखिर में सुनिश्चित करें कि पहला और आखिरी फ्रेम लूपिंग के पहले फ्रेम से मैच करें। जैसे, अगर टाइमलाइन पर हम फ्रेम 60 पर हैं तो लूपिंग सेक्शन भी फ्रेम 60 से ही शुरू होना चाहिए। इससे ट्रांज़िशन स्मूथ रहेगा और स्टार्ट व एंड पर कोई जंप या मिसमैच नहीं होगा। अब कंट्रोल + एंटर दबाकर एनीमेशन को प्रीव्यू करें। और ये रहा — हमारा अलार्म क्लॉक एनीमेशन तैयार है। अब अपने अलार्म क्लॉक एनीमेशन में साउंड डालकर उसे और रियल बनाएंगे। मैं एक नई लेयर बनाऊंगा और उसका नाम रखूंगा “Alarm Clock Sound”। अब इस लेयर के फ्रेम 1 पर मैं ऑडियो फाइल इम्पोर्ट करूंगा। इसके लिए, मैं फाइल मेन्यू में जाकर Import ऑप्शन चुनूंगा और फिर Import to Library सिलेक्ट करूंगा। यहाँ से मैं अपनी मनचाही ऑडियो फाइल को ढूंढकर सिलेक्ट करूंगा। इम्पोर्ट करने के बाद आप देखेंगे कि ऑडियो अभी टाइमलाइन पर दिखाई नहीं दे रहा है। इसे दिखाने के लिए, मैं प्रॉपर्टीज पैनल में फ्रेम सेक्शन के अंदर साउंड पैनल में जाकर ड्रॉपडाउन से Alarm Clock Sound MP3 फाइल सिलेक्ट करूंगा। अब चेक करते हैं कि साउंड हमारी एनीमेशन के साथ सिंक हो रहा है या नहीं। एनीमेशन प्ले करें और देखें कि सबकुछ परफेक्टली अलाइन है या नहीं। जब ये सब सेट हो जाए, तब फाइल को सेव करने का टाइम है। मैं Control + Enter दबाऊंगा ताकि फाइनल एनीमेशन को प्रीव्यू कर सकूं। और ये रहा — हमारा अलार्म क्लॉक एनीमेशन साउंड इफेक्ट्स के साथ पूरी तरह तैयार है। बस इतना ही आसान था। आपने सफलतापूर्वक एक स्मूथ बाउंसिंग अलार्म क्लॉक एनीमेशन बनाया जिसमें घूमती हुई सुइयाँ हैं। उम्मीद है आपको ये प्रोसेस पसंद आया होगा, और मैं आपको अगले ट्यूटोरियल में मिलूंगा।