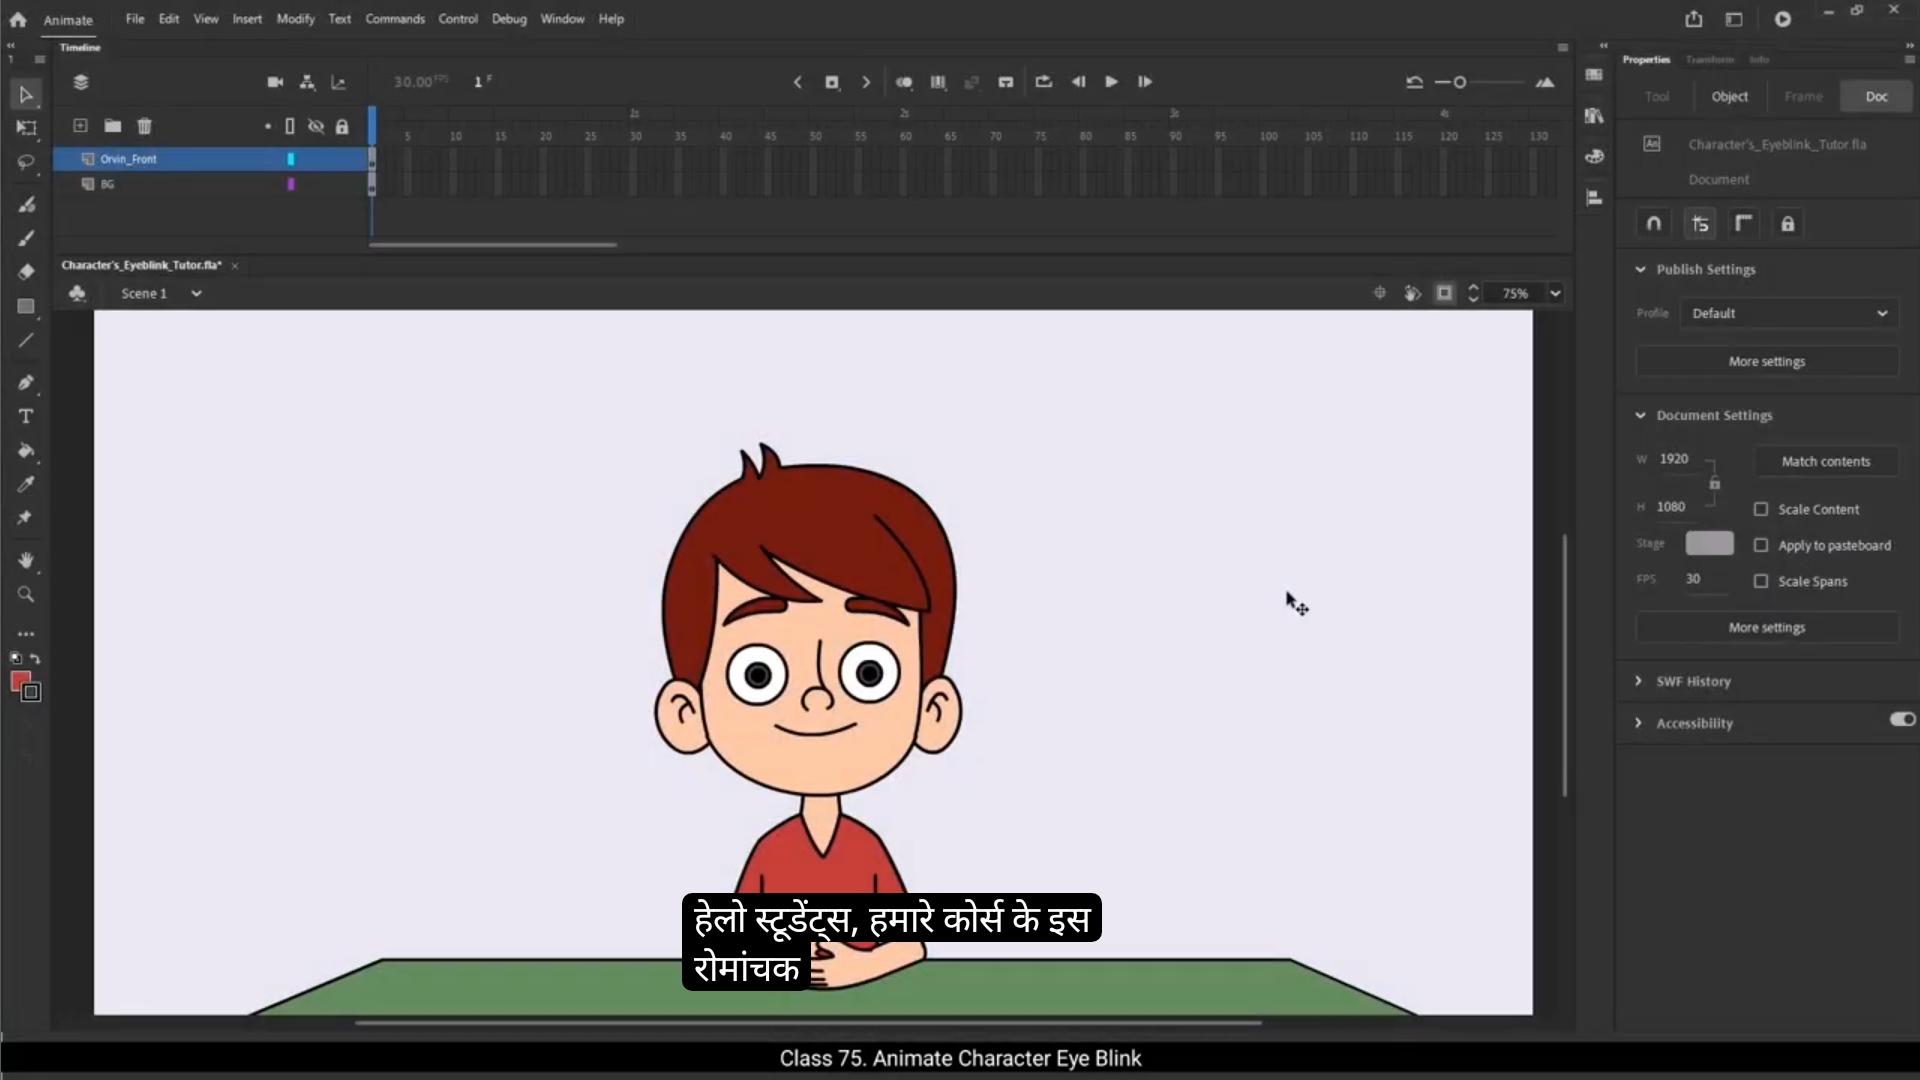
Hello students, welcome to this exciting section of our course where we will bring our character Orvin to life.Animating a character isn't just about making it move, it's about adding those small details that make it feel truly alive. That's why in the upcoming tutorials, we'll go step by step, focusing on different aspects of character animation. But first, let's begin with adding an eye blink to Orvin.Before we move ahead, let's make a small but very useful adjustment to our character's structure that will actually save us a lot of time during animation.I'll start by going inside the oven front symbol and then further inside the head symbol. Now if you remember, when we first dissected the character, we had created 2 separate symbols for the eyes inside the head symbol, one for the left eye and one for the right eye. And within each of these eye symbols we had placed their respective eyeball drawings. But here's the thing. While animating, especially for something like a blink. Both eyeballs usually move together. They shift positions slightly, follow the characters head turns, or adjust during expressions. Now, if we keep the eyeballs inside their respective eye symbols, every time we need to animate or adjust them, we'll have to open each eye symbol individually, move the eyeball, and keep going back and forth. And honestly, that's not efficient.It's time consuming and increases the chance Of mismatching the positions which could make the character look a little off.So to make our life easier and keep the animation workflow smoother, we'll bring both eyeballs out of the individual eye symbols and place them directly into the head symbol on separate layers.
😘
This way we can adjust both eyeballs together from the head level, keeping everything aligned, consistent and much quicker to manage.To do that, I'll first select the eyeball inside the right eye symbol. I'll cut it using Control X, then exit the eye symbol, go back into the head symbol and paste it onto the right eye layer.Now let's take this a step further and add a nice little highlight on the eyeball to create a light reflection effect. This simple detail can make your character look a lot more lively and polished, so I'll first go inside the eyeball group. Here I'll select a pure white color for the fill and set the stroke color to transparent since we don't need any outlines for this small highlight.Then I'll grab the Oval tool and make sure that object drawing mode Is turned on. This ensures the circle stays as a separate editable object. Now I'll draw a small circle, placing it on the eyeball in a spot where it looks natural and enhances the look, usually towards the upper left side of the pupil, mimicking how light typically reflects in an eye. If it feels a bit too big, I'll scale it down slightly to match the proportion.Next I'll copy this white highlight object and paste it on the other eyeball at the same position so both eyes have a consistent light reflection.Now, with the highlights added, I'll select this eyeball group, cut it, exit the current symbol and paste it into the left eye layer at the correct position.With both eyeballs in place, it's time to convert each eyeball group into a symbol. I'll select the left eyeball, press F8 to convert it to a symbol, rename it properly, and make sure to keep the registration point at the center.I'll do the same for the right eyeball. Convert it into a symbol, give it a clear name, and keep the registration point centered.
😘
Now notice we currently have two symbols on the same layer. One is the I base and the other is the eyeball symbol.To keep things clean and well organized, I'll select both symbols, right click on them and choose Distribute to Layers.I'll repeat this same process for the left eye layer too. This automatically creates separate layers for each symbol, making it much easier to animate and manage them individually without confusion. Now, why is this whole process so important? Well, here's the thing. It gives us the flexibility to select both eyeballs at the same time and move them simultaneously. This saves a ton of time because earlier, if the eyeballs were buried inside each individual eye symbol, we'd have to dive inside each one separately, adjust the position of the pupil, come back out, and repeat.That's not only time consuming, but also risky. Small position mismatches can easily happen and the eyes may end up looking off balance.Now that our layering part is all set, let's finally dive into animating the right eye blink for Orvin. We'll be using a mask effect here to give it a smooth, natural looking blink.So first thing I'll add a new layer right above the right eyeball layer and rename this new layer as right eye mask. Now to set up the mask, I'll copy the eye base layer. This is basically the white part of the eye and paste it onto the mask layer. This way we get an exact duplicate of the eye base shape on our mask layer. At this point, remember this pasted object is still a symbol, but for the mask to work properly, We need it as a drawing object, so I'll break it apart by pressing Control B. Now it's editable drawing object. Next I'll right click on the mask layer and select Mask. This turns the layer into a mask that controls the visibility of the layers beneath it.
😘
To make things clearer, while working, I'll also keep the mask layer in outline mode. This way it's easier for me to see and select the eyeball below it while adjusting positions and animating.Now there's one more important thing we need to fix here. See, when I move the eyeball towards the corners of the eye, the outline of the eye base shows up behind the eyeball, and it looks a little odd and messy.To avoid this, I'll add a new layer and name it right eye outer outline.Then I'll select the Ibase drawing from the mask layer, copy it and paste it onto the outer outline layer.Now we only need the outline here, so I'll go inside the drawing and remove the fill color, leaving just the clean outline around the eyeball.This way, even if the eyeball moves towards the edges, the outline stays perfectly on top, creating a clean, natural look where the pupil always appears inside the eye base.Once that's done, I'll repeat the exact same steps for the left eye. I'll add a new layer and rename it Left Eye Mask, copy the eye base symbol, paste it on this mask layer, and then break it apart since we need just a drawing object.Next I'll add another new layer for the left eye outer outline. Paste the eye base symbol here.Break it.Go inside and remove the fill color just like we did for the right eye.Finally, I'll select the left eye mask layer, right click on it and choose Mask.I'll also set the left eye mask layer to outline mode, so now it's easy to select and animate the eyeball below it without any confusion.Now it's time to bring our blink animation to life by adding blink patches on both eyeballs. These patches will act as eyelids while blinking.1st I'll add a new layer right above the right eye mask layer and give it a proper clear name, something like right eye blink patches so it stays organized.
😘
Then on frame 15 of this blink patch layer, I'll add a blank keyframe. Next, I'll select the 1st frame of the right eye mask layer, copy that drawing, and paste it onto frame 15 of the blink patch layer.Now I'll turn off the outline mode for the Blink patch layer so we can clearly see the patch. I'll then change its color from white to a skin tone, a slightly darker shade than the face color so it feels natural when the eyelid covers the eye.Next, on frame 12 I'll add another blank keyframe. Then I'll copy the drawing from frame 15 and paste it on frame 12.I'll go inside this drawing object, pick up the eraser tool, and erase the lower part of the drawing because we need just the top part, like an eyelid coming down. To finish this frame, I'll add a stroke line using the ink bottle tool. Shortcut key is S I'll first straighten the stroke line and then give it a slight curve to mimic the natural shape of a blinking eyelid.And that's our first frame of the eye. Blink done.Now on frame #13, we'll add another blank keyframe. Then I'll select the drawing from frame 15, copy it, and paste it onto frame 13 of the Blink patch layer. Next, I'll go inside this drawing object and erase the unwanted lower part of the shape, keeping only the upper lid portion. After that, I'll add a stroke line using the ink bottle tool and then carefully adjust the curve and shape so it looks natural and smooth.Now on to frame 14. Same thing here. Add a blank keyframe, copy the drawing from frame 15 and paste it onto frame 14. Jump inside the drawing object.Erase the unwanted parts.And add a nice curved stroke line to shape it like a nearly closed eyelid.At this point, we'll quickly play through these frames.On frame 13, I'll make slight adjustments by tweaking the curve to keep the motion smooth and natural.
😘
Once that's sorted, we're almost there.I'll now hold the fully closed eye for one more frame. That's frame 16 and we will reverse the frames from the frame #17.We'll start by copying frame 14. Just press and hold Alt on the keyboard and drag it onto frame 17.Then do the same by dragging frame 13 onto frame 18 and frame 12 onto frame 19.Finally, on frame 20 I'll add a blank keyframe to reset the patch. And there it is, our right eye blink animation is ready.Now let's animate the left eye blink using the same patches we made for the right eye, so we don't have to create everything from scratch.1st I'll select all the key frames on the right eye blink patches layer.And then press Control Alt C to copy them.Next I'll add a new layer above the left eye mask layer and give it a proper name.Then I'll press CTRL Alt V to paste those copied drawings onto this new layer.Now, even though the drawings are copied, their position is still over the right eye, so we need to move them over to the left eye. To do that easily, I'll first lock all the other layers, leaving only the left eye blink patches layer unlocked.Then I'll turn on edit multiple frames from the timeline.I'll set the frame range from 12 to 20 by adjusting those brackets. Once the frame range is set, I'll press Control A to select all the blink patch objects on left eye blink patches layer.Now, using the shift key along with the right arrow key, I'll carefully move these patches towards the left side and align them perfectly over the left eye.Once everything is nicely in place, I'll deselect the Edit multiple frames option to go back to normal.To make our animation feel even more alive and expressive, let's add some subtle movement to the eyeballs.For this, I'll first add a keyframe on frame 12 on both eyeball layers.Then I'll add another keyframe on frame 20.And one more on frame 15 for both layers.
😘
Now on frame 15, I'll move both eyeballs slightly downwards to simulate the natural eye movement during a blink. I'll keep them there for 2 frames, so I'll add a keyframe on frame 17 to hold that position.Next I'll apply classic tween from frame 12 to 15 and from frame 17 to 20 on both eyeball layers.Now let's animate the eyebrows too, just to add more life to the characters expression.I'll move both eyebrows layers to the top above the eyes layers in the timeline for better control.Then I'll add keyframes on frames 11, 20 and 15 on both eyebrow layers.On frame 15, I'll rotate the eyebrows slightly and move them a bit downwards.I'll also add a keyframe on frame 16 for both layers to hold the position for a frame and then apply a classic tween between the keyframes.
Once done, I'll exit the symbols and come back to the main timeline.Here I'll extend the frames till frame 60, which is 2 seconds at 30 frames per second, enough to let our entire blink animation play out nicely.And that's it, our Eyeblink animation is ready.So this is how you can add an expressive and natural looking Eyeblink animation to your character in Adobe Animate. I hope you found this tutorial helpful. In the next tutorial, we'll level up your character animation skills by learning lip syncing, a super important technique for animating dialogues and bringing characters to life. Thank you for watching and I'll see you in the next video.
हेलो स्टूडेंट्स, हमारे कोर्स के इस रोमांचक सेक्शन में आपका स्वागत है जहाँ हम अपने कैरेक्टर Orvin को सच में ज़िंदा करने वाले हैं। एक कैरेक्टर को एनिमेट करना सिर्फ़ उसे मूव कराना नहीं होता, बल्कि उन छोटे-छोटे डिटेल्स को जोड़ना होता है जो उसे असली ज़िंदगी जैसा महसूस कराते हैं। यही वजह है कि आने वाले ट्यूटोरियल्स में हम स्टेप-बाय-स्टेप, कैरेक्टर एनीमेशन के अलग-अलग पहलुओं पर फ़ोकस करेंगे।
लेकिन उससे पहले, चलिए Orvin को एक आई ब्लिंक देने से शुरुआत करते हैं।
आगे बढ़ने से पहले, हम अपने कैरेक्टर की स्ट्रक्चर में एक छोटा लेकिन बेहद काम का एडजस्टमेंट करेंगे, जो एनिमेशन के दौरान हमें बहुत सारा समय बचाएगा।
मैं सबसे पहले Orvin Front Symbol के अंदर जाऊँगा, और फिर उसके अंदर Head Symbol में। अब अगर आपको याद हो, जब हमने पहली बार कैरेक्टर को dissect किया था, तो हमने हेड सिंबल के अंदर आँखों के लिए दो अलग-अलग symbols बनाए थे — एक लेफ़्ट आई के लिए और एक राइट आई के लिए। और इन दोनों eye symbols के अंदर हमने उनके-अपने eyeball drawings रखे थे।
लेकिन बात ये है — एनिमेशन करते समय, खासकर जब बात blink की हो, तो दोनों eyeballs एकसाथ ही मूव करते हैं। वे हल्के से पोज़िशन बदलते हैं, हेड टर्न्स के साथ फ़ॉलो करते हैं, या expressions के दौरान adjust होते हैं।
अब अगर eyeballs अपने-अपने eye symbols के अंदर ही रहेंगे, तो हर बार एनिमेशन के दौरान हमें each eye symbol को खोलकर eyeball को मूव करना पड़ेगा — बार-बार अंदर-बाहर जाना पड़ेगा। और सच कहूँ तो ये बिल्कुल भी efficient नहीं है। इससे टाइम ज़्यादा लगता है और पोज़िशन mismatch होने का चांस भी बढ़ जाता है, जिससे कैरेक्टर थोड़ा अजीब भी लग सकता है।
तो अपने workflow को आसान और smooth बनाने के लिए, हम दोनों eyeballs को उनके individual eye symbols से बाहर निकालकर सीधे head symbol में अलग-अलग लेयर्स पर रखेंगे।
😘
इस तरह हम दोनों eyeballs को head लेवल से ही एक साथ adjust कर पाएँगे, जिससे सबकुछ aligned, consistent और बहुत जल्दी मैनेज किया जा सकेगा।
इसके लिए, मैं सबसे पहले right eye symbol के अंदर मौजूद eyeball को सेलेक्ट करूँगा। उसे Control + X से कट करूँगा, फिर eye symbol से बाहर आकर दोबारा head symbol में जाऊँगा और उसे right eye layer पर paste कर दूँगा।
अब चलिए इस step को थोड़ा आगे बढ़ाते हैं और eyeball पर एक छोटा सा highlight जोड़ते हैं ताकि light reflection effect बने। ये छोटा सा detail आपके character को और ज़्यादा lively और polished दिखाता है।
इसके लिए मैं eyeball group के अंदर जाऊँगा। यहाँ मैं fill के लिए pure white color चुनूँगा और stroke color को transparent कर दूँगा क्योंकि इस छोटे highlight के लिए outline की ज़रूरत नहीं होती।
फिर मैं Oval Tool लूँगा और ये सुनिश्चित करूँगा कि Object Drawing Mode ऑन हो। इससे बनाया गया circle एक अलग editable object बना रहेगा।
अब मैं एक छोटा सा circle ड्रॉ करूँगा और उसे eyeball पर ऐसे place करूँगा जहाँ वो natural लगे — आम तौर पर pupil के upper left side में, जैसे light आँख पर पड़ती है। अगर ये थोड़ा बड़ा लगे, तो मैं इसे थोड़ा सा scale down कर दूँगा ताकि proportion बिल्कुल सही लगे।
इसके बाद, मैं इस white highlight object को कॉपी करूँगा और दूसरी eyeball पर भी उसी position पर paste कर दूँगा ताकि दोनों आँखों में समान light reflection बने।
अब, highlights जोड़ने के बाद, मैं इस eyeball group को सेलेक्ट करूँगा, cut करूँगा, symbol से बाहर आऊँगा और इसे left eye layer में सही position पर paste कर दूँगा।
दोनों eyeballs ठीक जगह पर आ जाने के बाद, अब समय है इन्हें symbols में convert करने का।
मैं left eyeball को सेलेक्ट करूँगा, F8 दबाकर इसे symbol में convert कर दूँगा, एक सही नाम दूँगा और registration point को center पर ही रहने दूँगा।
ठीक इसी तरह मैं right eyeball को भी symbol में convert करूँगा — उसे नाम दूँगा और registration point center में ही रखूँगा।
😘
अब notice कीजिए कि हमारी एक ही layer पर दो symbols मौजूद हैं — एक है eye base और दूसरा है eyeball symbol। सबकुछ clean और well-organized रखने के लिए, मैं दोनों symbols को select करूँगा, उन पर right-click करूँगा और Distribute to Layers चुनूँगा।
इसी process को मैं left eye वाली layer पर भी repeat करूँगा। इससे हर symbol अपनी अलग layer पर चला जाता है, जिससे उनको individually animate और manage करना बहुत आसान हो जाता है, बिना किसी confusion के।
अब ये पूरा process इतना important क्यों है? क्योंकि इससे हमें ये flexibility मिलती है कि हम दोनों eyeballs को एक साथ select करके एक साथ move कर सकें। इससे बहुत सारा time बचता है, क्योंकि पहले eyeballs हर eye symbol के अंदर buried थे— मतलब हर बार अलग-अलग symbol के अंदर जाकर pupil को adjust करना पड़ता था, वापस बाहर आना पड़ता था, और फिर दूसरे eye में repeat करना पड़ता था।
ये ना केवल time-consuming था बल्कि risky भी—क्योंकि small position mismatches बहुत आसानी से हो जाते थे और eyes off-balance लगने लगती थीं।
अब जब हमारी layering पूरी तरह set हो चुकी है, चलिए आखिरकार Orvin के right eye blink को animate करना शुरू करते हैं। इसमें हम mask effect का इस्तेमाल करेंगे ताकि blink smooth और natural दिखे।
सबसे पहले, मैं right eyeball layer के ठीक ऊपर एक नई layer बनाऊँगा और इसका नाम रखूँगा: Right Eye Mask।
अब mask setup करने के लिए, मैं eye base layer— यानी eye का white हिस्सा—को copy करूँगा और उसे mask layer पर paste कर दूँगा। इससे mask layer पर eye base का exact duplicate shape आ जाएगा।
ध्यान रहे कि अभी ये pasted object एक symbol ही है, लेकिन mask ठीक से काम करने के लिए इसे drawing object होना ज़रूरी है। इसलिए मैं Ctrl + B दबाकर इसे break apart कर दूँगा। अब ये एक editable drawing object बन चुका है।
इसके बाद, मैं mask layer पर right-click करूँगा और Mask select करूँगा। इससे ये layer mask में बदल जाएगी और इसके नीचे वाली layers की visibility इसी mask के हिसाब से control होगी।
😘
काम करते समय चीज़ों को और साफ़-साफ़ देखने के लिए मैं mask layer को outline mode में रखूँगा। इससे eyeball को नीचे से select करना और उसकी position adjust करना आसान हो जाता है।
अब यहाँ एक और ज़रूरी चीज़ fix करनी है। जब मैं eyeball को eye के कोनों की तरफ़ move करता हूँ, तो eye base की outline eyeball के पीछे दिखाई देने लगती है, जिससे look थोड़ा odd और messy हो जाता है।
इसे ठीक करने के लिए मैं एक नई layer बनाऊँगा और उसका नाम रखूँगा Right Eye Outer Outline। फिर मैं mask layer से eye base drawing को select करके copy करूँगा और outer outline layer पर paste कर दूँगा।
अब यहाँ हमें सिर्फ़ outline चाहिए, इसलिए मैं drawing के अंदर जाऊँगा और उसका fill color हटा दूँगा, ताकि सिर्फ़ एक साफ़ outline बच जाए जो eyeball के ऊपर perfectly बनी रहे।
इस तरह, चाहे eyeball left या right edges तक move हो, outline हमेशा ऊपर रहेगी और pupil कभी भी eye base के बाहर जाता हुआ नहीं दिखेगा।
अब यही process मैं left eye के लिए भी repeat करूँगा— एक नई layer बनाकर उसका नाम रखूँगा Left Eye Mask, eye base symbol को copy करके इस mask layer पर paste करूँगा, और फिर उसे break apart कर दूँगा ताकि वो pure drawing object बन जाए।
इसके बाद एक और नई layer बनाऊँगा Left Eye Outer Outline नाम से, eye base drawing यहाँ paste करूँगा, उसे भी break करूँगा, अंदर जाकर उसका fill हटा दूँगा ताकि साफ़ outline रह जाए।
अंत में मैं left eye mask layer को select करूँगा, right-click करूँगा और Mask चुनूँगा। और इस layer को भी outline mode पर set कर दूँगा ताकि eyeball को select और animate करना आसान रहे।
अब time है blink animation को ज़िंदा करने का — इसके लिए हम दोनों eyeballs के ऊपर blink patches (eyelids) जोड़ेंगे।
सबसे पहले, मैं right eye mask layer के ठीक ऊपर एक नई layer बनाऊँगा और उसका नाम रखूँगा Right Eye Blink Patches, ताकि सबकुछ organized और साफ़ रहे।
😘
फ्रेम 15 पर, मैं इस blink patch layer में एक blank keyframe जोड़ूँगा। फिर right eye mask layer के पहले फ्रेम से drawing को copy करके, blink patch layer के फ्रेम 15 पर paste कर दूँगा।
अब blink patch layer का outline mode off कर दूँगा ताकि patch साफ़ दिखाई दे। इसके बाद इसकी color को white से बदलकर skin tone करूँगा — चेहरे से थोड़ा गहरा shade, ताकि eyelid बंद होने पर natural लगे।
अब फ्रेम 12 पर एक blank keyframe जोड़ूँगा। फ्रेम 15 की drawing को copy करके फ्रेम 12 में paste करूँगा।
फिर drawing object के अंदर जाऊँगा, eraser tool लेकर नीचे वाला हिस्सा erase कर दूँगा, क्योंकि हमें सिर्फ़ eyelid की ऊपर वाली portion चाहिए।
अब ink bottle tool (S) से एक stroke line जोड़ूँगा— पहले उसे straight करूँगा और फिर हल्का curve दूँगा ताकि eyelid का natural curve दिखे। यही हमारा blink का पहला frame तैयार है।
अब फ्रेम 13 पर एक blank keyframe जोड़ेंगे। फिर से फ्रेम 15 की drawing copy करके फ्रेम 13 पर paste कर देंगे।
Inside जाकर extra हिस्सा erase कर देंगे और ink bottle से एक curved stroke line जोड़ेंगे— shape को smooth और natural बनाने के लिए हल्का adjust भी करूँगा।
अब फ्रेम 14 की बारी— एक नया blank keyframe जोड़कर, फ्रेम 15 की drawing को यहाँ paste करूँगा। फिर अंदर जाकर unwanted parts erase कर दूँगा और एक curved eyelid stroke जोड़ दूँगा जिससे eye लगभग बंद दिखे।
अब इन frames को जल्दी से play करके check करूँगा और फ्रेम 13 पर curve में हल्का adjustment करूँगा ताकि पूरा blink motion smooth और natural लगे।
😘
जब ये सब सेट हो जाता है, तो हम लगभग तैयार हैं। अब मैं पूरी तरह बंद आँख को एक फ्रेम और रोकूंगा — यानी फ्रेम 16 पर। और फिर हम फ्रेम 17 से फ्रेम्स को रिवर्स करेंगे।
हम फ्रेम 14 को कॉपी करके शुरू करेंगे। कीबोर्ड पर Alt दबाकर रखें और उसे ड्रैग करके फ्रेम 17 पर ले जाएँ। फिर वही काम फ्रेम 13 को फ्रेम 18 पर और फ्रेम 12 को फ्रेम 19 पर ड्रैग करके करें।
आख़िर में, फ्रेम 20 पर मैं एक ब्लैंक की-फ्रेम जोड़ूँगा ताकि पैच रीसेट हो जाए। और बस, हमारी राइट आई ब्लिंक ऐनिमेशन तैयार है।
अब हम लेफ्ट आई ब्लिंक ऐनिमेशन बनाएँगे, वही पैचेज़ इस्तेमाल करके जो हमने राइट आई के लिए बनाए थे, ताकि सब कुछ फिर से शुरू से न बनाना पड़े।
सबसे पहले मैं राइट आई ब्लिंक पैचेज़ लेयर के सभी की-फ्रेम्स सेलेक्ट करूँगा। फिर Control + Alt + C दबाकर उन्हें कॉपी करूँगा।
इसके बाद लेफ्ट आई मास्क लेयर के ऊपर एक नई लेयर जोड़ूँगा और उसे सही नाम दूँगा। फिर CTRL + Alt + V दबाकर उन कॉपी किए हुए ड्रॉइंग्स को नई लेयर पर पेस्ट कर दूँगा।
अब, भले ही ड्रॉइंग्स कॉपी हो गए हैं, लेकिन उनकी पोज़ीशन अभी भी राइट आई के ऊपर ही है, इसलिए उन्हें लेफ्ट आई पर ले जाना होगा। इसे आसान बनाने के लिए, मैं बाकी सभी लेयर्स लॉक कर दूँगा, सिर्फ़ लेफ्ट आई ब्लिंक पैचेज़ लेयर अनलॉक छोड़कर।
इसके बाद टाइमलाइन में Edit Multiple Frames को ऑन करूँगा। मैं उन ब्रैकेट्स को एडजस्ट करके फ्रेम रेंज 12 से 20 तक सेट करूँगा। फ्रेम रेंज सेट होने के बाद, Control + A दबाकर लेफ्ट आई ब्लिंक पैचेज़ लेयर के सभी ऑब्जेक्ट्स सेलेक्ट कर लूँगा।
अब Shift की दबाकर और राइट ऐरो की का इस्तेमाल करते हुए, मैं इन पैचेज़ को धीरे-धीरे लेफ्ट साइड में मूव करूँगा और उन्हें लेफ्ट आई के ऊपर बिल्कुल सही तरीके से अलाइन कर दूँगा।
जब सब कुछ ठीक से सेट हो जाए, तो मैं Edit Multiple Frames ऑप्शन को बंद कर दूँगा ताकि सब कुछ नॉर्मल मोड में आ जाए।
हमारी ऐनिमेशन को और भी ज़्यादा ज़िंदा और एक्सप्रेसिव बनाने के लिए, अब हम आँखों की बॉल्स में हल्की-सी मूवमेंट जोड़ेंगे।
इसके लिए, मैं फ्रेम 12 पर दोनों आईबॉल लेयर्स में एक की-फ्रेम जोड़ूँगा। फिर फ्रेम 20 पर एक और की-फ्रेम जोड़ूँगा। और दोनों लेयर्स पर फ्रेम 15 पर भी एक की-फ्रेम जोड़ूँगा।
😘
अब फ्रेम 15 पर, मैं दोनों आईबॉल्स को थोड़ा-सा नीचे की ओर मूव करूँगा ताकि ब्लिंक के दौरान होने वाली नैचुरल आई मूवमेंट को दिखाया जा सके। मैं उन्हें 2 फ्रेम तक वहीं रखूँगा, इसलिए उस पोज़िशन को होल्ड करने के लिए फ्रेम 17 पर एक की-फ्रेम जोड़ूँगा।
अब मैं फ्रेम 12 से 15 तक और 17 से 20 तक, दोनों आईबॉल लेयर्स पर क्लासिक ट्वीन्स अप्लाई करूँगा।
अब आइए आइब्रो को भी ऐनिमेट करते हैं, ताकि कैरेक्टर के एक्सप्रेशन में और ज्यादा जान आए। मैं बेहतर कंट्रोल के लिए, दोनों आइब्रो लेयर्स को टाइमलाइन में आँखों वाली लेयर्स के ऊपर ले जाऊँगा।
फिर मैं दोनों आइब्रो लेयर्स पर फ्रेम 11, 20 और 15 पर की-फ्रेम्स जोड़ूँगा। फ्रेम 15 पर, मैं आइब्रो को हल्का-सा रोटेट करूँगा और थोड़ा नीचे की ओर मूव करूँगा।
मैं पोज़िशन को एक फ्रेम के लिए होल्ड करने के लिए फ्रेम 16 पर भी दोनों लेयर्स में की-फ्रेम जोड़ूँगा और फिर की-फ्रेम्स के बीच क्लासिक ट्वीन्स अप्लाई कर दूँगा।
जब सब हो जाए, तो मैं सिम्बल से बाहर निकलकर मेन टाइमलाइन पर वापस आऊँगा। यहाँ मैं फ्रेम्स को फ्रेम 60 तक बढ़ा दूँगा, जो कि 30 फ्रेम-पर-सेकंड पर 2 सेकंड होते हैं — इतना समय हमारी पूरी ब्लिंक ऐनिमेशन को अच्छे से प्ले होने के लिए काफी है।
और बस, हमारी Eye Blink ऐनिमेशन तैयार है।
तो इस तरह आप Adobe Animate में अपने कैरेक्टर के लिए एक एक्सप्रेसिव और नैचुरल-लुकिंग Eye Blink ऐनिमेशन बना सकते हैं।
आशा है कि आपको यह ट्यूटोरियल मददगार लगा होगा। अगले ट्यूटोरियल में हम कैरेक्टर ऐनिमेशन स्किल्स को और आगे बढ़ाएँगे और सीखेंगे Lip Syncing, जो कि डायलॉग ऐनिमेशन और कैरेक्टर्स को ज़िंदा करने के लिए बेहद ज़रूरी टेक्नीक है।
देखने के लिए धन्यवाद, और मैं आपको अगले वीडियो में मिलूँगा।