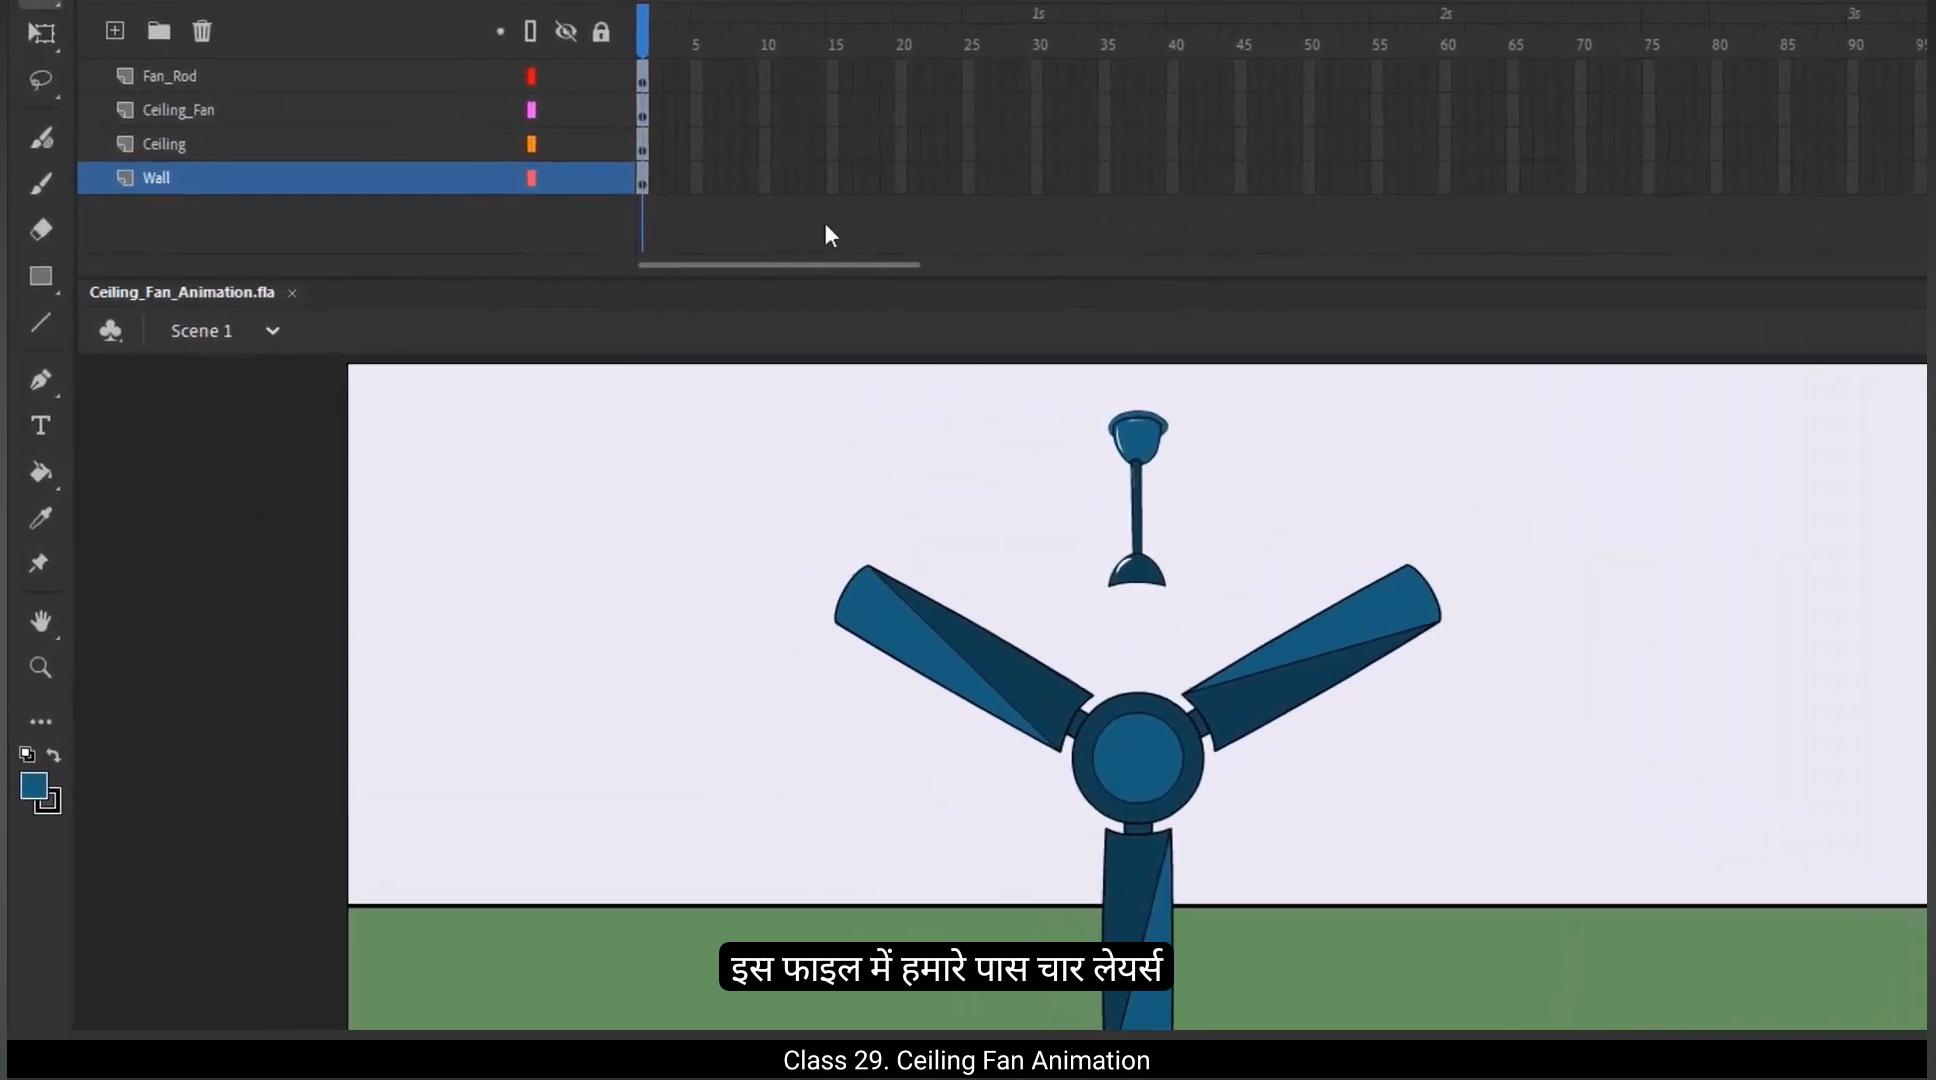
Welcome to the digital tutors. In this tutorial we will learn to create a ceiling fan animation in Adobe Animate. So let's start animating.1st I have taken a rigged vector file of a ceiling fan.To keep things organized, I saved this file with a new name, ceiling fan animation.In this file we have 4 layers.Wall layer.Ceiling layer, fan layer which includes the fan blades and round body of fan and last there is fan rod layer.Let's start by locking the wall layer, ceiling layer, and the fan rod layer. This will help us avoid accidentally making changes to these layers.We'll now go inside the ceiling fan symbol. Inside this symbol I've already created an extra symbol named ceiling fan extra.One we have on main timeline and one extra symbol is created inside ceiling fan symbol as well. Don't worry, you'll understand why we need this extra symbol shortly.Enter the fan extra symbol. Inside this extra symbol we have two symbols fan blades.And fan round body.Exit all symbols and go to main timeline. On the main timeline let's add frames for a 7 second animation that is till 210 frame. Select all layers and press F5 to insert frames.Next, go inside the ceiling fan symbol.Then go inside the ceiling fan extra symbol.Here extend the frames up to frame 15, select all layers on frame 15 and insert a keyframe by pressing F6.Now select only the fan blades layer and add a motion tween.In the Properties panel, under the Frame tab, locate the Tweening panel.Set the rotation direction to clockwise.This will create a rotating animation for the fan blades.However, we need to fix a key issue here. You'll notice that the blade positions on frame 14, 15 and frame one are identical. This causes a lag in the animation because it appears to pause at this point.Exit the symbol and add frames till frame 210. We will do this to test how the animation loops over its full duration.As you can see there is a lag or pause. As you can see there is a lag or pause. The rotation stops for a while because of the identical frames.The ceiling fan extra symbol is specifically created to avoid this issue and ensure a smooth animation loop.The identical blade positions on frame one and frame 14 cause a lag when looping the animation.To fix this, we will limit the animation to frame 13 by removing the extra frames. Select the frames from frame 14 onward and press Shift F5 to delete them.This ensures A seamless rotation where the animation loops smoothly.So we have 15 frame animation inside the extra fan symbol, but on outside it will be for 13 frame animation. This ensure the animation loops seamlessly without glitches.On the main timeline, you may notice a jerk at the start and end of the animation.Check the blade position for last few frames and 1st frame.You will notice that at frame 209 and frame one are identical, which causes the jerk.To fix this, remove the extra frames beyond frame 208.Select these frames and press Shift F5. Now the last frame is frame 208, ensuring a smooth loop.This is our animation look so far.Next, let's reposition the fan. Use the shift arrow key to move the fan towards the road.Now here the position of fan should be over the rod for that drag fan layer above the rod layer.Then use the free transform tool to adjust the position and perspective of the fan symbol, skew it and use arrow keys to position it near the rod.To match the perspective, go inside the symbol.Then enter to fan round symbol.And slightly moved the inner design to align it correctly.Now exit the symbol and go to main timeline.Let's add a shadow for the ceiling fan.Unlock the rod layer and select Fan layer and Rod layer.Right click and duplicate the ceiling fan layer and fan rod layer by selecting Duplicate Layers.Lock the original layers to avoid confusion.Rename duplicated layers as fan rod shadow and ceiling fan shadow.Select both shadow layers.Then select Free Transform tool.First, adjust the pivot point to the top of fan rod.Next, rotate the symbols 90°.And reposition the shadow layers below the original symbols.Adjust the position of the fan rod in the shadow to match the perspective. Finally, stretch the shadow slightly to align with the perspective, ensuring it looks natural and consistent.Select both shadow layers and go to Properties panel. Under Frame tab, find the Color Effect section. Add a tint effect and set the tint percentage to 100%.Change the colour to match the shadow effect.Ensure the shadow animation matches the fan blade movement.For this go to properties panel.And looping section in the object tab.And set the 1st frame to 13.This matches the main animations frame count.Save your file and test the animation by pressing Control Enter.And that's it. Our ceiling fan animation is ready. Practice this technique to get comfortable with motion tweens and looping animations. See you in the next tutorial. Hello students. इस ट्यूटोरियल में हम एडोबी एनीमेट में एक सीलिंग फैन एनीमेशन बनाना सीखेंगे। तो चलिए एनीमेशन शुरू करते हैं। सबसे पहले मैंने एक रिग्ड वेक्टर फाइल ली है जिसमें सीलिंग फैन है। सब कुछ ऑर्गनाइज़्ड रखने के लिए, मैंने इस फाइल को एक नए नाम से सेव किया है — “Ceiling Fan Animation”। इस फाइल में हमारे पास 4 लेयर्स हैं — वॉल लेयर, सीलिंग लेयर, फैन लेयर (जिसमें फैन ब्लेड्स और फैन का राउंड बॉडी शामिल है), और आखिरी में फैन रॉड लेयर है। सबसे पहले वॉल लेयर, सीलिंग लेयर और फैन रॉड लेयर को लॉक करें। इससे हम गलती से इन लेयर्स में कोई बदलाव नहीं करेंगे। अब हम सीलिंग फैन सिंबल के अंदर जाएंगे। इस सिंबल के अंदर मैंने पहले से ही एक एक्स्ट्रा सिंबल बनाया है जिसका नाम है “Ceiling Fan Extra”। एक सिंबल हमारे पास मेन टाइमलाइन पर है और एक एक्स्ट्रा सिंबल इसी सीलिंग फैन सिंबल के अंदर है। चिंता मत कीजिए, थोड़ी देर में आप समझ जाएंगे कि हमें ये एक्स्ट्रा सिंबल क्यों चाहिए। अब फैन एक्स्ट्रा सिंबल के अंदर जाएं। इस एक्स्ट्रा सिंबल के अंदर दो सिंबल्स हैं — फैन ब्लेड्स और फैन राउंड बॉडी। सभी सिंबल्स से बाहर निकलें और मेन टाइमलाइन पर वापस आएं। मेन टाइमलाइन पर हम 7 सेकंड की एनीमेशन के लिए फ्रेम्स ऐड करेंगे, यानी फ्रेम 210 तक। सभी लेयर्स सिलेक्ट करें और F5 दबाकर फ्रेम्स इंसर्ट करें। अब सीलिंग फैन सिंबल के अंदर जाएं। फिर सीलिंग फैन एक्स्ट्रा सिंबल के अंदर जाएं। यहाँ फ्रेम्स को फ्रेम 15 तक बढ़ाएं, फिर फ्रेम 15 पर सभी लेयर्स सिलेक्ट करें और F6 दबाकर एक कीफ्रेम इंसर्ट करें। अब सिर्फ फैन ब्लेड्स लेयर को सिलेक्ट करें और एक मोशन ट्वीन ऐड करें। प्रॉपर्टीज पैनल में, फ्रेम टैब के अंदर ट्वीनिंग पैनल ढूंढें। रोटेशन डायरेक्शन को क्लॉकवाइज़ पर सेट करें। इससे फैन ब्लेड्स के लिए रोटेटिंग एनीमेशन बनेगा। लेकिन यहाँ एक छोटी सी समस्या है — आप देखेंगे कि फ्रेम 14, 15 और फ्रेम 1 पर ब्लेड की पोज़िशन एक जैसी है। इस वजह से एनीमेशन में थोड़ी लैग या रुकावट दिखती है। सिंबल से बाहर निकलें और फ्रेम 210 तक फ्रेम्स ऐड करें ताकि हम एनीमेशन को पूरे ड्यूरेशन में टेस्ट कर सकें। जैसा कि आप देख सकते हैं, एनीमेशन में थोड़ा लैग है क्योंकि कुछ फ्रेम्स एक जैसे हैं। सीलिंग फैन एक्स्ट्रा सिंबल को खासतौर पर इस समस्या को ठीक करने और एनीमेशन को स्मूथ लूप में चलाने के लिए बनाया गया है। फ्रेम 1 और फ्रेम 14 पर ब्लेड की पोज़िशन एक जैसी होने के कारण एनीमेशन लूप करते समय रुकती हुई लगती है। इसे ठीक करने के लिए हम एनीमेशन को फ्रेम 13 तक सीमित करेंगे और एक्स्ट्रा फ्रेम्स हटा देंगे। फ्रेम 14 से आगे के फ्रेम्स सिलेक्ट करें और Shift + F5 दबाकर डिलीट कर दें। इससे एनीमेशन बिना किसी लैग के स्मूथली लूप होगी। अब हमारे पास एक्स्ट्रा फैन सिंबल के अंदर 15 फ्रेम की एनीमेशन है, लेकिन बाहर की तरफ यह 13 फ्रेम की एनीमेशन के रूप में काम करेगी। इससे एनीमेशन बिना किसी गड़बड़ी के स्मूथ लूप में चलेगी। मेन टाइमलाइन पर आप देख सकते हैं कि एनीमेशन की शुरुआत और अंत में थोड़ा झटका (jerk) आ रहा है। आखिरी कुछ फ्रेम्स और पहले फ्रेम पर ब्लेड की पोज़िशन चेक करें। आप पाएंगे कि फ्रेम 209 और फ्रेम 1 की पोज़िशन एक जैसी है, जिससे यह झटका आता है। इसे ठीक करने के लिए फ्रेम 208 से आगे के एक्स्ट्रा फ्रेम्स हटा दें। इन फ्रेम्स को सिलेक्ट करें और Shift + F5 दबाएं। अब आखिरी फ्रेम 208 होगा, जिससे लूप स्मूथ रहेगा। अब तक हमारी एनीमेशन इस तरह दिखती है। अब फैन की पोज़िशन एडजस्ट करते हैं। Shift + Arrow keys का उपयोग करके फैन को रॉड की तरफ मूव करें। फैन की पोज़िशन रॉड के ऊपर होनी चाहिए, इसके लिए फैन लेयर को रॉड लेयर के ऊपर ड्रैग करें। अब फ्री ट्रांसफॉर्म टूल का इस्तेमाल करके फैन सिंबल की पोज़िशन और परस्पेक्टिव एडजस्ट करें, उसे थोड़ा स्क्यू करें और एरो कीज़ से रॉड के पास लाएँ। परस्पेक्टिव मैच करने के लिए सिंबल के अंदर जाएं। फिर फैन राउंड सिंबल में एंटर करें। और अंदर के डिज़ाइन को थोड़ा एडजस्ट करें ताकि वह सही तरह से अलाइन हो जाए। अब सिंबल से बाहर निकलें और मेन टाइमलाइन पर वापस आएं। अब सीलिंग फैन के लिए एक शैडो ऐड करते हैं। रॉड लेयर को अनलॉक करें और फैन लेयर व रॉड लेयर दोनों को सिलेक्ट करें। दोनों लेयर्स पर राइट क्लिक करें और Duplicate Layers सिलेक्ट करें। ओरिजिनल लेयर्स को लॉक करें ताकि कोई कन्फ्यूज़न न हो। डुप्लिकेटेड लेयर्स के नाम बदलकर “Fan Rod Shadow” और “Ceiling Fan Shadow” रखें। दोनों शैडो लेयर्स सिलेक्ट करें। अब फ्री ट्रांसफॉर्म टूल सिलेक्ट करें। सबसे पहले, पिवट पॉइंट को फैन रॉड के टॉप पर एडजस्ट करें। फिर सिंबल्स को 90° रोटेट करें। और शैडो लेयर्स को ओरिजिनल सिंबल्स के नीचे पोज़िशन करें। फैन रॉड की पोज़िशन को शैडो में एडजस्ट करें ताकि परस्पेक्टिव सही लगे। आखिर में, शैडो को थोड़ा स्ट्रेच करें ताकि यह नैचुरल और कंसिस्टेंट दिखे। दोनों शैडो लेयर्स सिलेक्ट करें और प्रॉपर्टीज पैनल में जाएं। फ्रेम टैब के अंदर, Color Effect सेक्शन में जाएं। Tint Effect ऐड करें और टिंट प्रतिशत 100% पर सेट करें। रंग को शैडो इफेक्ट के अनुसार बदलें। सुनिश्चित करें कि शैडो एनीमेशन फैन ब्लेड्स की मूवमेंट से मैच करे। इसके लिए प्रॉपर्टीज पैनल में जाएं, और ऑब्जेक्ट टैब के लूपिंग सेक्शन में 1st फ्रेम को 13 पर सेट करें। यह मुख्य एनीमेशन के फ्रेम काउंट से मैच करेगा। अब अपनी फाइल सेव करें और Control + Enter दबाकर एनीमेशन को टेस्ट करें। और बस — हमारा सीलिंग फैन एनीमेशन तैयार है। इस टेक्निक को प्रैक्टिस करें ताकि आप मोशन ट्वीन और लूपिंग एनीमेशन में कम्फर्टेबल हो जाएं। मिलते हैं अगले ट्यूटोरियल में।