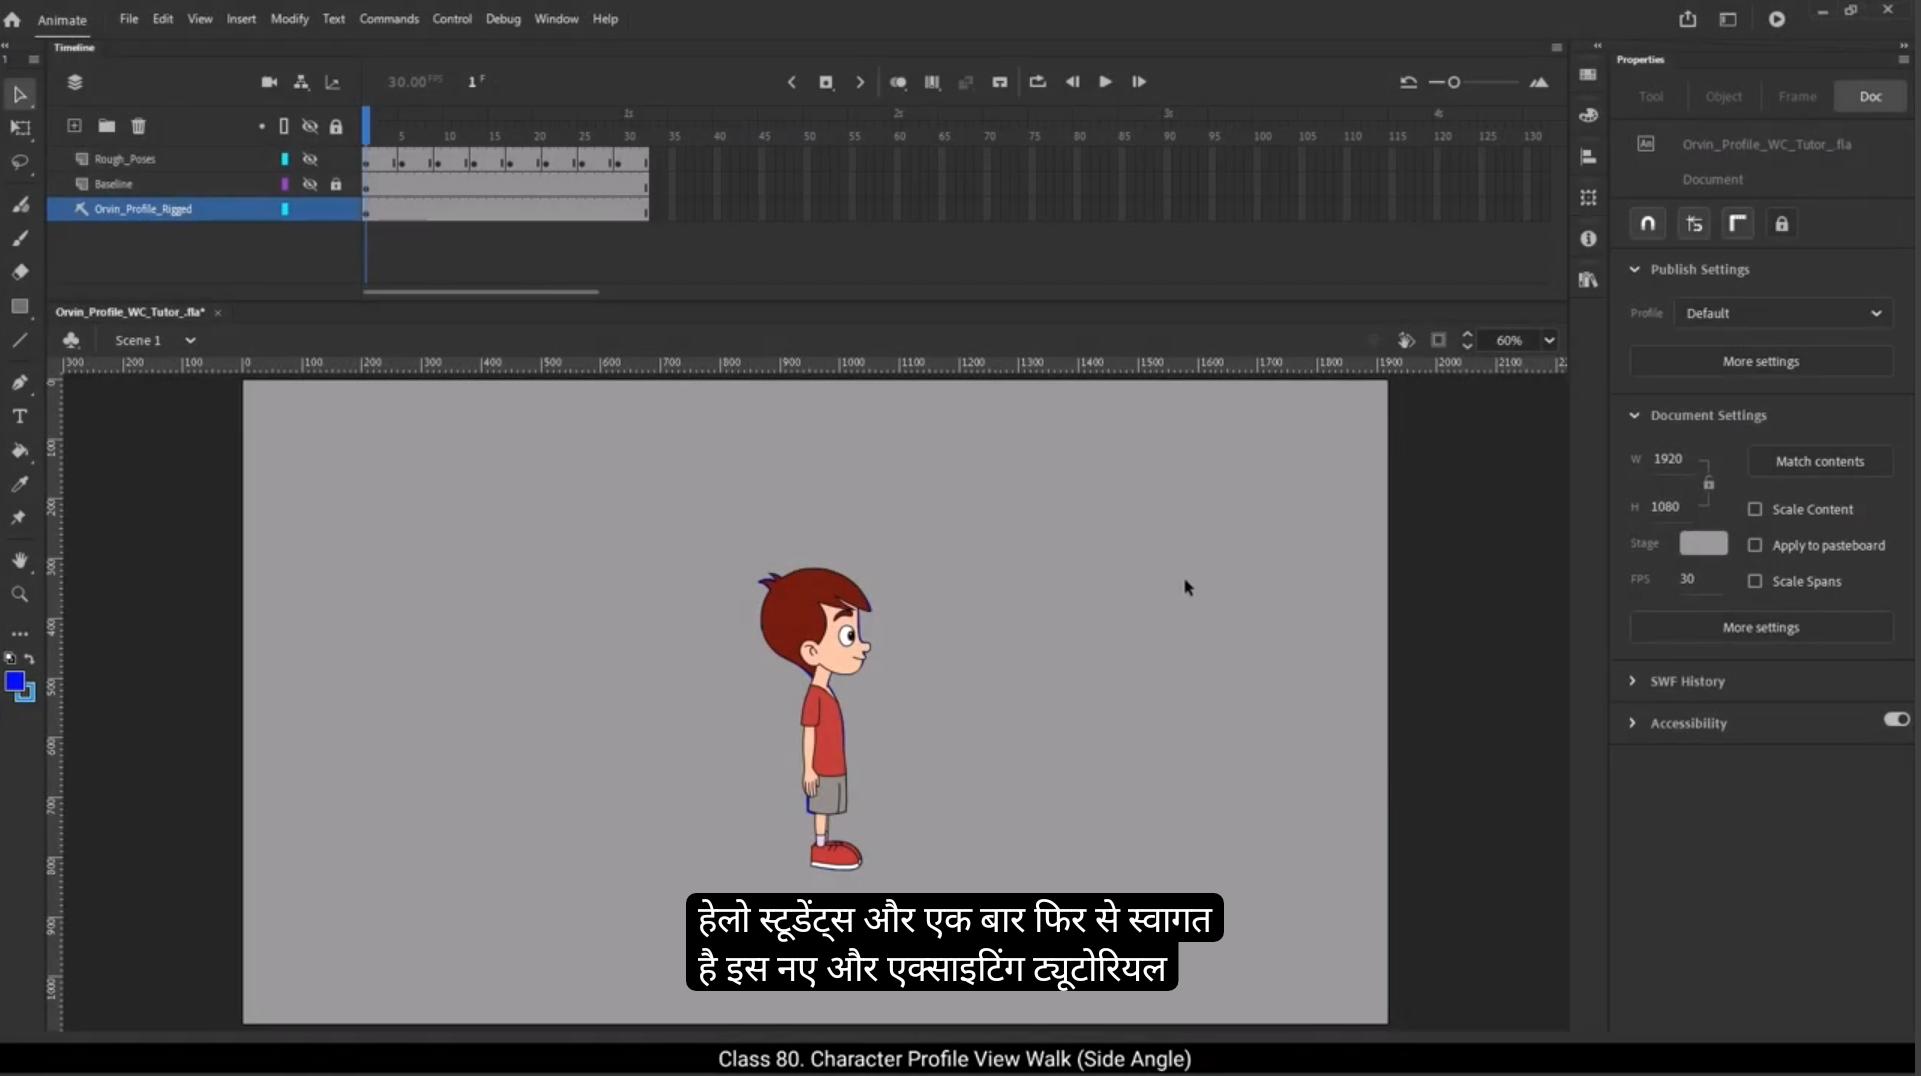
Hello students, and welcome back to another exciting tutorial. Today we're going to learn a very simple and essential animation exercises, the walk cycle in profile view, or in simpler terms, the side angle walk. This is one of the most important exercises for any animator and we'll go through it step by step.Before you begin drawing any walk poses, you must have a background or at least a baseline.Because if you animate the walk first and later decide to add a background with a different perspective, your character may not fit well. You'll have to redo the animation to match the angle, which means more work and wasted time. So to keep things simple and clean, I've added two horizontal lines that act as baselines for the walk cycle. This gives us a ground reference and helps keep the feet aligned throughout the walk.Now let's move on to the character.And the key animation poses. Here's the character I'll be using, but for now I'm going to hide the main drawing so we can focus on the rough poses first. These are drawn on a separate layer I've named rough poses.The first pose we're going to create is called the contact pose. In this position, both feet are touching the ground, one foot is extended forward and the other is behind about to lift off. It marks the beginning of a step. Whenever you're starting a walk cycle, it's a great idea to begin with this contact pose. It gives you a strong foundation and a clear starting point.Once you've drawn this pose, copy it to the last frame of your timeline.This is a neat little trick that helps your walk cycle loop perfectly. By having the first and last frames identical, you ensure that when the animation repeats, it flows smoothly without a visible jump or glitch. In this example, I'm working at 30 frames per second and I've decided to make the entire walk cycle 33 frames long.
😘
So to ensure a perfect loop, I've placed the same contact pose on both frame one and frame 33.Next, we draw the opposite contact pose. This pose is placed halfway through the walk cycle, which is at frame 17. In this pose, the other leg is forward and the original forward leg is now behind. Think of it as a mirror image of the first contact pose. It's important to maintain the same distance between the legs in both contact poses.This keeps the motion balanced and realistic.With both contact poses done, we now add what's called the passing pose. This pose comes between the contact pose and opposite contact pose. This is where the rear leg lifts and passes the front leg moving forward. In this pose, the thigh of the lifted leg is coming forward, the foot is off the ground and the supporting leg is straight carrying the weight.In this animation, the first passing pose Happens on frame 9 and the opposite passing pose is placed on frame 25.
Now let's move on to the up pose. This pose comes right after the Passing pose and represents the highest point in the character's vertical movement. The body slightly lifts as the stepping leg prepares to land in the next contact. Draw a horizontal reference line to help you spot this height difference. You'll notice that only the up pose reaches this upper line, while the other poses, like contact and Passing stay below it.Make sure to also create the opposite up pose after the second passing pose, which will be on frame 29 in this animation. Now let's add the downpose. The downpose is the lowest point in the walk cycle. It happens right after the contact pose. In this example, the first down pose is on frame 5, and the opposite downpose is on frame twenty-one.
😘
Let's take a quick recap of the five key poses in a standard profile. Walk cycle contact poses, which on frame one and again on frame 33. In this example of walk cycle, opposite contact pose placed exactly midway through the cycle, which is frame 17 In our case. This is the mirror of the first contact passing poses, which is on frame 9 and 25.Up poses on frames 13 and 29.And lastly, down poses, which is on frames 5 and 21 right after each contact pose. If you draw these rough poses properly, the rest of the animation will become much easier. Let's play the animation now with just these rough poses to see how it feels.Even with these few drawings, you'll already get a sense of rhythm and motion. But to take it a step further, let's talk about something very important, animation principles. These principles bring your character to life and add personality and realism to even the simplest movements. For example, squash and stretch. You can apply a slight stretch to the body during the up pose to show motion and give the character a better flexibility. Anticipation When the character goes down into the down pose, it sets up the energy for the upcoming pose.Follow through. If your character has hair, a scarf, or loose clothing, make sure they continue moving slightly even after the body stops. That delayed motion shows inertia or secondary action. Think of how the arms swing during a walk. They don't move at the same speed as the legs. They lag behind, a bit like a pendulum.These little details add depth to your animation.Once you're happy with the timing and spacing of your rough poses, you can move on to the clean up stage. To help you out, I've included these rough poses as downloadable reference material along with this video so you can follow along or even trace them while practicing.
😘
Now it's time to move on to tracing the character over our rough animation. We're going to match the character symbols with the rough drawings we created earlier.Let's begin by going inside the oven profile symbol. That's our main character symbol. Once inside, I'll remove any extra frames on the timeline that we don't need.Then on frame 17, I'll add a keyframe on all the layers inside this symbol. This frame marks the midpoint of our walk cycle. Now I'll jump back to frame one and begin resizing and repositioning the different parts of the character, making sure they line up perfectly with the rough drawing underneath.We'll repeat this same process inside each symbol. We will enter the symbol, match its timeline with the mainstage timeline And adjust the symbols so that they match the corresponding rough pose.
So now our first contact pose is fully traced and ready, and in the same way I've traced all the rough key poses. That includes contact pose, down pose, passing pose, up pose, then the opposite contact pose, followed by the opposite down, opposite, passing, opposite up pose, and finally back to the contact pose to complete the loop. Now It's time to add a small but important detail? The follow-through of the character's hair. This will give the animation more life and flexibility. The hair should appear to follow the movement of the head with a slight delay that shows the softness and flow.Let's begin this process. I'll start by working on the down pose, which is on frame 5. First I'll enter the hair symbol, but before we change the drawing, we need to extend the timeline by adding frames. I'll also add a keyframe on the last frame to make sure that the hair drawing on frame one and frame 33 is exactly the same.Now I'll go to frame 5 and add a keyframe there.
😘
Then I'll match the vector drawing of the hair with our rough pose. To make this easier and more accurate, I'll turn on the outline mode, which helps us see the structure better when aligning.
Once that’s done We move to the next pose on frame 9 inside the hair symbol again. I'll add a new keyframe and then adjust the hair drawing to follow the rough pose for that frame.We repeat the same process for the next one on frame 13.Now from keyframe 15 onwards the hair drawings repeats. So instead of redrawing, we can copy the hair drawings and paste them from keyframe 15 onwards to complete the cycle.After that, I'll go through each keyframe and check the hair position carefully, making minor adjustments if needed to make everything feel smooth.Once that's done, let's play the animation and see how it's looking so far.So this is how you can animate a walk cycle in profile view. This is a simple and effective way to bring your character to life. But wait, there's a next level to this. You can actually add motion inside the drawings themselves.This gives you a more subtle, smooth and realistic walk animation. To do this, first select all the keyframes and simply add a classic tween.Now, after adding the tween, you might notice that some symbols appear to break or glitch between frames. That's normal, and we'll fix that by matching the drawings inside those in between frames. You'll also need to add classic tweens or shape tweens inside the symbols wherever necessary. Let's fix the right hand animation. We'll start by going inside the right hand symbol and then add classic tween across all the keyframes.Let's say there's a glitch on frame 5. Then enter the bicep symbol.
😘
Simply add a keyframe there.Now add a shape tween between frame 5 and the next keyframe.Play through the animation and if you notice the bicep is actually moving, then add a shape tween between those specific keyframes. But if there's no noticeable movement, you can just leave it as it is. No need to tween unnecessarily. Repeat this process throughout the animation. Check the full timeline and add shape tween wherever the bicep shape is moving.And that's it. Now you can see there's no more glitch and the animation looks smooth.We'll do the same process for the left hand.Watch the movement carefully and add shape tween wherever the bicep is moving. We are using shape tween because the bicep is a raw shape, not a symbol. If it was a symbol, then we'd use a classic tween instead.Once all that is done, exit the symbols and add classic tween between all the keyframes.So now both hand animations are clean and smooth.Next up, let's fix the left leg distortion.Now on frame #14 I noticed the leg is getting dislocated.So to fix this, I'll start by selecting frames 13 to 17 on the left leg layer and add keyframes.I'll do the same on the left shoe layer to keep everything In Sync.On frame 14, I'll first adjust the shoe position.And then select both the lower leg and the shoe and move them slightly to the right just to realign the motion. Next, I need to fix the thigh drawing, so I'll add a keyframe on the thigh layer, go inside the thigh symbol, and on frame 14 I'll add a keyframe on the thigh patch layer. Then I'll tweak the knee shape to match better. The goal here is to match the outlines of the lower leg and the thigh as closely as possible to avoid any weird distortion during movement.I'll also add keyframes up to frame 16, and then on frame 15 I'll refine the thigh shape, reposition it, and make sure it aligns smoothly with the lower leg and shoe.Finally, I'll do the same cleanup for frame #16 to complete the fix.
😘
Next, let's fix the left pant of the character which isn't matching the body shape from frame 10 onward. So I'll add keyframes on the left thigh, layer across the frames until the next keyframe, and adjust the shape to match the upper body on each frame. I'll also add keyframes on the pelvis layer.And make similar adjustments there to ensure everything flows naturally. Now moving on to the right thigh from frame 14, the pant is slightly mismatched so I'll add keyframes from frame 14 to 16, and on each of those keyframes I'll tweak the pants shape and position to match it with the lower body parts.I also noticed an issue on the first few frames of the right thigh. The pant shape needs some work.So I'll go inside the right thigh symbol, add a keyframe on frame #2 and adjust the pant drawing.We'll repeat the same adjustments on frames three and four as well.Here the knee drawing is appearing suddenly. Instead it should start from the 2nd frame, so I'll fix that as well.Now we've removed all the jerks and glitches in the animation.To repeat the walk cycle, just add more frames on the main timeline.And copy and paste the inner animation till frame 65.Because we copied the entire animation to repeat the walk cycle, the eye blink animation also repeats, which we don't want. To avoid this, I'll only select the head symbol layer and synchronize the symbol so the blink animation will happen only once, keeping it realistic.And that's it, our profile view or side angle walk cycle is ready. I hope you found this tutorial helpful and learned something new in character animation. In the next tutorial, we'll learn how to draw and animate a three quarters angle walk cycle. Thanks for watching and see you in the next video.
हेलो स्टूडेंट्स, और एक बार फिर से स्वागत है इस नए और एक्साइटिंग ट्यूटोरियल में। आज हम एक बहुत ही सिंपल लेकिन बेहद ज़रूरी एनीमेशन एक्सरसाइज़ सीखने वाले हैं, जिसे प्रोफाइल व्यू वॉक साइकिल कहा जाता है, या आसान शब्दों में साइड एंगल वॉक। यह हर एनिमेटर के लिए सबसे महत्वपूर्ण अभ्यासों में से एक है और हम इसे स्टेप बाय स्टेप समझेंगे।
वॉक पोज़ ड्रॉ करना शुरू करने से पहले आपके पास एक बैकग्राउंड या कम से कम एक बेसलाइन होना बहुत ज़रूरी है, क्योंकि अगर आप पहले वॉक एनीमेशन बना लेते हैं और बाद में किसी अलग पर्सपेक्टिव वाला बैकग्राउंड जोड़ते हैं, तो हो सकता है आपका कैरेक्टर उस एंगल में ठीक से फिट न बैठे। ऐसी स्थिति में आपको पूरी एनीमेशन दोबारा बनानी पड़ सकती है, जिससे समय और मेहनत दोनों बर्बाद होते हैं। इसलिए चीज़ों को सिंपल और क्लीन रखने के लिए मैंने दो हॉरिज़ॉन्टल लाइन्स जोड़ी हैं, जो वॉक साइकिल के लिए बेसलाइन का काम करती हैं। ये हमें ग्राउंड का रेफरेंस देती हैं और पूरी वॉक के दौरान पैरों को सही तरह से अलाइन्ड रखने में मदद करती हैं।
अब चलते हैं कैरेक्टर और की एनीमेशन पोज़ की तरफ। यह वह कैरेक्टर है जिसका मैं इस्तेमाल करने वाला हूँ, लेकिन फिलहाल मैं मेन ड्रॉइंग को हाइड कर रहा हूँ ताकि हम पहले सिर्फ रफ़ पोज़ पर फोकस कर सकें। ये रफ़ पोज़ एक अलग लेयर पर ड्रॉ किए गए हैं, जिसका नाम मैंने “रफ़ पोज़” रखा है। पहला पोज़ जो हम बनाएंगे उसे कॉन्टैक्ट पोज़ कहा जाता है। इस पोज़ में दोनों पैर ज़मीन को छू रहे होते हैं, एक पैर आगे की तरफ बढ़ा होता है और दूसरा पीछे की तरफ होता है जो उठने ही वाला होता है। यह पोज़ एक स्टेप की शुरुआत को दर्शाता है। जब भी आप वॉक साइकिल शुरू करते हैं, तो कॉन्टैक्ट पोज़ से शुरुआत करना एक बहुत अच्छा आइडिया होता है, क्योंकि यह आपको एक मज़बूत बेस और क्लियर स्टार्टिंग पॉइंट देता है।
जब आप यह पोज़ ड्रॉ कर लेते हैं, तो इसे अपनी टाइमलाइन के आख़िरी फ्रेम पर कॉपी कर दें। यह एक छोटा सा ट्रिक है जो आपकी वॉक साइकिल को परफेक्ट तरीके से लूप कराने में मदद करता है। जब पहला और आख़िरी फ्रेम एक जैसा होता है, तो एनीमेशन रिपीट होने पर स्मूदली फ्लो करती है और कोई भी विज़िबल जंप या ग्लिच दिखाई नहीं देता। इस उदाहरण में मैं 30 फ्रेम्स पर सेकंड की स्पीड से काम कर रहा हूँ और मैंने पूरी वॉक साइकिल को 33 फ्रेम्स का रखा है।
😘
परफेक्ट लूप सुनिश्चित करने के लिए मैंने वही कॉन्टैक्ट पोज़ फ्रेम 1 और फ्रेम 33 दोनों पर रखा है। इसके बाद हम अपोज़िट कॉन्टैक्ट पोज़ ड्रॉ करते हैं। यह पोज़ वॉक साइकिल के बिल्कुल बीच में आता है, यानी फ्रेम 17 पर। इस पोज़ में दूसरा पैर आगे होता है और जो पैर पहले आगे था, वह अब पीछे चला जाता है। इसे आप पहले कॉन्टैक्ट पोज़ की मिरर इमेज की तरह समझ सकते हैं। दोनों कॉन्टैक्ट पोज़ में पैरों के बीच की दूरी एक जैसी रखना बहुत ज़रूरी है, क्योंकि इससे मूवमेंट बैलेंस्ड और रियलिस्टिक लगता है।
दोनों कॉन्टैक्ट पोज़ तैयार होने के बाद अब हम पासिंग पोज़ जोड़ते हैं। यह पोज़ कॉन्टैक्ट पोज़ और अपोज़िट कॉन्टैक्ट पोज़ के बीच आता है। इस पोज़ में पीछे वाला पैर ऊपर उठता है और आगे बढ़ते हुए सामने वाले पैर को पार करता है। इसमें उठे हुए पैर की जांघ आगे की तरफ आती है, पैर ज़मीन से ऊपर होता है और जो पैर सपोर्ट कर रहा है वह सीधा रहता है और शरीर का वजन संभालता है। इस एनीमेशन में पहला पासिंग पोज़ फ्रेम 9 पर है और इसका अपोज़िट पासिंग पोज़ फ्रेम 25 पर रखा गया है।
अब चलते हैं अप पोज़ की तरफ। यह पोज़ पासिंग पोज़ के ठीक बाद आता है और कैरेक्टर की वर्टिकल मूवमेंट का सबसे ऊँचा पॉइंट दिखाता है। इस समय शरीर थोड़ा ऊपर उठता है, जब स्टेप लेने वाला पैर अगले कॉन्टैक्ट के लिए तैयार होता है। इस ऊँचाई के फर्क को समझने के लिए आप एक हॉरिज़ॉन्टल रेफरेंस लाइन ड्रॉ कर सकते हैं। आप देखेंगे कि सिर्फ अप पोज़ ही इस ऊपरी लाइन तक पहुँचता है, जबकि कॉन्टैक्ट और पासिंग जैसे बाकी पोज़ इससे नीचे रहते हैं। दूसरे पासिंग पोज़ के बाद अपोज़िट अप पोज़ बनाना भी ज़रूरी है, जो इस एनीमेशन में फ्रेम 29 पर होगा।
अब आख़िर में डाउन पोज़ जोड़ते हैं। डाउन पोज़ वॉक साइकिल का सबसे नीचे वाला पॉइंट होता है और यह कॉन्टैक्ट पोज़ के ठीक बाद आता है। इस उदाहरण में पहला डाउन पोज़ फ्रेम 5 पर है और इसका अपोज़िट डाउन पोज़ फ्रेम 21 पर रखा गया है।
😘
आइए अब स्टैंडर्ड प्रोफ़ाइल वॉक साइकिल के पाँच मुख्य की-पोज़ का एक छोटा सा रीकैप कर लेते हैं। सबसे पहले कॉन्टैक्ट पोज़ होता है, जो फ्रेम 1 पर और फिर फ्रेम 33 पर दोबारा आता है। इस वॉक साइकिल के उदाहरण में अपोज़िट कॉन्टैक्ट पोज़ बिल्कुल बीच में रखा गया है, यानी फ्रेम 17 पर। यह पहले कॉन्टैक्ट पोज़ का मिरर होता है। इसके बाद पासिंग पोज़ आते हैं, जो फ्रेम 9 और फ्रेम 25 पर होते हैं। फिर अप पोज़ होते हैं, जो फ्रेम 13 और फ्रेम 29 पर रखे जाते हैं। और अंत में डाउन पोज़ होते हैं, जो हर कॉन्टैक्ट पोज़ के ठीक बाद आते हैं, यानी फ्रेम 5 और फ्रेम 21 पर। अगर आप इन रफ पोज़ को सही तरीके से ड्रॉ कर लेते हैं, तो आगे का पूरा एनीमेशन बहुत आसान हो जाता है। अब चलिए सिर्फ इन रफ पोज़ के साथ एनीमेशन को प्ले करके देखते हैं कि इसका फील कैसा लग रहा है।
सिर्फ़ कुछ ही ड्रॉइंग्स के साथ आपको रिदम और मूवमेंट का अच्छा एहसास मिलने लगेगा। लेकिन इसे और बेहतर बनाने के लिए अब हम एक बहुत ही ज़रूरी चीज़ की बात करते हैं, और वह है एनीमेशन प्रिंसिपल्स। ये प्रिंसिपल्स आपके कैरेक्टर में जान डालते हैं और सबसे सिंपल मूवमेंट को भी पर्सनैलिटी और रियलिज़्म देते हैं। उदाहरण के लिए स्क्वैश और स्ट्रेच। आप अप पोज़ के दौरान बॉडी को थोड़ा स्ट्रेच दे सकते हैं ताकि मूवमेंट ज़्यादा फ्लेक्सिबल और जीवंत लगे। एंटिसिपेशन भी उतना ही ज़रूरी है। जब कैरेक्टर डाउन पोज़ में जाता है, तो वह अगले पोज़ के लिए एनर्जी सेट करता है।
इसके बाद आता है फ़ॉलो थ्रू। अगर आपके कैरेक्टर के बाल हैं, स्कार्फ है या ढीले कपड़े हैं, तो ध्यान रखें कि बॉडी के रुकने के बाद भी वे थोड़ी देर तक मूव करते रहें। यही डिले मूवमेंट इनर्शिया या सेकेंडरी एक्शन को दिखाता है। जैसे वॉक के दौरान हाथों का स्विंग। हाथ पैरों के साथ एक ही स्पीड से मूव नहीं करते, बल्कि थोड़ा पीछे रह जाते हैं, बिल्कुल पेंडुलम की तरह। ये छोटे-छोटे डिटेल्स आपकी एनीमेशन में गहराई लाते हैं।
जब आप अपने रफ पोज़ के टाइमिंग और स्पेसिंग से संतुष्ट हो जाएँ, तब आप क्लीन-अप स्टेज पर जा सकते हैं। आपकी मदद के लिए मैंने ये सभी रफ पोज़ इस वीडियो के साथ डाउनलोडेबल रेफ़रेंस मटीरियल के रूप में शामिल किए हैं, ताकि आप इन्हें देखकर प्रैक्टिस कर सकें या चाहें तो ट्रेस भी कर सकें।
😘
अब समय आ गया है कि हम अपनी रफ एनीमेशन के ऊपर कैरेक्टर को ट्रेस करना शुरू करें। इसमें हम उन कैरेक्टर सिंबल्स को उन रफ ड्रॉइंग्स के साथ मैच करेंगे जो हमने पहले बनाई थीं। सबसे पहले हम ओर्विन प्रोफ़ाइल सिंबल के अंदर जाएँगे, जो हमारा मेन कैरेक्टर सिंबल है। अंदर जाने के बाद, टाइमलाइन में जो एक्स्ट्रा फ़्रेम्स हमें नहीं चाहिए, उन्हें हटा दूँगा। इसके बाद फ्रेम 17 पर, इस सिंबल के अंदर सभी लेयर्स पर एक कीफ़्रेम ऐड करूँगा। यह फ्रेम हमारे वॉक साइकिल का मिडपॉइंट होता है। अब मैं वापस फ्रेम 1 पर जाऊँगा और कैरेक्टर के अलग-अलग पार्ट्स को रिसाइज़ और रीपोज़िशन करना शुरू करूँगा, ताकि वे नीचे बनी रफ ड्रॉइंग के साथ बिल्कुल सही तरीके से अलाइन हो जाएँ।
यही सेम प्रोसेस हम हर सिंबल के अंदर दोहराएँगे। हम सिंबल के अंदर जाएँगे, उसकी टाइमलाइन को मेन स्टेज टाइमलाइन के साथ मैच करेंगे और फिर सिंबल्स को एडजस्ट करेंगे ताकि वे संबंधित रफ पोज़ से सही तरह से मेल खाएँ। इस तरह अब हमारा पहला कॉन्टैक्ट पोज़ पूरी तरह ट्रेस होकर रेडी हो गया है, और इसी तरीके से मैंने सारे रफ की पोज़ भी ट्रेस कर लिए हैं। इसमें कॉन्टैक्ट पोज़, डाउन पोज़, पासिंग पोज़, अप पोज़, फिर अपोज़िट कॉन्टैक्ट पोज़, उसके बाद अपोज़िट डाउन, अपोज़िट पासिंग, अपोज़िट अप पोज़ और आखिर में फिर से कॉन्टैक्ट पोज़ शामिल है, जिससे लूप पूरा होता है।
अब समय है एक छोटे लेकिन बहुत ज़रूरी डिटेल को जोड़ने का, और वह है कैरेक्टर के बालों का फ़ॉलो-थ्रू। इससे एनीमेशन में ज़्यादा लाइफ़ और फ्लेक्सिबिलिटी आएगी। बालों को सिर की मूवमेंट को थोड़ी देर से फॉलो करना चाहिए, जिससे उनकी सॉफ्टनेस और फ्लो दिखाई दे। चलिए इस प्रोसेस को शुरू करते हैं। मैं सबसे पहले डाउन पोज़ पर काम करूँगा, जो फ्रेम 5 पर है। सबसे पहले मैं हेयर सिंबल के अंदर जाऊँगा, लेकिन ड्रॉइंग बदलने से पहले हमें टाइमलाइन को आगे तक बढ़ाना होगा, इसके लिए मैं फ़्रेम्स ऐड करूँगा। मैं लास्ट फ़्रेम पर भी एक कीफ़्रेम ऐड करूँगा ताकि फ्रेम 1 और फ्रेम 33 पर हेयर ड्रॉइंग बिल्कुल एक जैसी रहे। इसके बाद मैं फ्रेम 5 पर जाऊँगा और वहाँ एक कीफ़्रेम ऐड करूँगा।
😘
इसके बाद मैं बालों की वेक्टर ड्रॉइंग को हमारी रफ पोज़ के साथ मैच करूँगा। इसे आसान और ज़्यादा सटीक बनाने के लिए मैं आउटलाइन मोड ऑन करूँगा, जिससे अलाइन करते समय स्ट्रक्चर साफ़ दिखाई देता है। एक बार यह हो जाने के बाद, हम फिर से हेयर सिंबल के अंदर फ्रेम 9 वाली अगली पोज़ पर जाएँगे। वहाँ मैं एक नया कीफ़्रेम ऐड करूँगा और फिर उस फ्रेम की रफ पोज़ को फॉलो करते हुए बालों की ड्रॉइंग को एडजस्ट करूँगा। यही सेम प्रोसेस हम फ्रेम 13 पर भी दोहराएँगे। अब फ्रेम 15 के बाद से हेयर ड्रॉइंग्स रिपीट होने लगती हैं, इसलिए हर बार दोबारा ड्रॉ करने के बजाय हम कीफ़्रेम 15 से आगे तक बालों की ड्रॉइंग को कॉपी-पेस्ट करके पूरा साइकल पूरा कर सकते हैं। इसके बाद मैं हर एक कीफ़्रेम को ध्यान से चेक करूँगा और जहाँ ज़रूरत हो वहाँ छोटे-मोटे एडजस्टमेंट करूँगा, ताकि मूवमेंट स्मूथ और नैचुरल लगे।
यह सब हो जाने के बाद, चलिए एनीमेशन को प्ले करके देखते हैं कि अभी तक कैसा लग रहा है। तो इस तरह आप प्रोफ़ाइल व्यू में वॉक साइकिल एनीमेट कर सकते हैं। यह आपके कैरेक्टर को ज़िंदगी देने का एक सिंपल और इफेक्टिव तरीका है। लेकिन यहाँ बात ख़त्म नहीं होती, इसका एक नेक्स्ट लेवल भी है। आप ड्रॉइंग्स के अंदर भी मोशन ऐड कर सकते हैं, जिससे वॉक एनीमेशन और भी ज़्यादा सटल, स्मूथ और रियलिस्टिक बन जाता है। इसके लिए सबसे पहले सभी कीफ़्रेम्स को सेलेक्ट करें और सिंपली एक क्लासिक ट्वीन ऐड कर दें।
अब क्लासिक ट्वीन ऐड करने के बाद, आप देखेंगे कि कुछ सिंबल्स फ्रेम्स के बीच में टूटे हुए या ग्लिच करते हुए नज़र आ सकते हैं। यह नॉर्मल है और हम इसे आसानी से ठीक कर सकते हैं, इसके लिए हमें उन इन-बिटवीन फ्रेम्स के अंदर ड्रॉइंग्स को आपस में मैच करना होगा। जहाँ भी ज़रूरत पड़े, आपको सिंबल्स के अंदर क्लासिक ट्वीन या शेप ट्वीन भी ऐड करनी होगी। चलिए अब राइट हैंड की एनीमेशन को ठीक करते हैं। इसके लिए हम सबसे पहले राइट हैंड सिंबल के अंदर जाएँगे और सभी कीफ़्रेम्स के बीच एक क्लासिक ट्वीन ऐड करेंगे। मान लीजिए फ्रेम 5 पर कोई ग्लिच दिखाई देता है, तो ऐसे में हम बाइसेप सिंबल के अंदर एंटर करेंगे।
😘
वहाँ सिंपली एक कीफ़्रेम ऐड कर दें। अब फ्रेम 5 और उसके अगले कीफ़्रेम के बीच एक शेप ट्वीन ऐड करें। एनीमेशन को प्ले करके देखें और अगर आपको लगे कि बाइसेप सच में मूव कर रहा है, तो उन स्पेसिफ़िक कीफ़्रेम्स के बीच शेप ट्वीन ऐड करें। लेकिन अगर कोई ज़्यादा मूवमेंट नज़र नहीं आ रहा है, तो उसे वैसे ही छोड़ सकते हैं। बिना वजह ट्वीन लगाने की ज़रूरत नहीं है। यही प्रोसेस पूरे एनीमेशन में दोहराएँ। पूरी टाइमलाइन को ध्यान से चेक करें और जहाँ भी बाइसेप शेप मूव कर रहा हो, वहाँ शेप ट्वीन ऐड करें।
और बस इतना ही। अब आप देख सकते हैं कि कोई ग्लिच नहीं है और एनीमेशन स्मूथ लग रहा है। अब यही सेम प्रोसेस हम लेफ्ट हैंड के लिए भी करेंगे। मूवमेंट को ध्यान से देखें और जहाँ भी बाइसेप मूव कर रहा हो, वहाँ शेप ट्वीन ऐड करें। हम यहाँ शेप ट्वीन इसलिए इस्तेमाल कर रहे हैं क्योंकि बाइसेप एक रॉ शेप है, कोई सिंबल नहीं। अगर यह सिंबल होता, तो हम क्लासिक ट्वीन इस्तेमाल करते।
यह सब हो जाने के बाद, सभी सिंबल्स से बाहर आएँ और सभी कीफ़्रेम्स के बीच क्लासिक ट्वीन ऐड करें। अब दोनों हाथों की एनीमेशन क्लीन और स्मूथ हो चुकी है।
अब अगला स्टेप है लेफ्ट लेग की डिस्टॉर्शन को ठीक करना। फ्रेम नंबर 14 पर मैंने देखा कि पैर थोड़ा डिसलोकेट हो रहा है। इसे ठीक करने के लिए, सबसे पहले मैं लेफ्ट लेग लेयर पर फ्रेम 13 से 17 तक कीफ़्रेम्स ऐड करूँगा। यही काम मैं लेफ्ट शू लेयर पर भी करूँगा, ताकि सब कुछ सिंक में रहे।
फ्रेम 14 पर, सबसे पहले मैं शू की पोज़िशन एडजस्ट करूँगा। उसके बाद लोअर लेग और शू दोनों को सेलेक्ट करके थोड़ा सा राइट साइड की ओर मूव करूँगा, ताकि मोशन दोबारा सही से अलाइन हो जाए। अब मुझे थाई ड्रॉइंग को ठीक करना है, तो इसके लिए मैं थाई लेयर पर एक कीफ़्रेम ऐड करूँगा, फिर थाई सिंबल के अंदर जाऊँगा और फ्रेम 14 पर थाई पैच लेयर पर भी एक कीफ़्रेम ऐड करूँगा। इसके बाद मैं नी की शेप को थोड़ा ट्वीक करूँगा, ताकि वह बेहतर तरीके से मैच करे।
यहाँ हमारा मकसद यह है कि लोअर लेग और थाई की आउटलाइन आपस में जितना हो सके उतना अच्छे से मैच करे, ताकि मूवमेंट के दौरान कोई अजीब डिस्टॉर्शन न दिखे। मैं फ्रेम 16 तक कीफ़्रेम्स भी ऐड करूँगा, और फिर फ्रेम 15 पर थाई की शेप को और रिफ़ाइन करूँगा, उसे रीपोज़िशन करूँगा और यह सुनिश्चित करूँगा कि वह लोअर लेग और शू के साथ स्मूथली अलाइन हो। आखिर में, मैं फ्रेम नंबर 16 के लिए भी यही क्लीनअप करूँगा, ताकि यह फिक्स पूरी तरह से कम्प्लीट हो जाए।
😘
अब अगला स्टेप है कैरेक्टर की लेफ्ट पैंट को ठीक करना, जो फ्रेम 10 के बाद बॉडी शेप से मैच नहीं कर रही है। इसके लिए मैं लेफ्ट थाई लेयर पर अगले कीफ़्रेम तक सभी फ्रेम्स में कीफ़्रेम्स ऐड करूँगा और हर फ्रेम पर शेप को एडजस्ट करूँगा ताकि वह अपर बॉडी के साथ सही से मैच करे। साथ ही, मैं पेल्विस लेयर पर भी कीफ़्रेम्स ऐड करूँगा और वहाँ भी इसी तरह के एडजस्टमेंट करूँगा, ताकि पूरा मूवमेंट नेचुरल और फ्लोइंग लगे।
अब राइट थाई पर आते हैं। फ्रेम 14 से पैंट थोड़ी मिसमैच दिख रही है, तो मैं फ्रेम 14 से 16 तक कीफ़्रेम्स ऐड करूँगा और हर कीफ़्रेम पर पैंट की शेप और पोज़िशन को ट्वीक करूँगा, ताकि वह लोअर बॉडी पार्ट्स के साथ सही से मैच हो जाए। मैंने राइट थाई के शुरुआती कुछ फ्रेम्स में भी एक इश्यू नोटिस किया है, जहाँ पैंट की शेप पर थोड़ा और काम करने की ज़रूरत है। इसलिए मैं राइट थाई सिंबल के अंदर जाऊँगा, फ्रेम नंबर 2 पर एक कीफ़्रेम ऐड करूँगा और पैंट ड्रॉइंग को एडजस्ट करूँगा। यही सेम एडजस्टमेंट मैं फ्रेम 3 और 4 पर भी करूँगा।
यहाँ नी की ड्रॉइंग अचानक दिखाई दे रही है, जबकि उसे फ्रेम 2 से ही शुरू होना चाहिए, तो मैं उस इश्यू को भी फिक्स कर दूँगा। अब हमने एनीमेशन से सारे जर्क्स और ग्लिचेस हटा दिए हैं।
वॉक साइकिल को रिपीट करने के लिए, बस मेन टाइमलाइन पर और फ्रेम्स ऐड करें और इनर एनीमेशन को फ्रेम 65 तक कॉपी-पेस्ट कर दें। क्योंकि हमने पूरी एनीमेशन को कॉपी किया है, आई ब्लिंक एनीमेशन भी रिपीट हो रही है, जो हम नहीं चाहते। इसे अवॉइड करने के लिए, मैं सिर्फ हेड सिंबल लेयर को सेलेक्ट करूँगा और सिंबल को सिंक्रोनाइज़ करूँगा, ताकि ब्लिंक एनीमेशन सिर्फ एक बार ही हो और ज़्यादा रियलिस्टिक लगे।
और बस इतना ही, हमारी प्रोफाइल व्यू या साइड एंगल वॉक साइकिल तैयार है। उम्मीद है आपको यह ट्यूटोरियल हेल्पफुल लगा होगा और आपने कैरेक्टर एनीमेशन के बारे में कुछ नया सीखा होगा। अगले ट्यूटोरियल में हम थ्री-क्वार्टर एंगल वॉक साइकिल ड्रॉ और एनीमेट करना सीखेंगे। देखने के लिए धन्यवाद, और मिलते हैं अगले वीडियो में।