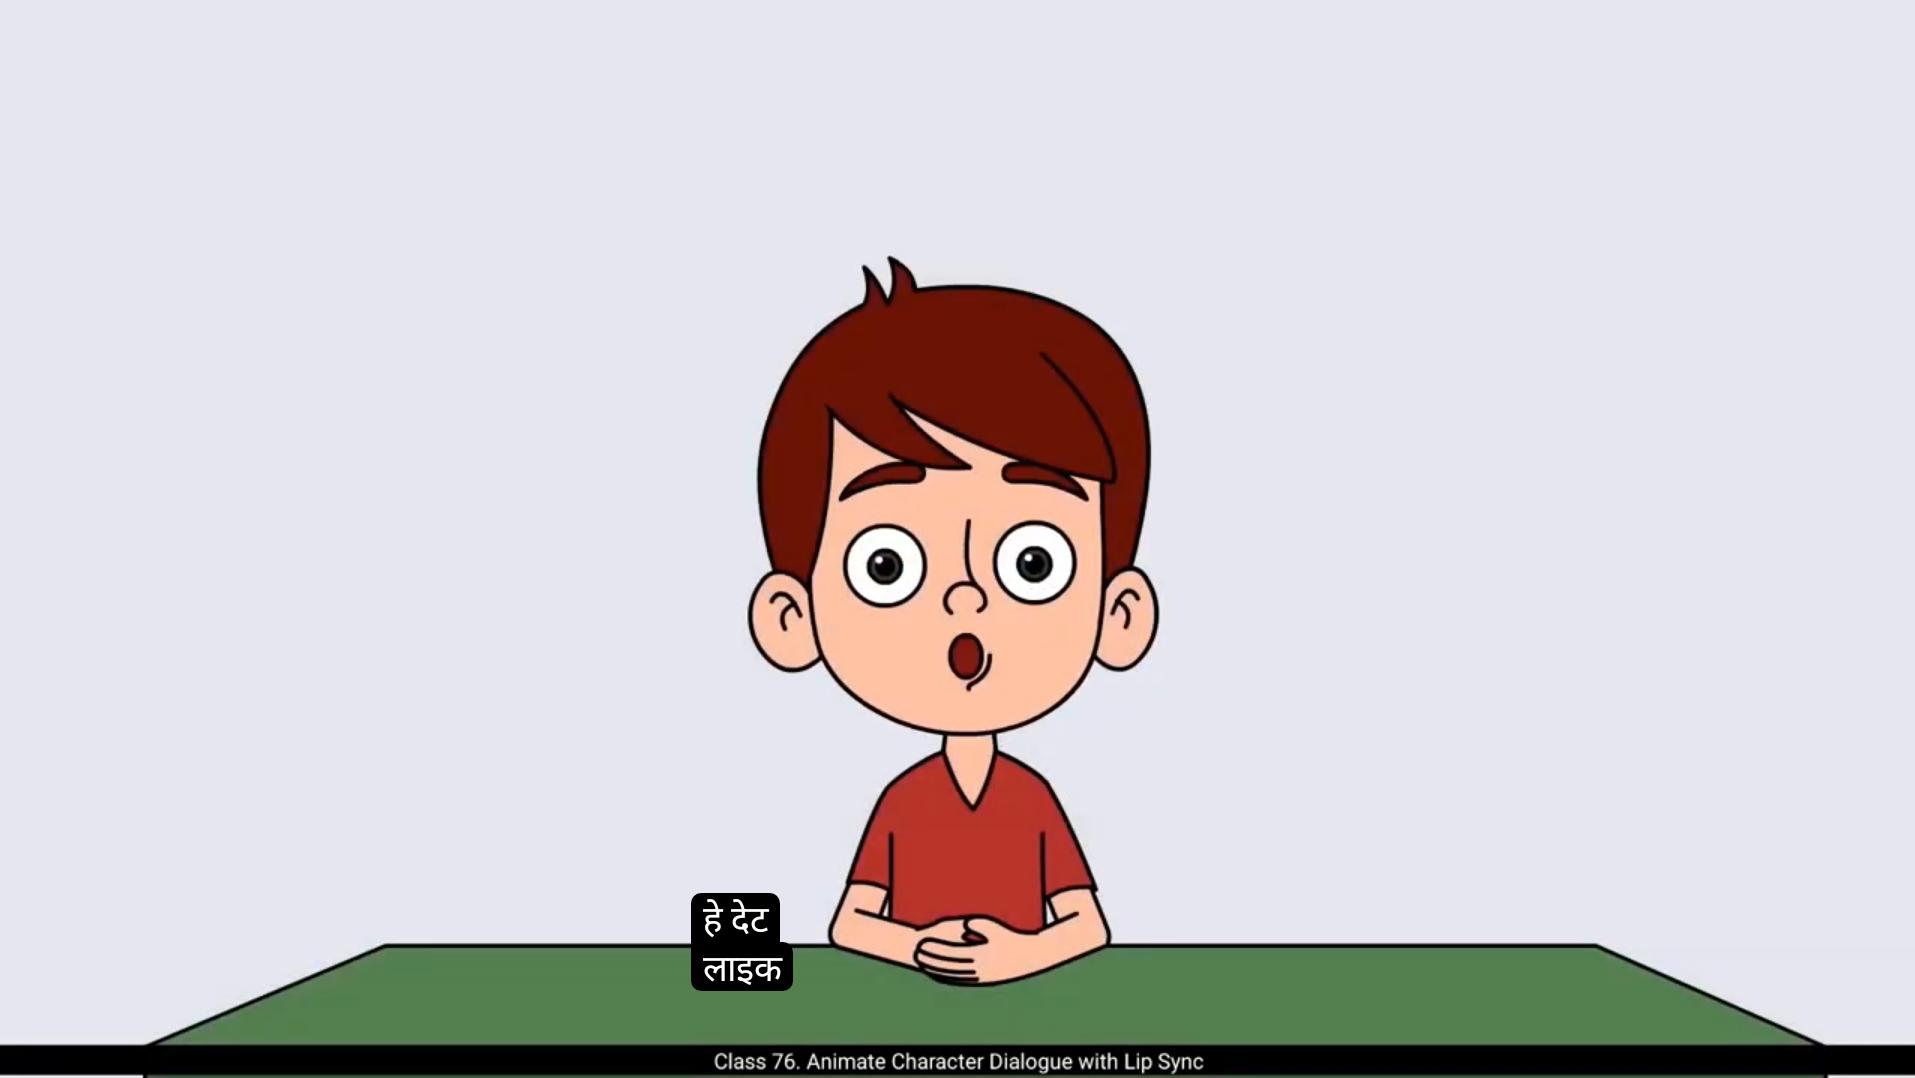
Hey there, ready to animate like a pro? Finish this course and you'll be creating magic like me.Hello students, today we're going to learn how to lip sync a dialogue while animating your character. In simple words, how to match the characters lip movements with the audio.For this tutorial, I'm using the same animation file we worked on in our last tutorial where we added an eye blink to our character Orvin.I'm doing this intentionally so we don't have to animate the other facial features again. This way we can focus completely on lip syncing.The first thing we need to do is add a new layer for our audio file.Now let's import the audio file.You can do this by pressing Control R on your keyboard.Adobe Animate generally supports Wave and MP3 audio formats. Between these two, WAV files are uncompressed and offer higher audio quality, while MP3 files are compressed, which makes them lighter and easier to handle. But for better quality of audio, I recommend using Wave audio format.So I'll select my audio file and open it.You'll notice the audio file now appears on the timeline right on the layer we created for it. Next we need to adjust the number of frames according to the length of our audio.For example, the audio I'm using is around 7 seconds long, so at 30 frames per second, we need to extend our timeline up to frame 210 to cover the entire length of the audio.Once you've placed your audio on the timeline, you should add a blank keyframe right where the audio ends. This marks the end of that audio clip.If you're working with multiple audio files in your animation, it's even more important to do this for each one. It prevents any unexpected overlapping or playback issues.Next, let's take a look at the Properties panel.
😘
You'll see a section called Sound under the Frame tab. Here you'll find a sync setting which gives you different options to control how the sound behaves. On the timeline. You'll see options like Event, Start, Stop, and Stream. Let's quickly understand the two main ones we use most often, Event and Stream.When we select event, the sound waits until the playhead reaches the frame where the audio is placed and then it starts playing. This option is best used for specific sounds like button clicks, pop-up effects or small actions.When we select Stream, the sound will play until the animation reaches the end of the timeline or a specific stop point. This is ideal for background music, dialogue, or sounds that should play continuously in the background of an animation. So in our case, since we're syncing A dialogue with our character Orvin, we'll choose the Stream option.Let's test the audio. If you press Enter on your keyboard, you'll be able to hear the audio play along the timeline.Hey there, ready to animate like a pro? Finish this course and you'll be creating magic like me.To start with the actual lip sync process, we first need to make sure that all the frames inside our character and head symbols match the length of the main timeline.First, double Click to enter the Orvin front symbol.Inside this we'll insert frames until frame 210, just like we did on the main timeline.Next, enter the head symbol.We'll insert frames inside the head symbol till frame 210 as well.After that we'll add a new layer inside the head symbol and on this layer we'll insert the same audio file again.
😘
To do this, go to the Properties panel and in the sound section simply select the audio file we've already imported. This makes it easy to hear the audio while working inside the head symbol without depending on the main timeline.Now, since we're going to animate only the jaw movement for the lip sync, we'll lock all the other layers inside the head symbol.Then select the Jaw symbol. With the jaw symbol selected, look over to the Properties panel under the Object tab. Here you'll find a section called Looping. In this section you'll see an option named Frame Picker. Go ahead and select that.The frame picker is a super useful tool for lip sync because it allows you to easily choose from different mouth shapes that are already created inside your jaw symbol. We'll use this to match mouth shapes with the sounds in our audio, for example.Inside our jaw symbol, we've already created different mouth shapes or drawings like happy lips, sad lips.Now when I select the jaw symbol and select frame on the timeline where I want to change the mouth shape, then head over to the frame picker and click on the thumbnail of the mouth drawing I want. The moment I do that, that drawing appears on the timeline as a keyframe. It's super quick and makes selecting the right mouth shape for each sound very straightforward.If you're using an older version of animate, you might not have this frame picker feature.In that case, you would have to manually add a keyframe on the timeline, then copy and paste that particular frame of the drawing you want to show. This frame picker tool is available in the latest versions of Adobe Animate CC.Next, right click on the audio layer in the timeline, then go to properties.
😘
Here I'll change the layer height to 300%. This will enlarge the audio layer, making the audio waveform much clearer and easier to read.Now, before we start adding any lip drawings, it's very important to listen to the audio carefully. Here the dialogue is said in a happy mood, so we'll stick to using only the happy mouth drawings we created earlier. Whenever you're working on lip sync, it's a great habit to keep a mirror in front of you. Say the dialogue out loud while watching your own lip movements, and you can pick the correct drawing accordingly.In our audio the character is saying 'hey there', so we will add related phonetic sound, lip drawings for 'hey'. I'll use the mouth shapes for the A, I and again A sounds.Then for 'there', we'll pick mouth drawings for the S, I and A sounds. Place these lip drawings just before each sound starts.Once you've added these, play the animation along with the audio and carefully check if the lip movements match the spoken words. If something feels off, adjust the frame positions and fine tune the timing until it looks right. Next, our character says, 'ready to animate like a pro'. Now, just like before, we'll add the mouth drawings according to the phonetic sounds in this sentence. Take it word by word, sound by sound, and place the matching mouth shapes from our happy lip drawing set.Keep checking in between play the audio and see if the mouth movements are syncing properly with the sound. If something feels off, adjust the drawing or tweak the timing. Lip sync is all about small, careful adjustments.Now, after Orvin says 'pro', there's a pause in the dialogue. During pauses like this, we should avoid keeping the mouth open, especially not in an O shape.So Right in the middle of that pause, I'll add the closed mouth drawing.
😘
Now let's move to the final part of our dialogue. This time Orvin is saying, 'finish this course and you'll be creating magic like me'.Just like we've been doing Add the mouth drawings according to the phonetic sounds in this sentence.And remember, don't go by the spelling of the words. The way a word is written isn't always how it sounds. It's a good habit to listen to the phonetic sound carefully, or better yet, watch your own lip movements in a mirror while speaking the line. Then pick the mouth drawing that best matches the actual sound being made.As you reach the end of the sentence, make sure you don't leave Orvin's mouth hanging open. Once the dialogue is finished, always switch to the closed mouth drawing. It makes the character look natural, as if they finish speaking.Now let's check the entire dialogue from start to end. Play the animation, watch the visuals closely, and listen to the audio. If you feel like something isn't syncing quite right, you can make adjustments anytime. Move the drawings around, change the mouth shapes, tweak the timing, whatever's needed to sync it perfectly.Once we're happy with the adjustments and everything feels smooth, let's play the animation one final time. This looks much better now.
And perfectly synced.Now that we've finished the lip sync, it's time to quickly add a little more life to our character by refining eye blink animation. We already have the blink animation frames ready from our earlier work. We'll simply copy those blink frames and paste them randomly along the timeline. This makes the character feel more alive instead of just staring blankly while talking.And that's it. Now let's quickly see the preview of our animation.
😘
Orvin is talking smoothly, lip syncing perfectly and blinking naturally. It's all coming together really well.So far in this video, we've learned how to do manual lip syncing in Adobe Animate. But Animate also offers another way to do lip sync using the automatic lip sync feature. This method is not really recommended for professional animation. That's because it's not as accurate as manual lip sync.
Even after using the automatic option, you'll usually need to go in and manually fix a lot of the frames. But still, it's good to know this method exists, so let's quickly walk through how it works. First, we'll go inside the character symbol and then enter the head symbol.Now select the Jaw symbol and look in the Properties panel. Under the Object tab. In the looping section, you'll find an option called Lip Syncing. Click on that and a dialog box will appear.Now this process has two main steps. Step one is to set up the visemes inside the graphic symbol. Visemes are basically the mouth shapes that represent different phonetic sounds. As you can see, Animate gives you around 12 standard mouth positions. What we need to do is assign our existing mouth drawings to the appropriate viseme.For example, for neutral, we'll assign the closed mouth drawing.And we continue assigning each viseme with the matching lip drawing from our symbol.Once that's done.Step 2 is to select the audio layer that we want to sync with, just pick the correct audio from the drop down and then click done.Now Animate will automatically generate the lip sync based on the audio. Let's preview it.
😘
Hey there, ready to animate like a pro? Finish this course and you'll be creating magic like me.As you can see, Animate has created the lip sync automatically, but if you watch closely you'll notice there are a few mismatched mouth drawings.The sink is not perfect and it will need some cleanup and manual adjustments, so in the end, if you're going to fix it manually anyway, then doing manual lip sync from the beginning using the frame picker gives you more control and better results.Let's do a quick comparison side by side of both previews, one with manual lip sync and one with automatic lip sync. Hey there, ready to animate like a pro? Finish this course and you'll be creating magic like me.You'll clearly spot the difference and then you can decide which method works best for you. After all, it depends on each animators workflow and preference.You can either go with automatic lip sync as a base and refine it.Or use the frame picker to manually set up the lip sync for more polished results.I hope you found this video helpful and learn something new about character animation. In the next tutorial, we'll be working on hand gestures, adding simple hand movements to make Orvin's animation even more expressive.Thank you so much for watching and I'll see you in the next video.
हेलो स्टूडेंट्स, आज हम सीखेंगे कि अपने कैरेक्टर को ऐनिमेट करते समय डायलॉग को लिप सिंक कैसे किया जाता है। सिंपल शब्दों में कहें तो, ऑडियो के साथ कैरेक्टर के लिप मूवमेंट को कैसे मैच किया जाए।
इस ट्यूटोरियल के लिए मैं वही ऐनिमेशन फ़ाइल इस्तेमाल कर रहा हूँ, जिस पर हमने पिछले ट्यूटोरियल में काम किया था, जहाँ हमने अपने कैरेक्टर ऑर्विन में आई ब्लिंक ऐड किया था।
मैं यह जानबूझकर कर रहा हूँ ताकि हमें बाकी फ़ेशियल फ़ीचर्स को दोबारा ऐनिमेट न करना पड़े। इस तरह हम पूरा फोकस सिर्फ लिप सिंकिंग पर कर पाएँगे।
सबसे पहला काम जो हमें करना है, वह है ऑडियो फ़ाइल के लिए एक नया लेयर ऐड करना। अब चलिए ऑडियो फ़ाइल इम्पोर्ट करते हैं।
आप अपने कीबोर्ड पर कंट्रोल + आर दबाकर ऐसा कर सकते हैं। एडोबी एनिमेट आमतौर पर WAV और MP3 ऑडियो फ़ॉर्मैट को सपोर्ट करता है।
इन दोनों में, WAV फ़ाइल अनकम्प्रेस्ड होती है और बेहतर ऑडियो क्वालिटी देती है, जबकि MP3 फ़ाइल कम्प्रेस्ड होती है, जिससे वह हल्की और इस्तेमाल में आसान होती है।
लेकिन बेहतर ऑडियो क्वालिटी के लिए, मैं आपको WAV ऑडियो फ़ॉर्मैट इस्तेमाल करने की सलाह देता हूँ।
तो मैं अपनी ऑडियो फ़ाइल सिलेक्ट करता हूँ और उसे ओपन करता हूँ। आप देखेंगे कि ऑडियो फ़ाइल अब टाइमलाइन पर उसी लेयर में दिखाई दे रही है, जो हमने इसके लिए बनाई थी।
अब अगला स्टेप है ऑडियो की लंबाई के हिसाब से फ्रेम्स को एडजस्ट करना। उदाहरण के लिए, जो ऑडियो मैं इस्तेमाल कर रहा हूँ, वह लगभग 7 सेकंड लंबा है।
तो 30 फ्रेम-पर-सेकंड के हिसाब से, हमें पूरी ऑडियो को कवर करने के लिए टाइमलाइन को फ्रेम 210 तक बढ़ाना होगा।
एक बार जब आप ऑडियो को टाइमलाइन पर रख दें, तो जहाँ ऑडियो खत्म होता है, वहीं एक ब्लैंक की-फ्रेम ज़रूर ऐड करें। यह उस ऑडियो क्लिप के एंड पॉइंट को मार्क करता है।
अगर आप अपनी ऐनिमेशन में एक से ज़्यादा ऑडियो फ़ाइल्स के साथ काम कर रहे हैं, तो हर एक के लिए यह करना और भी ज़रूरी हो जाता है।
इससे किसी भी तरह की अनचाही ओवरलैपिंग या प्लेबैक से जुड़ी प्रॉब्लम्स से बचा जा सकता है।
अब चलिए प्रॉपर्टीज़ पैनल पर एक नज़र डालते हैं।
😘
आपको फ़्रेम टैब के अंदर साउंड नाम का एक सेक्शन दिखाई देगा। यहाँ आपको सिंक नाम की एक सेटिंग मिलेगी, जो यह कंट्रोल करती है कि साउंड टाइमलाइन पर कैसे बिहेव करेगा।
टाइमलाइन में आपको Event, Start, Stop, और Stream जैसे ऑप्शन्स दिखेंगे। चलो जल्दी से उन दो मेन ऑप्शन्स को समझते हैं, जिन्हें हम सबसे ज़्यादा इस्तेमाल करते हैं – Event और Stream।
जब हम Event सिलेक्ट करते हैं, तो साउंड तब तक इंतज़ार करता है जब तक प्लेहेड उस फ्रेम तक नहीं पहुँच जाता जहाँ ऑडियो रखा गया है, और फिर वह प्ले होना शुरू करता है। यह ऑप्शन बटन क्लिक, पॉप-अप इफेक्ट्स या छोटे एक्शन साउंड्स के लिए सबसे अच्छा रहता है।
जब हम Stream सिलेक्ट करते हैं, तो साउंड तब तक प्ले होता रहता है जब तक ऐनिमेशन टाइमलाइन के एंड तक नहीं पहुँच जाता या किसी स्पेसिफिक स्टॉप पॉइंट पर नहीं रुकता। यह बैकग्राउंड म्यूज़िक, डायलॉग या ऐसे साउंड्स के लिए परफेक्ट है जो लगातार ऐनिमेशन के साथ चलते रहें।
तो हमारे केस में, क्योंकि हम अपने कैरेक्टर ऑर्विन के साथ डायलॉग को सिंक कर रहे हैं, इसलिए हम Stream ऑप्शन चुनेंगे।
अब चलिए ऑडियो को टेस्ट करते हैं। अगर आप अपने कीबोर्ड पर Enter प्रेस करेंगे, तो आप टाइमलाइन के साथ ऑडियो प्ले होता हुआ सुन पाएँगे।
हे वहाँ, प्रो की तरह ऐनिमेट करने के लिए तैयार हो? यह कोर्स पूरा करो और तुम भी मेरी तरह मैजिक क्रिएट करने लगोगे।
अब असली लिप सिंक प्रोसेस शुरू करने से पहले, हमें यह पक्का करना होगा कि हमारे कैरेक्टर और हेड सिंबल के अंदर के सारे फ्रेम्स मेन टाइमलाइन की लंबाई से मैच करें।
सबसे पहले, ऑर्विन फ्रंट सिंबल में जाने के लिए डबल क्लिक करें। इसके अंदर हम फ्रेम्स को फ्रेम 210 तक इंसर्ट करेंगे, बिल्कुल वैसे ही जैसे हमने मेन टाइमलाइन पर किया था।
अब हेड सिंबल के अंदर जाएँ। यहाँ भी हम फ्रेम्स को फ्रेम 210 तक इंसर्ट करेंगे।
इसके बाद, हेड सिंबल के अंदर एक नया लेयर ऐड करेंगे और इसी लेयर पर वही ऑडियो फ़ाइल दोबारा इंसर्ट करेंगे।
😘
यह करने के लिए प्रॉपर्टीज़ पैनल में जाएँ और साउंड सेक्शन के अंदर वही ऑडियो फ़ाइल सिलेक्ट करें जिसे हमने पहले इम्पोर्ट किया था। इससे हेड सिंबल के अंदर काम करते समय ऑडियो आसानी से सुनाई देगा, और हमें मेन टाइमलाइन पर निर्भर नहीं रहना पड़ेगा।
अब, क्योंकि हम लिप सिंक के लिए सिर्फ़ जॉ मूवमेंट ऐनिमेट करने वाले हैं, इसलिए हेड सिंबल के अंदर बाकी सभी लेयर्स को लॉक कर देंगे। इसके बाद जॉ सिंबल को सिलेक्ट करें।
जॉ सिंबल सिलेक्ट होने के बाद, प्रॉपर्टीज़ पैनल में ऑब्जेक्ट टैब के अंदर देखें। यहाँ आपको लूपिंग नाम का एक सेक्शन मिलेगा। इसी सेक्शन में आपको फ्रेम पिकर नाम का एक ऑप्शन दिखाई देगा। इसे सिलेक्ट करें।
फ्रेम पिकर लिप सिंक के लिए एक बहुत ही काम का टूल है, क्योंकि इसकी मदद से आप जॉ सिंबल के अंदर पहले से बने हुए अलग-अलग माउथ शेप्स को आसानी से चुन सकते हैं। हम इसी का इस्तेमाल ऑडियो के साउंड्स के साथ माउथ शेप्स को मैच करने के लिए करेंगे।
हमारे जॉ सिंबल के अंदर पहले से ही अलग-अलग माउथ शेप्स या ड्रॉइंग्स बनी हुई हैं, जैसे हैप्पी लिप्स, सैड लिप्स वगैरह। अब जब मैं जॉ सिंबल को सिलेक्ट करता हूँ और टाइमलाइन पर उस फ्रेम को चुनता हूँ जहाँ मुझे माउथ शेप बदलनी है, फिर फ्रेम पिकर में जाकर जिस माउथ ड्रॉइंग की ज़रूरत है उस थंबनेल पर क्लिक करता हूँ, तो तुरंत वही ड्रॉइंग टाइमलाइन पर कीफ्रेम के रूप में दिखाई देने लगती है। यह तरीका बहुत तेज़ है और हर साउंड के लिए सही माउथ शेप चुनना काफी आसान बना देता है।
अगर आप एडोबी ऐनिमेट का कोई पुराना वर्ज़न इस्तेमाल कर रहे हैं, तो हो सकता है आपके पास यह फ्रेम पिकर फ़ीचर न हो। ऐसे केस में आपको टाइमलाइन पर मैन्युअली कीफ्रेम ऐड करना पड़ेगा, फिर जिस ड्रॉइंग की ज़रूरत है उस फ्रेम को कॉपी करके पेस्ट करना होगा। फ्रेम पिकर टूल एडोबी ऐनिमेट CC के लेटेस्ट वर्ज़न में अवेलेबल है।
अब टाइमलाइन में ऑडियो लेयर पर राइट क्लिक करें और फिर प्रॉपर्टीज़ पर जाएँ।
😘
यहाँ मैं लेयर की हाइट को 300% पर सेट करूँगा। इससे ऑडियो लेयर बड़ी हो जाएगी और ऑडियो वेवफ़ॉर्म ज़्यादा क्लियर और पढ़ने में आसान दिखेगी। अब, किसी भी लिप ड्रॉइंग को ऐड करने से पहले, ऑडियो को ध्यान से सुनना बहुत ज़रूरी है। यहाँ डायलॉग हैप्पी मूड में बोला गया है, इसलिए हम सिर्फ़ वही हैप्पी माउथ ड्रॉइंग्स इस्तेमाल करेंगे जो हमने पहले बनाई थीं। जब भी आप लिप सिंक पर काम करें, तो सामने एक शीशा रखना बहुत अच्छी आदत है। डायलॉग को ज़ोर से बोलें और अपने खुद के होंठों की मूवमेंट देखें, इससे सही ड्रॉइंग चुनना आसान हो जाता है।
हमारे ऑडियो में कैरेक्टर “हे देयर” बोल रहा है, इसलिए “हे” के लिए हम उससे जुड़े फ़ोनेटिक साउंड्स की लिप ड्रॉइंग्स ऐड करेंगे। मैं A, I और फिर से A साउंड वाली माउथ शेप्स इस्तेमाल करूँगा।
इसके बाद “देयर” के लिए हम S, I और A साउंड की माउथ ड्रॉइंग्स चुनेंगे। इन लिप ड्रॉइंग्स को हर साउंड शुरू होने से थोड़ा पहले प्लेस करें।
एक बार ये सब ऐड हो जाए, तो ऑडियो के साथ ऐनिमेशन प्ले करें और ध्यान से देखें कि लिप मूवमेंट बोले गए शब्दों से मैच कर रही है या नहीं। अगर कुछ भी थोड़ा अटपटा लगे, तो फ़्रेम्स की पोज़िशन एडजस्ट करें और टाइमिंग को फाइन ट्यून करें जब तक सब सही न लगे।
इसके बाद हमारा कैरेक्टर कहता है, “रेडी टू ऐनिमेट लाइक अ प्रो”। अब पहले की तरह ही, इस सेंटेंस के फ़ोनेटिक साउंड्स के हिसाब से माउथ ड्रॉइंग्स ऐड करेंगे। हर शब्द को एक-एक करके, साउंड दर साउंड लें और हमारी हैप्पी लिप ड्रॉइंग सेट से मैच करती हुई माउथ शेप्स प्लेस करें।
बीच-बीच में ऑडियो प्ले करके चेक करते रहें कि माउथ मूवमेंट सही तरह से सिंक हो रही है या नहीं। अगर कुछ गड़बड़ लगे, तो ड्रॉइंग बदलें या टाइमिंग थोड़ी एडजस्ट करें। लिप सिंक पूरी तरह छोटे-छोटे और ध्यान से किए गए एडजस्टमेंट्स पर ही डिपेंड करता है।
अब, “प्रो” बोलने के बाद डायलॉग में एक छोटा सा पॉज़ आता है। ऐसे पॉज़ के दौरान मुँह खुला नहीं रखना चाहिए, ख़ासकर O शेप में तो बिल्कुल नहीं। इसलिए उस पॉज़ के बीच में मैं क्लोज़्ड माउथ ड्रॉइंग ऐड कर दूँगा।
😘
अब चलिए हमारे डायलॉग के फ़ाइनल पार्ट पर आते हैं। इस बार ऑर्विन कह रहा है, “फ़िनिश दिस कोर्स एंड यू’ll बी क्रिएटिंग मैजिक लाइक मी”। जैसे हम अब तक करते आए हैं, वैसे ही इस सेंटेंस के फ़ोनेटिक साउंड्स के हिसाब से माउथ ड्रॉइंग्स ऐड करें। और याद रखें, शब्दों की स्पेलिंग देखकर मत जाइए। कोई शब्द जैसा लिखा जाता है, ज़रूरी नहीं है कि वैसा ही सुनाई भी दे। बेहतर आदत यह है कि फ़ोनेटिक साउंड को ध्यान से सुनें, या उससे भी अच्छा, लाइन बोलते समय शीशे में अपने होंठों की मूवमेंट देखें। फिर उसी साउंड से सबसे ज़्यादा मैच करने वाली माउथ ड्रॉइंग चुनें।
जैसे ही आप सेंटेंस के एंड तक पहुँचें, ध्यान रखें कि ऑर्विन का मुँह खुला न रह जाए। डायलॉग खत्म होते ही हमेशा क्लोज़्ड माउथ ड्रॉइंग पर स्विच करें। इससे कैरेक्टर ज़्यादा नैचुरल लगता है, जैसे उसने बोलना पूरा कर लिया हो।
अब चलिए पूरे डायलॉग को शुरुआत से लेकर अंत तक चेक करते हैं। ऐनिमेशन प्ले करें, विज़ुअल्स को ध्यान से देखें और ऑडियो को सुनें। अगर आपको लगे कि कहीं कुछ ठीक से सिंक नहीं हो रहा है, तो आप कभी भी एडजस्टमेंट कर सकते हैं। ड्रॉइंग्स को आगे-पीछे करें, माउथ शेप्स बदलें, टाइमिंग ट्वीक करें, जो भी ज़रूरी हो ताकि सब परफेक्टली सिंक हो जाए।
जब हम सभी एडजस्टमेंट्स से खुश हो जाएँ और सब कुछ स्मूद लगे, तो एक बार ऐनिमेशन फ़ाइनल टाइम प्ले करें। अब यह काफ़ी बेहतर लग रहा है। और पूरी तरह से सिंक्ड भी।
अब जब लिप सिंक पूरा हो गया है, तो अपने कैरेक्टर में थोड़ी और जान डालने के लिए आई ब्लिंक ऐनिमेशन को रिफ़ाइन करने का समय है। हमारे पास पहले से ही ब्लिंक ऐनिमेशन फ़्रेम्स रेडी हैं। हम बस उन ब्लिंक फ़्रेम्स को कॉपी करेंगे और टाइमलाइन पर रैंडमली पेस्ट कर देंगे। इससे कैरेक्टर ज़्यादा ज़िंदा महसूस होता है, बजाय इसके कि वह बात करते समय बस खाली-खाली घूरता रहे।
और बस इतना ही। अब चलिए जल्दी से अपनी ऐनिमेशन का प्रीव्यू देखते हैं।
😘
ऑर्विन स्मूदली बात कर रहा है, लिप सिंक परफेक्ट है और ब्लिंक नैचुरली हो रहा है। सब कुछ बहुत अच्छे से एक साथ आ रहा है। अब तक इस वीडियो में हमने सीखा कि Adobe Animate में मैनुअल लिप सिंक कैसे किया जाता है। लेकिन Animate एक और तरीका भी देता है लिप सिंक करने का, जिसे ऑटोमैटिक लिप सिंक फीचर कहा जाता है। यह मेथड प्रोफेशनल ऐनिमेशन के लिए ज़्यादा रिकमेंडेड नहीं होता, क्योंकि यह मैनुअल लिप सिंक जितना एक्यूरेट नहीं होता। ऑटोमैटिक ऑप्शन इस्तेमाल करने के बाद भी, ज़्यादातर टाइम आपको बहुत सारे फ़्रेम्स मैनुअली जाकर ठीक करने पड़ते हैं। फिर भी, यह जानना अच्छा है कि ऐसा एक तरीका मौजूद है, तो चलिए जल्दी से समझ लेते हैं कि यह कैसे काम करता है।
सबसे पहले हम कैरेक्टर सिम्बल के अंदर जाएँगे और फिर हेड सिम्बल में एंटर करेंगे। अब जॉ सिम्बल को सेलेक्ट करें और प्रॉपर्टीज़ पैनल में देखें। ऑब्जेक्ट टैब के अंदर, लूपिंग सेक्शन में आपको “लिप सिंकिंग” नाम का एक ऑप्शन मिलेगा। उस पर क्लिक करें और एक डायलॉग बॉक्स ओपन हो जाएगा।
अब यह प्रोसेस दो मेन स्टेप्स में होता है। स्टेप वन है ग्राफ़िक सिम्बल के अंदर विज़ीम्स सेट करना। विज़ीम्स बेसिकली वो माउथ शेप्स होते हैं जो अलग-अलग फ़ोनेटिक साउंड्स को रिप्रेज़ेंट करते हैं। जैसा कि आप देख सकते हैं, Animate आपको लगभग 12 स्टैंडर्ड माउथ पोज़िशन्स देता है। हमें क्या करना है कि अपने पहले से बने माउथ ड्रॉइंग्स को सही विज़ीम्स के साथ असाइन करना है। जैसे कि न्यूट्रल के लिए हम क्लोज़्ड माउथ ड्रॉइंग असाइन करेंगे। और इसी तरह हर विज़ीम के लिए उसके मैचिंग लिप ड्रॉइंग को अपने सिम्बल से असाइन करते जाएँगे।
एक बार यह हो जाने के बाद, स्टेप टू आता है। इसमें हमें उस ऑडियो लेयर को सेलेक्ट करना है जिसके साथ हम लिप सिंक करना चाहते हैं। ड्रॉप-डाउन से सही ऑडियो चुनें और फिर डन पर क्लिक कर दें।
अब Animate ऑडियो के बेस पर ऑटोमैटिकली लिप सिंक जेनरेट कर देगा। चलिए इसका प्रीव्यू देखते हैं।
😘
हे देयर, रेडी टू ऐनिमेट लाइक अ प्रो? फ़िनिश दिस कोर्स और यू’ll बी क्रिएटिंग मैजिक लाइक मी। जैसा कि आप देख सकते हैं, Animate ने लिप सिंक ऑटोमैटिकली क्रिएट कर दिया है, लेकिन अगर आप ध्यान से देखें तो आपको कुछ माउथ ड्रॉइंग्स मिसमैच होती हुई नज़र आएँगी। सिंक पूरी तरह परफेक्ट नहीं है और इसमें थोड़ी क्लीनअप और मैनुअल एडजस्टमेंट की ज़रूरत पड़ेगी। तो आख़िर में, अगर आपको वैसे भी मैनुअली ठीक करना ही है, तो शुरुआत से ही फ्रेम पिकर का इस्तेमाल करके मैनुअल लिप सिंक करना ज़्यादा कंट्रोल देता है और बेहतर रिज़ल्ट्स मिलते हैं।
चलो अब दोनों प्रीव्यू का साइड बाय साइड एक क्विक कम्पैरिजन करते हैं। एक मैनुअल लिप सिंक के साथ और एक ऑटोमैटिक लिप सिंक के साथ। हे देयर, रेडी टू ऐनिमेट लाइक अ प्रो? फ़िनिश दिस कोर्स और यू’ll बी क्रिएटिंग मैजिक लाइक मी।
आप क्लियरली डिफ़रेंस देख पाएँगे और फिर डिसाइड कर सकते हैं कि कौन सा मेथड आपके लिए बेस्ट काम करता है। आख़िरकार यह हर ऐनिमेटर के वर्कफ़्लो और प्रेफ़रेंस पर डिपेंड करता है।
आप चाहें तो ऑटोमैटिक लिप सिंक को बेस की तरह यूज़ करके उसे रिफ़ाइन कर सकते हैं। या फिर ज़्यादा पॉलिश्ड रिज़ल्ट्स के लिए फ्रेम पिकर का इस्तेमाल करके मैनुअली लिप सिंक सेटअप कर सकते हैं।
मुझे उम्मीद है कि आपको यह वीडियो हेल्पफुल लगा होगा और आपने कैरेक्टर ऐनिमेशन के बारे में कुछ नया सीखा होगा। अगले ट्यूटोरियल में हम हैंड जेस्चर्स पर काम करेंगे, यानी ऑर्विन की ऐनिमेशन को और ज़्यादा एक्सप्रेसिव बनाने के लिए सिंपल हैंड मूवमेंट्स ऐड करेंगे। देखने के लिए बहुत-बहुत धन्यवाद और मैं आपसे अगले वीडियो में मिलूँगा।