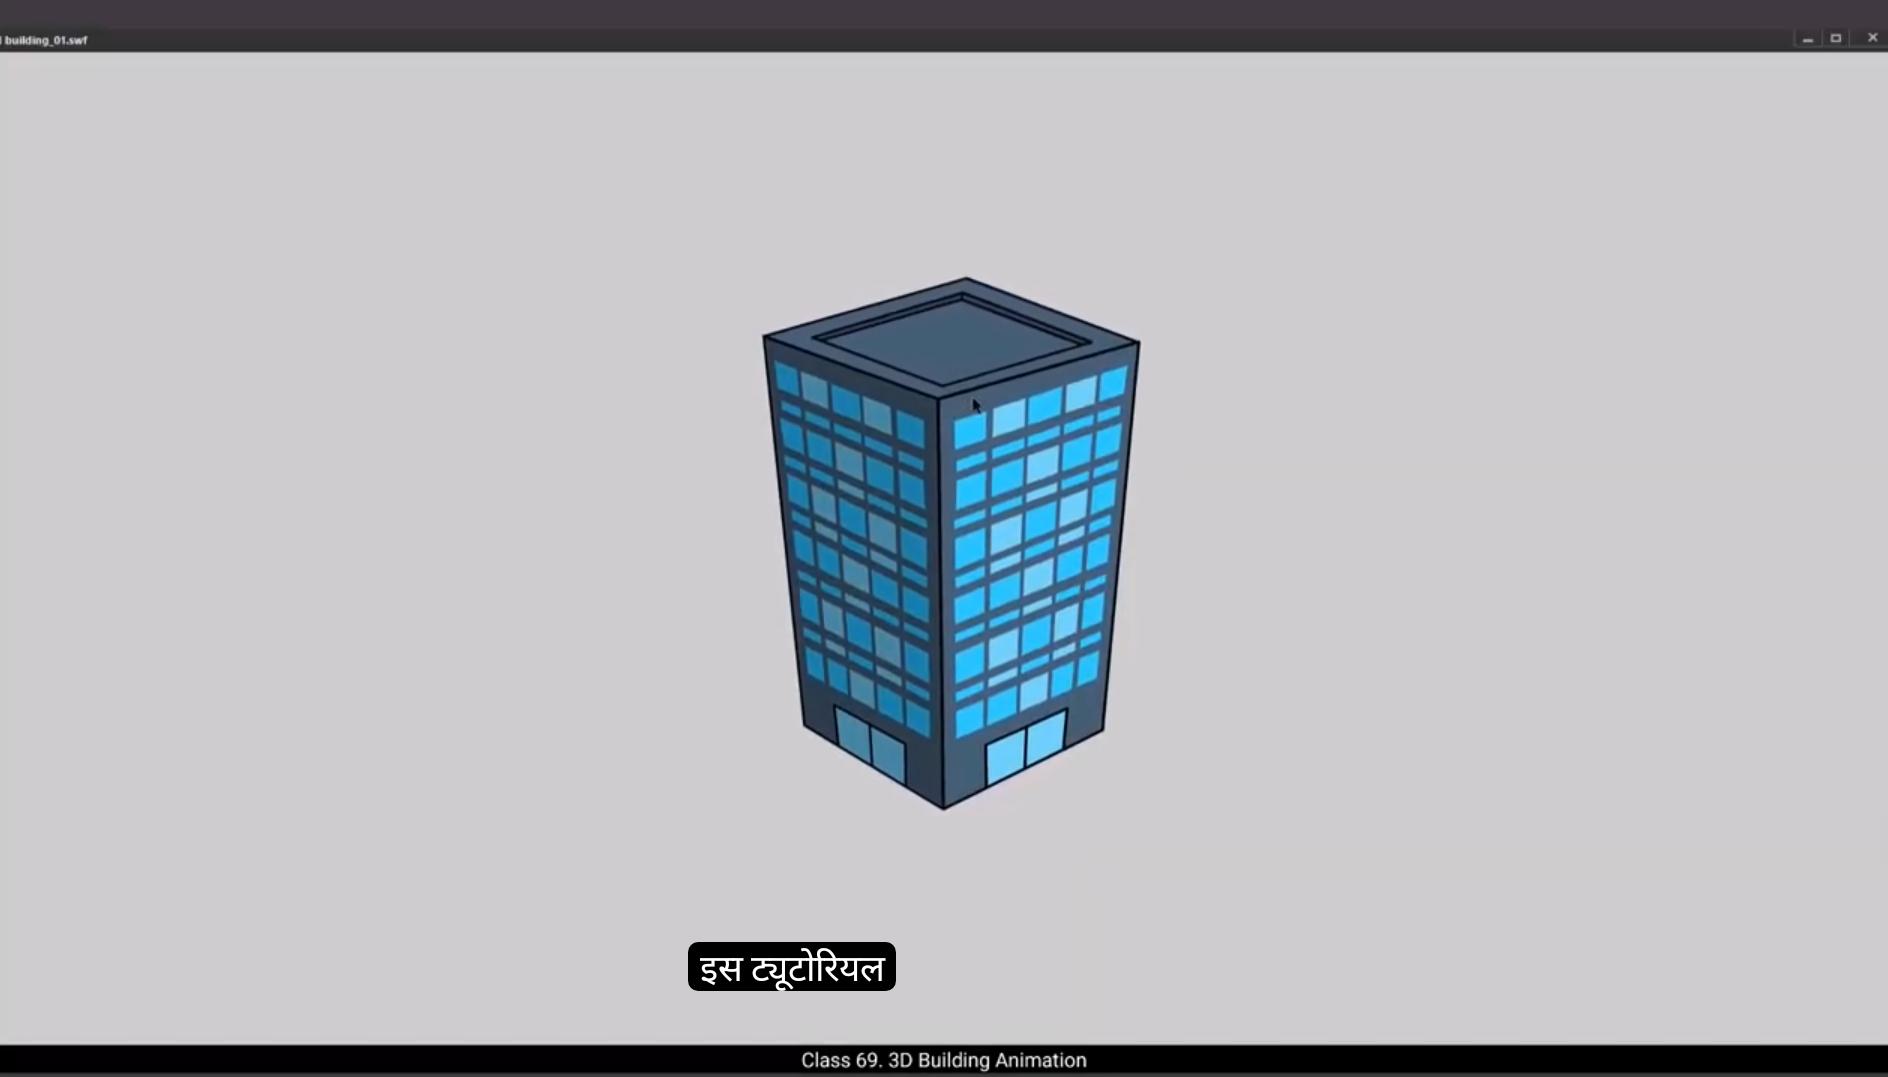
In this tutorial we are going to animate a 2D building in such a way that it looks 3D when animated.You can see that we have two layers of building ready here. 1 is called the side plane and the other is called the top plane.Now what we need to do is to separate the two sides of the building. For this, let's select both the sides of the building as seen in the video.We then right click on the selected sides and choose Distribute to Layers from the menu that appears.We can see that using Distribute 2 layers has created 2 layers for the two sides of the building which we have selected. So now let's select an earlier layer called Side plane and delete it by pressing the delete key on the keyboard. We now have 3 layers as seen in the video. Please make sure that you keep the top plane layer under the side plane layers as seen in the video.We do this because the shape of the top plane layer is going to be distorted quite a bit and it will be easier to manage it if the layer is under the other layer, you will notice that we have set the timeline for 100 frames already.
Done this by selecting frame 100 and pressing F5.We then select frame 50 on all the three layers and add a keyframe on each layer using F6 as seen in the video. We now get started by going to the top plane layer, but before that we lock all the layers except this one and switch the other two layers to wireframe mode. Please see the video to locate the wireframe switch. Now we go to the top plane, select it and start modifying the shape using the free transform tool. The shortcut is Q. Please make sure you match the adjustments and distortions of the shape as it is done in the video.
😘
Next, we adjust the side planes so that they fit in the top planes shape that we have modified.Once this is done, we switch off the wireframe.We switch on the onion skin option so that we can see both the keys clearly. Please see the video and follow it for the good results.We match the first key and the 50th keyframe.Once you've followed the video and matched the positions, we switch off the onion skin.Then we add a keyframe on frame 100 on all the layers using F6.We then adjust our building to the left side as seen in the video. We do this by using the free transform tool. The shortcut is Q.
Select some frames between the 1st and the last keyframes. Right click on anyone and choose Create Classic Tween from the menu that appears. A quick preview by pressing the Enter key shows us that the building can be seen rotating. The top plane seems to be distorting a bit too much.So we locked the two side plane layers. Then we go to frame 75, select it and add a keyframe using F6 and adjust the top plane exactly as seen in the video. The top plane is still distorting a bit while rotating, so we go to frame 75, select it and add a keyframe. Using F6. We adjust the top plane shape as seen in the video.We still have some distortion in the top lane, so we add a keyframe on frame 13 using F6 and adjust the top lane on this keyframe as seen in the video. We then add another keyframe on frame 37 and refine the top lane shape. Next, we do the same addition after frame 50 as seen in the video.
😘
We add a keyframe at frame 63 and adjust the top plane and then we go to frame 87 and do the same adjustments as seen in the video. We can do a quick preview now and see what our animation looks like.Now let's add a shadow effect. We go to the left plane and unlock the layer. We select the symbol and go to the tint at the right of our work area, which is in properties object colour effect. We select black in the colour box next to tint and on the tint slider we set a value of 20% as seen in the video. Next we go to frame 50, go back to tint and set the value at 30% here. And then we go to frame 100, go back to the tint slider and set the value To 40%. A quick preview by pressing the enter key will show us that a shadow effect is added to the left side of the building.
Let's now export an SWF and look at the preview properly.The building looks good.Hope you found this tutorial helpful. Thanks for watching.
इस ट्यूटोरियल में हम एक 2D बिल्डिंग को animate करने वाले हैं इस तरह कि वो एनीमेशन में 3D दिखाई दे। आप देख सकते हैं कि यहाँ बिल्डिंग की दो लेयर्स ready हैं। एक का नाम साइड प्लेन है और दूसरे का नाम टॉप प्लेन है। अब हमें बिल्डिंग के दोनों साइड्स को अलग करना है। इसके लिए हम वीडियो में दिखाए अनुसार बिल्डिंग के दोनों साइड्स को select करते हैं। फिर हम select किए हुए साइड्स पर right click करते हैं और menu में से Distribute to Layers चुनते हैं। हम देख सकते हैं कि Distribute to Layers इस्तेमाल करने से उन दोनों साइड्स के लिए 2 नई लेयर्स create हो चुकी हैं जिन्हें हमने select किया था। अब हम पुराने वाले Side Plane layer को select करके keyboard पर delete key दबाकर delete कर देते हैं। अब हमारे पास वीडियो में दिखाए अनुसार 3 लेयर्स हैं। कृपया ध्यान रखें कि Top Plane layer को Side Plane layers के नीचे रखें जैसा वीडियो में है। हम ऐसा इसलिए करते हैं क्योंकि Top Plane की shape काफ़ी distort होने वाली है और इसे manage करना आसान होगा अगर layer दूसरी layer के नीचे रहे। आप notice करेंगे कि टाइमलाइन पहले से 100 फ्रेम्स तक सेट की हुई है। ये हमने फ्रेम 100 select करके और F5 दबाकर किया है। फिर हम तीनों layers पर frame 50 select करते हैं और हर layer पर F6 से keyframe add करते हैं जैसा वीडियो में दिखाया गया है। अब हम Top Plane layer पर जाते हैं, लेकिन उससे पहले हम बाकी सभी layers को lock करते हैं और सिर्फ़ इस layer को unlock रखते हैं और बाकी दोनों layers को wireframe mode में set कर देते हैं। कृपया वीडियो में wireframe switch का location देखें। अब हम Top Plane को select करते हैं और free transform tool का इस्तेमाल करते हुए इसकी shape modify करना शुरू करते हैं। Shortcut है Q। कृपया shape की adjustment और distortion वीडियो में जैसे की गई है वैसी ही match करें।
😘
इसके बाद हम साइड प्लेन्स को adjust करते हैं ताकि वो टॉप प्लेन की modified shape में fit हो जाएँ। ये करने के बाद हम wireframe switch off कर देते हैं। अब हम onion skin option on करते हैं ताकि हम दोनों keys को clearly देख सकें। कृपया अच्छे result के लिए वीडियो देखें और follow करें। हम पहले key और 50वें keyframe को match करते हैं। जैसे ही आप वीडियो follow करके positions match कर लें, हम onion skin switch off कर देते हैं। फिर हम frame 100 पर सभी layers में F6 दबाकर keyframe add करते हैं। इसके बाद हम free transform tool का इस्तेमाल करके बिल्डिंग को वीडियो में दिखाए अनुसार left side adjust करते हैं। Shortcut है Q। अब हम first और last keyframe के बीच कुछ frames select करते हैं। किसी भी एक पर right click करके menu में से Create Classic Tween चुनते हैं। Enter key दबाकर एक quick preview से हमें दिखाई देता है कि बिल्डिंग rotate होती नज़र आ रही है। टॉप प्लेन थोड़ा ज़्यादा distort होता नज़र आता है। इसलिए हम side plane की दोनों layers को lock कर देते हैं। फिर हम frame 75 पर जाते हैं, उसे select करते हैं और F6 से keyframe add करते हैं और top plane को वीडियो में जैसी दिखती है वैसा adjust करते हैं। टॉप प्लेन rotation के दौरान अभी भी थोड़ा distort हो रहा है, इसलिए फिर से frame 75 पर जाकर उसको select करके F6 से keyframe add करते हैं और top plane की shape वीडियो में दिखाए अनुसार adjust करते हैं। अभी भी top plane में distortion है, इसलिए हम frame 13 पर F6 दबाकर keyframe add करते हैं और वीडियो में दिखाए अनुसार top plane को adjust करते हैं। इसके बाद हम frame 37 पर एक और keyframe add करके top plane की shape refine करते हैं। अगला addition हम frame 50 के बाद उसी तरह करते हैं जैसा वीडियो में दिखाया गया है।
😘
हम frame 63 पर एक keyframe add करते हैं और top plane को adjust करते हैं और फिर हम frame 87 पर जाकर वीडियो में दिखाई गई वही adjustments करते हैं। अब हम एक quick preview कर सकते हैं और देख सकते हैं कि हमारी animation कैसी लग रही है। अब चलिए एक shadow effect add करते हैं। हम left plane पर जाते हैं और layer unlock करते हैं। हम symbol select करते हैं और अपने work area के right side पर properties object colour effect में tint पर जाते हैं। हम tint के बगल वाली colour box में black select करते हैं और tint slider पर value 20% set करते हैं जैसा कि वीडियो में दिखाया गया है। इसके बाद हम frame 50 पर जाते हैं, tint पर वापस जाते हैं और यहां value 30% set करते हैं। और फिर हम frame 100 पर जाते हैं, tint slider पर वापस जाते हैं और value 40% set करते हैं। Enter key दबाकर एक quick preview दिखाता है कि building के left side पर shadow effect add हो गया है। अब चलिए एक SWF export करते हैं और preview properly देखते हैं। Building अच्छी लग रही है। उम्मीद है कि आपको यह tutorial helpful लगा। Thanks for watching.