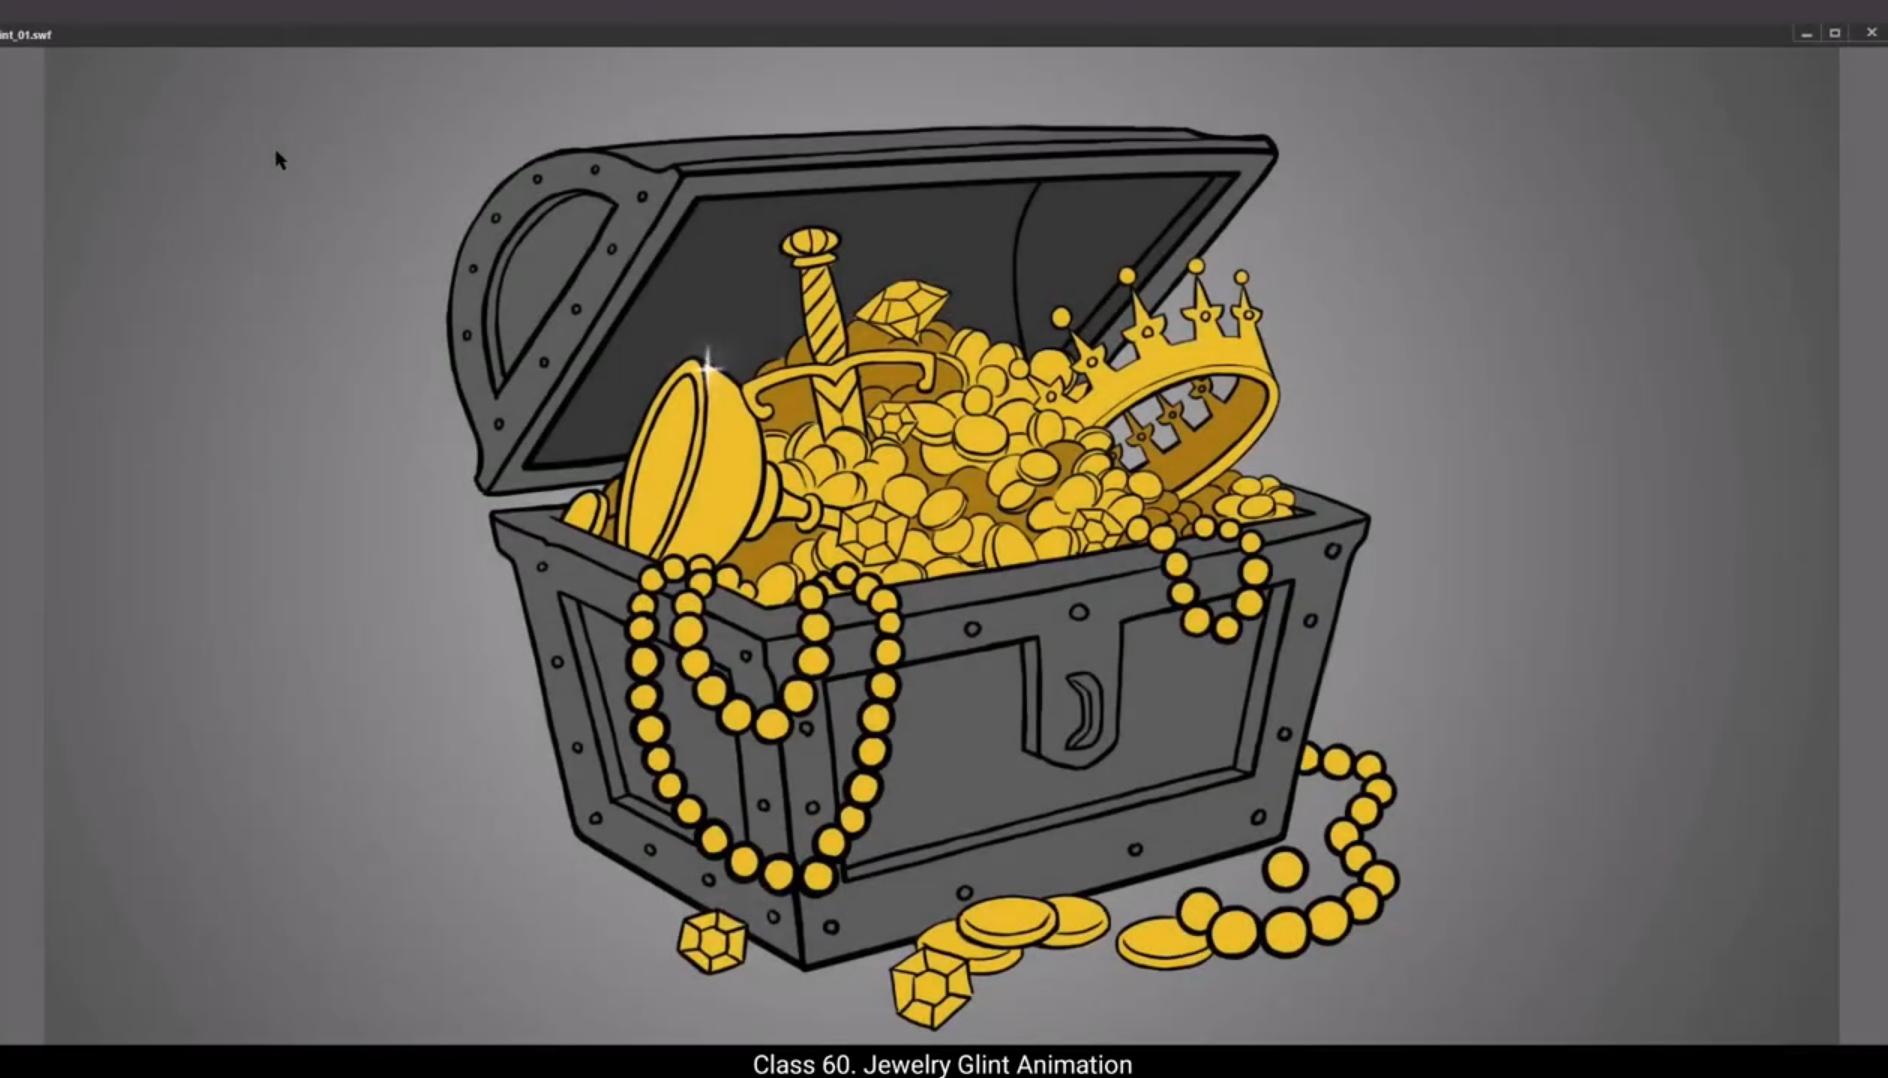
In this tutorial we are going to learn to animate the effect of a glint.As you can see, we have a treasure chest background here. We have 6 layers in all. One is the background and five are for animating the glint effect on various things in the treasure chest. We have already added 100 frames to our timeline as you can see in the video. So let's start animation.On layer one we go to frame 6, add a keyframe using the F6.Next, using the shortcut R for the Rectangle tool, we draw a rectangle and delete the outline.We change the fill to white. Now we are going to work on the shape of the rectangle and make it look more starry, like a four pointed star. We use a selection tool to modify the shape.We've turned our rectangle into a four pointed star.Now we select the shape, use the shortcut F8 to convert it into a symbol and name it glint.Then we enter the symbol by double clicking our shape. We add 20 frames to our timeline by selecting frame 20 and using the shortcut F5 to add frames as we've done earlier in our tutorial. We then move our first keyframe to frame 5 as seen in the video so that our animations first glint animation will start at frame 5. Now let's scale down our * shape using the Scale and Rotate tool. The shortcut for this is Control Alt S. we scale it down to 70%, we scale it once more to 70%. We need our shape to be little smaller so we still scale it down again to 60%. Next we add a keyframe on frame 7.We go back to the scale and rotate tool again and scale up our star shape 125% then using the free transform tool. The shortcut for this is Q. We rotate our shape a little. Please follow the video for how much rotation.
😘
We now add a keyframe on frame 9.Again we scale up the shape to 130% and rotate it just a little bit. Please follow the video again for how much rotation. Next we are going to use the same process we did till frame 11 only this time in the next few steps we are going to scale down our shape instead of scaling it up. Please follow the video for values in how much rotation.And finally, we close our animation on frame 19 by adding a blank keyframe using the shortcut F7. Now let's see what our animation looks like by pressing enter.This looks OK. We now exit the symbol by clicking on the Scene 1 tab like we've done in the earlier tutorials. Now let's move our glint animation to the channels on the left side of the treasure chest. We now scale up our animation 210%.We needed to be bigger, so we scale it up to 140% a second time.Our Glenn seems to be working well, but we need to stop it from playing in a loop. So we add a keyframe at say frame 24 and use the shortcut F7 to add a blank keyframe. This will stop our animation there. This way our first blend will play just once and not keep playing in a loop.Now we are going to use the same animation a few times over other places on the treasure. We tweak the timing a little so that all the glints don't look like same. Now we can select a random frame over the layer glint 1 and drag it to the upper layer glint 2.Remember to hold down the Alt key while dragging the frame to the upper layer.Let's keep this on frame 30. That means our copy of the glint animation will start at frame 30 on the layer glint 2. And let's stop it at frame 50 using F7 as we've done before.
😘
We now move our copied symbols to the crown on the treasure. We then scale it up to 130%.Now when we playback our animation using the enter key, we see that two glints are animated, one on the chalice and the second on the crown. We'll now animate our next two glints on the hilt of a sword and on the diamond next to it.We select our glint animation on the ground, copy it using Control C.Then we go to the upper layer of the glint three, select frame 55. We add a keyframe here using the shortcut F6, paste our animation in place by using Control Shift V, and finally we move our symbol over to the diamond as seen in the video. We now right click this symbol and from the drop down menu we choose duplicate symbol. We do this so that we can change the timing on the symbol.Not affecting the timing on our earlier symbols. We named the symbol Blink 1. Then we double click the symbol to enter it and make some changes to the animation so that it looks different from the others. Inside the symbol we select keyframe 11 and remove the keyframe using Shift F6. Now we select all the frames after this one and drag them back to the gap so that the gap created by deleting frame 11 is filled.This looks OK. We now exit the symbol by clicking the tab Scene 1 like we've done before several times. We select frame 75 and use F7 to stop the looping on this animation, again like we've done before. we right click on the diamond glint animation and from the drop down menu we choose copy and on the upper layer named Glint 4 we paste this copied animation in place by using Control Shift V. The other option is you could choose paste in place of the drop down menu on frame 65.
😘
That's like it is done in the video.Next we select the Symbol and move the position to the top of the hills of the sword as seen in the video then Go to frame 80 and stop the looping on this animation by using F7.Now we go down to the symbol on layer glint one, select any frame at random and drag it up to layer glint 5 on frame 19 as seen in the video.What we need to do now is extend our timeline a little to accommodate this last glint. We go to frame 120 and using F5 we add frames.We need to stop our animation a little earlier than the end of our timeline, which is now on frame 120. So we go to frame 105 and using F7 we stop our animation at this frame. We will now change the position of this last print and move it over to the gym outside the treasure hunt. We press enter to take a quick look at our animation.This looks fine. We will now add a little glue and blur to our glints which will make them look better and shinier. We select layer glint one, then we go to properties, frame filter and click on the plus sign. We select glow from the drop down menu and then we select white from the color palette. Then we select the high option from the quality menu and the strength will be 200. The values for the X&Y axis will be 50. After This We go back to the plus sign and choose Blur. We choose the high option on the quality menu. We take a quick look at how the glow and blur are showing on our glint animation. It looks like it would be better with a little less blur. So we go back and change the blur values on the X&Y axis and cut them down to 2 instead of four. Now we go to each symbol and repeat this process so that we'll have added glow and blur to all our glints. Here you can experiment with different values of glow and blur according to the background and what material you want the glints to shine on. Now we are done adding glows and blurs to all our glands, so let's press control enter and see what our animation looks like.Looks good.Hope you found this tutorial helpful. Thanks for watching.
इस ट्यूटोरियल में हम glint इफ़ेक्ट को animate करना सीखने वाले हैं। जैसा कि आप देख सकते हैं, हमारे पास यहाँ एक treasure chest का background है। हमारे पास कुल 6 layers हैं। एक background है और बाकी पाँच treasure chest के अलग-अलग objects पर glint इफ़ेक्ट animate करने के लिए हैं। हमने पहले से अपनी timeline में 100 frames ऐड कर दिए हैं जैसा कि वीडियो में दिख रहा है। तो चलिए animation शुरू करते हैं। Layer one पर हम frame 6 पर जाते हैं और F6 यूज़ करके एक keyframe ऐड करते हैं। इसके बाद R shortcut से Rectangle tool लेते हैं, एक rectangle ड्रॉ करते हैं और उसकी outline डिलीट कर देते हैं। हम fill को white में बदल देते हैं। अब हम rectangle के shape पर काम करने वाले हैं और उसे एक चार pointed star की तरह बनाने वाले हैं। Selection tool की मदद से हम shape को modify करते हैं। अब हमारा rectangle एक चार pointed star में बदल गया है।
अब हम shape को select करते हैं, F8 shortcut से उसे symbol में convert करते हैं और उसका नाम glint रखते हैं। फिर हम अपने shape पर double click करके symbol के अंदर enter करते हैं। हम timeline में frame 20 को select करते हैं और F5 यूज़ करके 20 frames ऐड करते हैं जैसा कि हमने पहले ट्यूटोरियल में किया था। फिर हम अपना पहला keyframe frame 5 पर move करते हैं ताकि हमारी पहली glint animation frame 5 से शुरू हो। अब हम Scale and Rotate tool यूज़ करके अपनी star shape को scale down करते हैं। इस tool का shortcut Control Alt S है। हम इसे 70% तक scale down करते हैं, फिर एक बार और 70% तक scale करते हैं। हमें shape थोड़ा और छोटा चाहिए, इसलिए हम इसे फिर से 60% तक scale down करते हैं। इसके बाद हम frame 7 पर एक keyframe ऐड करते हैं। हम वापस scale and rotate tool में जाते हैं और अपनी star shape को 125% तक scale up करते हैं, फिर Free Transform tool (shortcut Q) यूज़ करके shape को थोड़ा rotate करते हैं। Rotation की amount के लिए वीडियो फ़ॉलो करें।
😘
अब हम फ्रेम 9 पर एक कीफ्रेम ऐड करते हैं। फिर से हम शेप को 130% तक स्केल अप करते हैं और उसे थोड़ा सा रोटेट करते हैं। रोटेशन कितना करना है, इसके लिए कृपया वीडियो फॉलो करें। अगले स्टेप में हम वही प्रोसेस यूज़ करेंगे जो हमने फ्रेम 11 तक किया था, बस इस बार आने वाले कुछ स्टेप्स में हम अपनी शेप को स्केल अप करने की जगह स्केल डाउन करेंगे। रोटेशन की वैल्यूज़ के लिए वीडियो फॉलो करें। और आखिर में हम अपनी एनीमेशन को फ्रेम 19 पर बंद करते हैं और F7 शॉर्टकट से एक ब्लैंक कीफ्रेम ऐड करते हैं। अब एंटर प्रेस करके देखते हैं कि हमारी एनीमेशन कैसी लग रही है। यह ठीक लग रही है। अब हम सीन 1 टैब पर क्लिक करके सिंबल से बाहर निकलते हैं, जैसा कि हमने पहले ट्यूटोरियल में किया था। अब हम अपनी ग्लिन्ट एनीमेशन को ट्रेज़र चेस्ट के लेफ्ट साइड वाले चैनल्स पर मूव करते हैं। अब हम अपनी एनीमेशन को 210% तक स्केल अप करते हैं। हमें इसे और बड़ा चाहिए, इसलिए हम इसे दूसरी बार 140% तक स्केल अप करते हैं। हमारी ग्लिन्ट सही काम कर रही है, लेकिन हमें इसे लूप में प्ले होने से रोकना है। तो हम फ्रेम 24 पर जाते हैं और F7 से एक ब्लैंक कीफ्रेम ऐड करते हैं। इससे हमारी एनीमेशन वहीं रुक जाएगी। इस तरह हमारी पहली ग्लिन्ट सिर्फ एक बार चलेगी और लूप में बार–बार नहीं चलेगी। अब हम इसी एनीमेशन को ट्रेज़र के दूसरे हिस्सों पर कुछ बार और यूज़ करने वाले हैं। हम टाइमिंग में थोड़ा बदलाव करेंगे ताकि सारी ग्लिन्ट बिल्कुल एक जैसी न लगें। अब हम लेयर ग्लिन्ट 1 पर किसी भी रैंडम फ्रेम को सेलेक्ट करते हैं और उसे ऊपर वाली लेयर ग्लिन्ट 2 पर ड्रैग करते हैं। फ्रेम को ड्रैग करते समय Alt की दबाकर रखें। इसे फ्रेम 30 पर रखते हैं। इसका मतलब हमारी कॉपी वाली ग्लिन्ट एनीमेशन लेयर ग्लिन्ट 2 पर फ्रेम 30 से शुरू होगी। और इसे फ्रेम 50 पर F7 यूज़ करके रोक देंगे, जैसा कि हमने पहले किया था।
😘
अब हम अपने कॉपी किए गए सिम्बल्स को ट्रेज़र के क्राउन पर मूव करते हैं। फिर इसे 130% तक स्केल अप करते हैं। अब जब हम Enter की दबाकर एनीमेशन प्लेबैक करते हैं, तो हमें दिखता है कि दो ग्लिन्ट्स एनिमेट हो रही हैं — एक कप पर और दूसरी क्राउन पर। अब हम अपनी अगली दो ग्लिन्ट्स तलवार के हिल्ट और उसके पास वाले डायमंड पर एनिमेट करेंगे। हम ग्राउंड पर मौजूद ग्लिन्ट एनीमेशन को सेलेक्ट करके Control C से कॉपी करते हैं। फिर हम ऊपर वाली लेयर Glint 3 पर जाते हैं और फ्रेम 55 को सेलेक्ट करते हैं। यहाँ शॉर्टकट F6 से एक कीफ्रेम ऐड करते हैं, फिर Control Shift V से अपनी एनीमेशन को उसी जगह पेस्ट करते हैं, और आखिर में वीडियो में दिखाए अनुसार इस सिम्बल को डायमंड पर मूव करते हैं। अब हम इस सिम्बल पर राइट क्लिक करते हैं और ड्रॉप-डाउन मेन्यू से Duplicate Symbol चुनते हैं। ऐसा हम इसलिए कर रहे हैं ताकि टाइमिंग बदलने पर पहले वाले सिम्बल्स की टाइमिंग प्रभावित न हो। हम इस सिम्बल का नाम Blink 1 रखते हैं। अब हम सिम्बल को एंटर करने के लिए उस पर डबल क्लिक करते हैं और एनीमेशन में कुछ बदलाव करते हैं ताकि यह बाकी ग्लिन्ट्स से अलग दिखे। सिम्बल के अंदर हम कीफ्रेम 11 को सेलेक्ट करके Shift F6 से डिलीट करते हैं। अब इसके बाद वाले सभी फ्रेम्स को सेलेक्ट करते हैं और उन्हें पीछे ड्रैग करके उस गैप को भर देते हैं जो फ्रेम 11 हटाने से बना था। यह ठीक लग रहा है। अब हम Scene 1 टैब पर क्लिक करके सिम्बल से बाहर आ जाते हैं, जैसा कि हमने पहले भी किया है। हम फ्रेम 75 को सेलेक्ट करते हैं और F7 का उपयोग करके इस एनीमेशन की लूपिंग रोक देते हैं, जैसा कि पहले भी किया था। अब हम डायमंड ग्लिन्ट एनीमेशन पर राइट क्लिक करके Copy चुनते हैं और ऊपर वाली लेयर Glint 4 पर फ्रेम 65 पर जाकर Control Shift V से इसे उसी जगह पेस्ट करते हैं। दूसरा तरीका यह है कि ड्रॉप-डाउन मेन्यू से Paste in Place चुन सकते हैं।
😘
जैसा की वीडियो में किया गया है। अगला हम Symbol को सेलेक्ट करते हैं और वीडियो में दिखाए अनुसार उसकी पोज़िशन तलवार के हिल्ट के टॉप पर मूव करते हैं फिर Frame 80 पर जाते हैं और F7 यूज़ करके इस animation की looping को रोक देते हैं। अब हम नीचे layer glint one पर वाले symbol पर जाते हैं, कोई भी random frame सेलेक्ट करते हैं और वीडियो में दिखाए अनुसार उसे layer glint 5 पर Frame 19 पर ड्रैग करते हैं। अब हमें अपनी timeline को थोड़ा extend करना है ताकि ये last glint accommodate हो सके। हम Frame 120 पर जाते हैं और F5 यूज़ करके frames add करते हैं। हमें अपनी animation को timeline के end से थोड़ा पहले रोकना है, जो अब Frame 120 है। इसलिए हम Frame 105 पर जाते हैं और F7 यूज़ करके अपनी animation को इस frame पर रोक देते हैं। अब हम इस last glint की position change करते हैं और इसे treasure hunt के बाहर वाले gem पर मूव करते हैं। हम Enter दबाकर अपनी animation का quick लुक लेते हैं। ये ठीक लग रहा है। अब हम अपनी glints पर थोड़ी glow और blur add करेंगे जिससे ये ज़्यादा बेहतर और shiny दिखें। हम layer glint one को select करते हैं, फिर properties, frame filter पर जाते हैं और plus sign क्लिक करते हैं। हम drop down menu से glow select करते हैं और फिर color palette से white select करते हैं। फिर हम quality menu में से high option select करते हैं और strength को 200 रखते हैं। X&Y axis के values 50 रहेंगे। इसके बाद हम वापस plus sign पर जाते हैं और Blur choose करते हैं। हम quality menu में से high option चुनते हैं। हम जल्दी से देखते हैं कि glow और blur हमारी glint animation पर कैसे दिख रहे हैं। ऐसा लगता है कि थोड़ा कम blur बेहतर लगेगा। इसलिए हम वापस जाते हैं और Blur values को X&Y axis पर 4 की जगह 2 कर देते हैं। अब हम हर symbol पर जाते हैं और ये process repeat करते हैं ताकि हमारी सारी glints पर glow और blur add हो जाए। यहाँ आप background और जिस material पर glints shine करनी हैं, उसके हिसाब से glow और blur की values experiment कर सकते हैं। अब हम अपनी सारी glints पर glow और blur add कर चुके हैं, तो चलिए Control Enter प्रेस करके देखते हैं कि हमारी animation कैसी दिखती है। अच्छी लग रही है। उम्मीद है आपको ये tutorial मददगार लगा होगा। Thanks for watching.