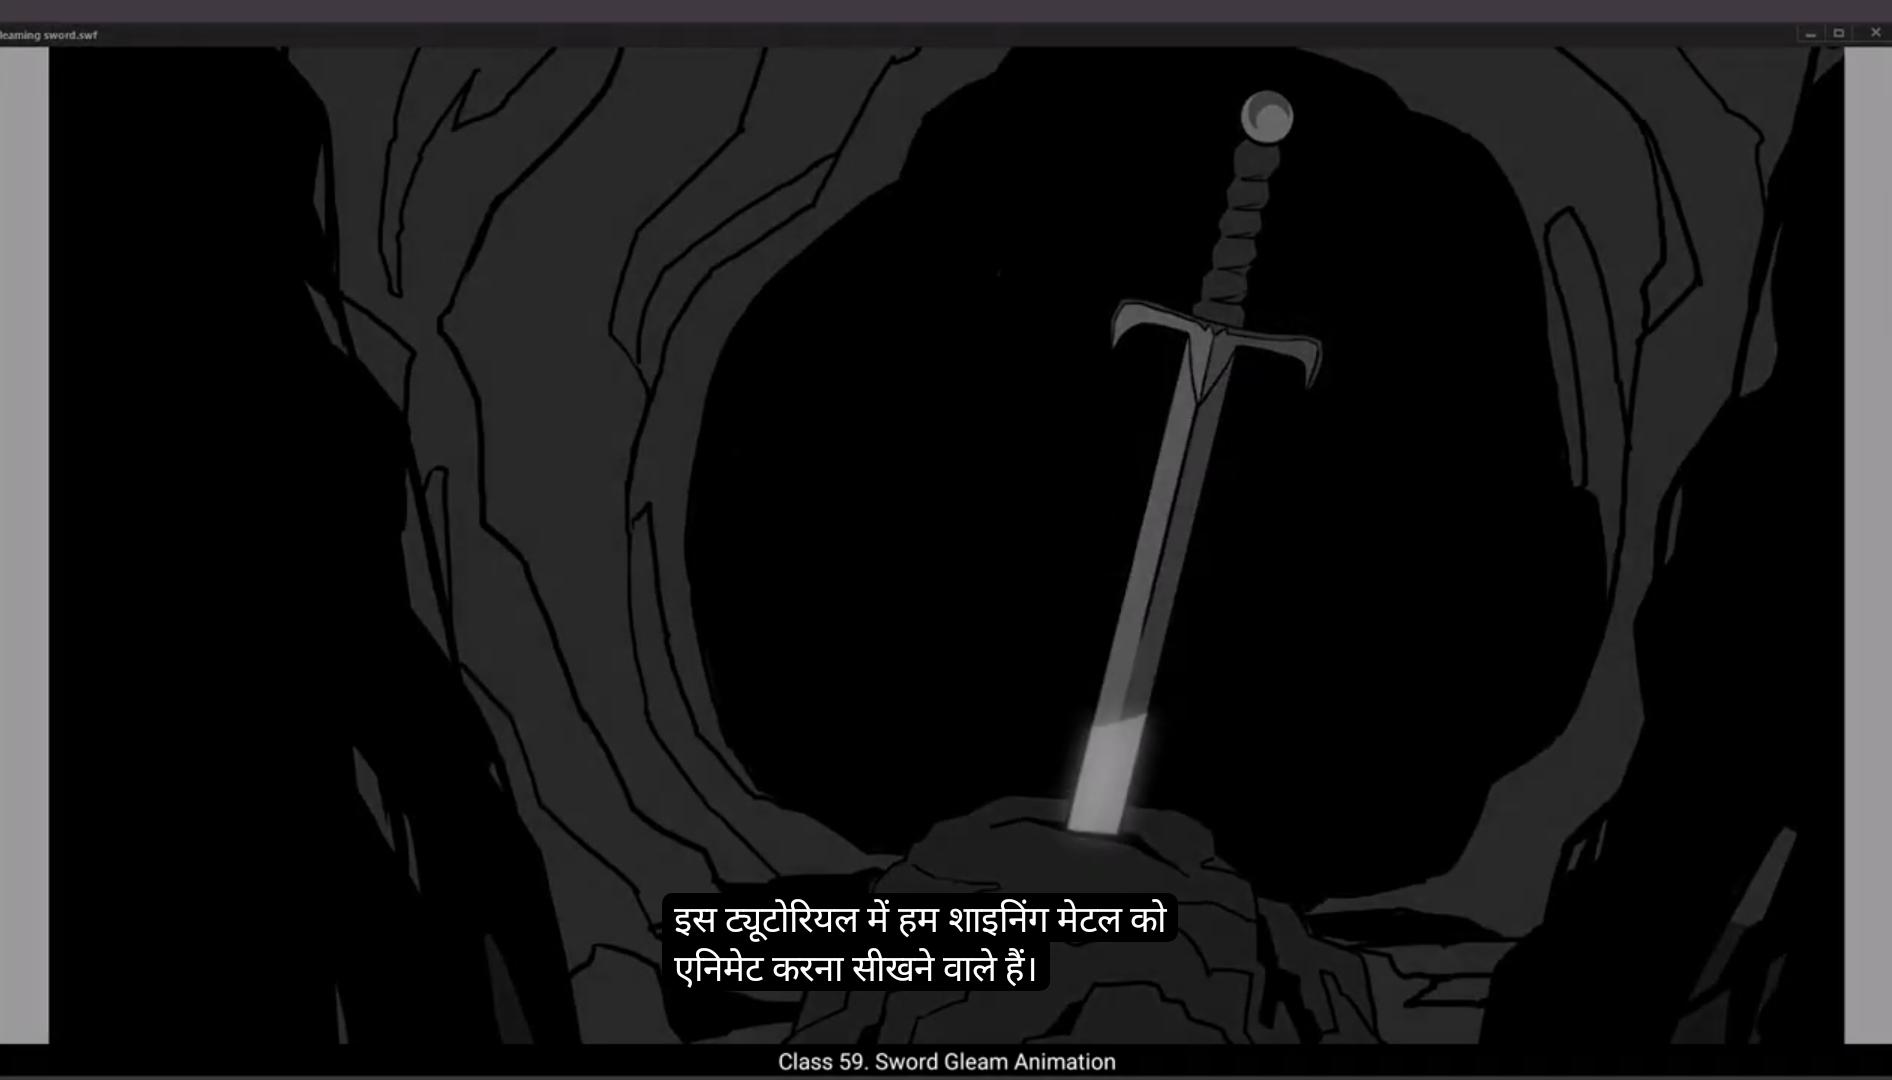
In this tutorial we are going to learn how to animate shining metal.As you can see, we have two layers here. 1 is a background with a sword, we'll call it BG and other is called Glimpse where we are going to animate the glam on the sword. We have already set our timeline here to 70 frames. We've estimated that our animation should not take longer than that.Now let's get started. Let the BG layer be locked as you can see in the video. Now we select the glam layer and draw a rectangle using the Rectangle tool. The shortcut for that is R, and we keep a fight filled to it by going to Properties, Object Color, and Style fill and choosing whites from the palette that will pop up once you click on the fill.Next we change the shape of the rectangle. Please follow the video here.Once this is done we right click on our shape and choose Convert to Symbol from the drop down menu. Or we can also use the shortcut key F8 to do this. Then we call this symbol Glimpse.After this is done, we go to the Glam layer, right click on it and go to Add Classic Motion Guide. From the drop down menu. You can now see a new layer added above the Glim layer and that has already been named Guide Glim.Our path or the guide for the movement of the glimpse is going to be on this layer.Now we lock our Glim layer, select the layer for the guide glimpse and go to the line tool. The shortcut for this is N. You can see that we are drawing a line next to our shape and increasing its thickness. For this we go to Properties, Object Colour and Style, Stroke size and change it on the slider. Then using the selection tool we curve our newly created guide into sort of a bow shape and place it so that the curve runs Over the blade of the sword. That's because we want our shine to be moving on the blade. Next, we unlock the Glim layer and switch on the Snap to Object tool.
😘
Please follow the video to locate it.Now we bring our shape close to the line and you will see that the shape snaps to the line automatically. This is how the Snap to object tool operates. Now we select the first keyframe on the glimmer and drag it to frame #5. This means our animation will start on frame #5. Then we select frame 20 and add a keyframe there.Now as you can see in the video, we bring our shape down the guide and rotate it a little using the free transform tool. The shortcut is Q.We add another keyframe on frame 35 and move our shape further down the guide and rotate it again exactly as seen in the video.Then we select frames in between the keys that we have made at random. Please follow the video here. Then we right click on any one of those frames and choose Create Classic Tween from the drop down menu.You can see that the shape is moving over the path or the guide that we have created.Next we select the gram layer and go to properties, frame filters and click on the plus sign. We choose Glow from the drop down menu. We select white from the color palette and the values for the X and the Y axis will be 10.We then keep the quality high and input a value of 130 in the strength box.The next thing we need to do is to add a mask to our animation so that the white glimpse is only seen passing over the metal blade of the sword.So we add a new layer and call it mask.Next we hide both the guide and the animation layers. For the time being, we are now going to create the mask. We start with drawing a rectangle. The shortcut for the rectangle tool is R Then we delete the outlines. We then choose a bright colour for the rectangle so that it stands out clearly from the background.Our colour is going to be blue here and the opacity will be 60%.
😘
We input these values right next to the fill box.Please follow the video. We now zoom in a bit and modify the rectangle so that it matches the shape of a blade exactly as you can see in the video.
We need to draw another rectangle to mask the cross guard and the rain guard of the sword as you can see in the video.
Now that this is done, the area where the blue mask is seen is the area where our moving limb will be visible.Then we unhide our glam animation layer and we drag it up so that it sits on the top of the guide layer. Please see the video. Then we select our mask layer, right click on it and click Mask from the drop down menu. We also hide the guide layer as seen in the video. We can now see the glimpse animate by pressing Enter. Now let's make few changes so that our glam shape slides over more of the sword.We go to frame #12 and add a keyframe by using F6.Then we move our glam shape more to the left so that it covers more of the blade.Go to Frame 5. Double Click to enter the symbol and use the Scale and Rotate tool. The shortcut is Control Alt S. And we scale it up to 120%.We then exit the symbol.We then, add a keyframe on frame 27 using F6 and then adjust the symbol. We then select the Glim layer and go to properties, Frame, filters and then the plus sign and choose blur from the drop down menu.We choose medium in the quality drop down menu. The values in the X&Y axis both will be two.
Now we double click on our glam shape to enter the symbol, then we go To the properties, objects Color and Style, then select the box next to the checkered square and input a value of 60%. This is a value for our alpha.
😘
Let's exit the symbol by clicking the Scene 1 tab as seen in the video.We go to properties, Frame Filters, glow and change the values for the X&Y axis to 30.Our animation looks OK, but we can tweak the timing to make it more interesting. So we select some in between frames as seen in the video. Then we go to properties, frame Tweening and in the Effects drop down menu we choose Classic Ease. Let's add a value of 70 here.Next we select some in between frames from keyframe 20 to keyframe 35 and go back to the classic ease box and input a value of 70.Now we can see what our animation looks like by pressing enter. Hope you Found this tutorial helpful. Thanks for watching.
इस ट्यूटोरियल में हम शाइनिंग मेटल को एनीमेट करना सीखने वाले हैं। जैसे आप देख सकते हैं, यहाँ हमारे पास दो लेयर्स हैं। एक बैकग्राउंड लेयर है जिसमें तलवार है, उसे हम BG कहेंगे और दूसरी Glimpse है जहाँ हम तलवार पर ग्लैम एनीमेट करेंगे। हमने यहाँ अपनी टाइमलाइन पहले से 70 फ्रेम्स तक सेट कर रखी है। हमने अंदाज़ा लगाया है कि हमारी एनीमेशन इस से ज़्यादा लंबी नहीं होगी। अब चलिए शुरू करते हैं। BG लेयर को लॉक रहने दीजिए जैसे आप वीडियो में देख सकते हैं। अब हम ग्लैम लेयर को सेलेक्ट करते हैं और रेक्टैंगल टूल का इस्तेमाल करके एक रेक्टैंगल ड्रॉ करते हैं। इसका शॉर्टकट R है, और हम प्रॉपर्टीज़, ऑब्जेक्ट कलर, स्टाइल फिल में जाकर फिल को व्हाइट चुनते हैं जो पैलेट पॉप अप होने पर दिखेगा। अब हम रेक्टैंगल की शेप बदलते हैं। कृपया यहाँ वीडियो को फ़ॉलो करें। जब यह हो जाए तो हम अपने शेप पर राइट क्लिक करते हैं और ड्रॉप डाउन मेन्यू से Convert to Symbol चुनते हैं। या हम यह काम शॉर्टकट F8 से भी कर सकते हैं। फिर हम इस सिम्बल को Glimpse नाम देते हैं। इसके बाद हम ग्लैम लेयर पर राइट क्लिक करके Add Classic Motion Guide पर जाते हैं। ड्रॉप डाउन मेन्यू से। अब आप देख सकते हैं कि Glim लेयर के ऊपर एक नई लेयर ऐड हो गई है जिसका नाम Guide Glim है। ग्लिम्प्स की मूवमेंट का हमारा पाथ या गाइड इसी लेयर पर होगा। अब हम Glim लेयर को लॉक करते हैं, guide glimpse वाली लेयर को सेलेक्ट करते हैं और लाइन टूल लेते हैं। इसका शॉर्टकट N है। आप देख सकते हैं कि हम अपने शेप के पास एक लाइन ड्रॉ कर रहे हैं और उसकी थिकनेस बढ़ा रहे हैं। इसके लिए हम प्रॉपर्टीज़, ऑब्जेक्ट कलर एंड स्टाइल, स्ट्रोक साइज में जाकर स्लाइडर से थिकनेस बदलते हैं। फिर सिलेक्शन टूल का इस्तेमाल करके हम अपने गाइड को कर्व करते हैं और उसे बो की शेप में बनाते हैं ताकि कर्व तलवार के ब्लेड के ऊपर से गुज़रे। क्योंकि हमें अपनी शाइन को ब्लेड पर मूव करता हुआ दिखाना है। अब हम Glim लेयर को अनलॉक करते हैं और Snap to Object टूल ऑन करते हैं।
😘
कृपया वीडियो को फ़ॉलो करें ताकि आप इसे खोज सकें। अब हम अपने शेप को लाइन के क़रीब लाते हैं और आप देखेंगे कि शेप अपने-आप लाइन पर स्नैप हो जाता है। इसी तरह Snap to Object टूल काम करता है। अब हम ग्लिमर पर पहला की-फ्रेम सेलेक्ट करते हैं और उसे फ्रेम #5 पर ड्रैग करते हैं। इसका मतलब है कि हमारी एनीमेशन फ्रेम #5 से शुरू होगी। फिर हम फ्रेम 20 सेलेक्ट करते हैं और वहाँ एक की-फ्रेम ऐड करते हैं। अब जैसा आप वीडियो में देख सकते हैं, हम अपने शेप को गाइड पर नीचे लाते हैं और फ्री ट्रांसफॉर्म टूल का इस्तेमाल करके उसे थोड़ा रोटेट करते हैं। इसका शॉर्टकट Q है। हम फ्रेम 35 पर एक और की-फ्रेम ऐड करते हैं और अपने शेप को गाइड पर और नीचे ले जाते हैं और उसे फिर से रोटेट करते हैं जैसे वीडियो में दिखाया गया है। फिर हम रैंडमली अपने बनाए हुए की-फ्रेम्स के बीच कुछ फ्रेम्स सेलेक्ट करते हैं। कृपया यहाँ वीडियो फ़ॉलो करें। फिर हम उन में से किसी भी फ्रेम पर राइट क्लिक करके ड्रॉप-डाउन मेन्यू से Create Classic Tween चुनते हैं। आप देख सकते हैं कि शेप उस पाथ या गाइड पर मूव कर रहा है जिसे हमने बनाया था। अब हम ग्राम लेयर सेलेक्ट करते हैं और प्रॉपर्टीज़, फ्रेम फ़िल्टर्स में जाकर प्लस आइकन पर क्लिक करते हैं। हम ड्रॉप-डाउन मेन्यू से Glow चुनते हैं। हम कलर पैलेट से व्हाइट चुनते हैं और X और Y एक्सिस के लिए वैल्यू 10 रखते हैं। हम क्वालिटी हाई रखते हैं और स्ट्रेंथ बॉक्स में 130 की वैल्यू डालते हैं। अब हमें अपनी एनीमेशन में मास्क ऐड करना है ताकि व्हाइट glimps सिर्फ़ तलवार के मेटल ब्लेड पर से गुज़रता हुआ दिखाई दे। तो हम एक नई लेयर ऐड करते हैं और उसे mask नाम देते हैं। अब हम गाइड और एनीमेशन लेयर दोनों को थोड़ी देर के लिए हाइड कर देते हैं। अब हम मास्क बनाने जा रहे हैं। हम एक रेक्टैंगल ड्रॉ करके शुरू करते हैं। रेक्टैंगल टूल का शॉर्टकट R है। फिर हम आउटलाइन डिलीट कर देते हैं। फिर हम रेक्टैंगल के लिए एक ब्राइट कलर चुनते हैं ताकि वो बैकग्राउंड से साफ़ दिखाई दे। हमारा कलर यहाँ ब्लू होगा और उसकी ओपेसिटी 60% होगी।
😘
हम इन वैल्यूज़ को फिल बॉक्स के ठीक सामने इनपुट करते हैं। कृपया वीडियो को फॉलो करें। अब हम थोड़ा ज़ूम इन करते हैं और रेक्टैंगल को मॉडिफाई करते हैं ताकि वह ब्लेड की शेप से बिल्कुल मैच करे, जैसा कि आप वीडियो में देख सकते हैं।
हमें एक और रेक्टैंगल ड्रॉ करना है ताकि वह क्रॉस गार्ड और रेन गार्ड को मास्क कर सके, जैसा कि वीडियो में दिखाया गया है।
अब जब यह हो गया है, जहाँ भी ब्लू मास्क दिखाई दे रहा है, वही इलाक़ा वह जगह होगी जहाँ हमारा मूविंग लिम्ब विज़िबल होगा। फिर हम अपने ग्लैम एनीमेशन लेयर को अनहाइड करते हैं और उसे ड्रैग करके गाइड लेयर के ऊपर ला देते हैं। कृपया वीडियो देखें। फिर हम अपने मास्क लेयर को सेलेक्ट करके उस पर राइट क्लिक करते हैं और ड्रॉप डाउन मेनू से Mask पर क्लिक करते हैं। हम गाइड लेयर को भी वीडियो में दिखाए अनुसार हाइड कर देते हैं। अब हम Enter दबाकर ग्लिंप्स को एनीमेट होते हुए देख सकते हैं।
अब चलिए कुछ चेंजेज़ करते हैं ताकि हमारा ग्लैम शेप तलवार के ऊपर और ज़्यादा स्लाइड करे। हम फ्रेम #12 पर जाते हैं और F6 से एक कीफ़्रेम ऐड करते हैं। फिर हम अपने ग्लैम शेप को थोड़ा लेफ्ट मूव करते हैं ताकि वह ब्लेड को ज़्यादा कवर करे।
फ्रेम 5 पर जाएँ। सिम्बल में एंटर करने के लिए डबल क्लिक करें और Scale and Rotate टूल का इस्तेमाल करें। शॉर्टकट है Control Alt S. और इसे 120% तक स्केल करें।
फिर हम सिम्बल से बाहर आ जाते हैं।
फिर हम फ्रेम 27 पर F6 से एक कीफ़्रेम ऐड करते हैं और सिम्बल को एडजस्ट करते हैं। फिर हम Glim लेयर को सेलेक्ट करते हैं और प्रॉपर्टीज़, Frame, filters में जाते हैं और प्लस साइन दबाते हैं और ड्रॉप डाउन मेनू से blur चुनते हैं। हम क्वालिटी ड्रॉप डाउन मेनू में से medium चुनते हैं। X और Y दोनों की वैल्यू दो होगी।
अब हम अपने ग्लैम शेप पर डबल क्लिक करके सिम्बल में एंटर करते हैं, फिर प्रॉपर्टीज़, objects Color and Style में जाते हैं, फिर चेकर्ड स्क्वायर के पास वाले बॉक्स को सेलेक्ट करते हैं और 60% वैल्यू इनपुट करते हैं। यह हमारी alpha की वैल्यू है।
😘
सिम्बल से बाहर निकलने के लिए हम Scene 1 टैब पर क्लिक करते हैं जैसा कि वीडियो में दिखाया गया है। हम प्रॉपर्टीज़, Frame Filters, glow में जाते हैं और X&Y axis की वैल्यू 30 कर देते हैं। हमारी एनीमेशन ठीक दिख रही है, लेकिन हम टाइमिंग में थोड़ा बदलाव करके इसे और इंट्रेस्टिंग बना सकते हैं। तो हम कुछ इन-बीच वाले फ्रेम्स को सेलेक्ट करते हैं जैसा कि वीडियो में दिखाया गया है। फिर हम प्रॉपर्टीज़, frame Tweening में जाते हैं और Effects ड्रॉप डाउन मेनू में Classic Ease चुनते हैं। यहाँ एक वैल्यू 70 ऐड करते हैं।
इसके बाद हम keyframe 20 से keyframe 35 तक कुछ इन-बीच वाले फ्रेम्स को सेलेक्ट करते हैं और वापस classic ease बॉक्स में जाकर 70 की वैल्यू इनपुट करते हैं। अब हम Enter दबाकर देख सकते हैं कि हमारी एनीमेशन कैसी लग रही है। उम्मीद है आपको यह ट्यूटोरियल हेल्पफुल लगा होगा। देखने के लिए धन्यवाद।