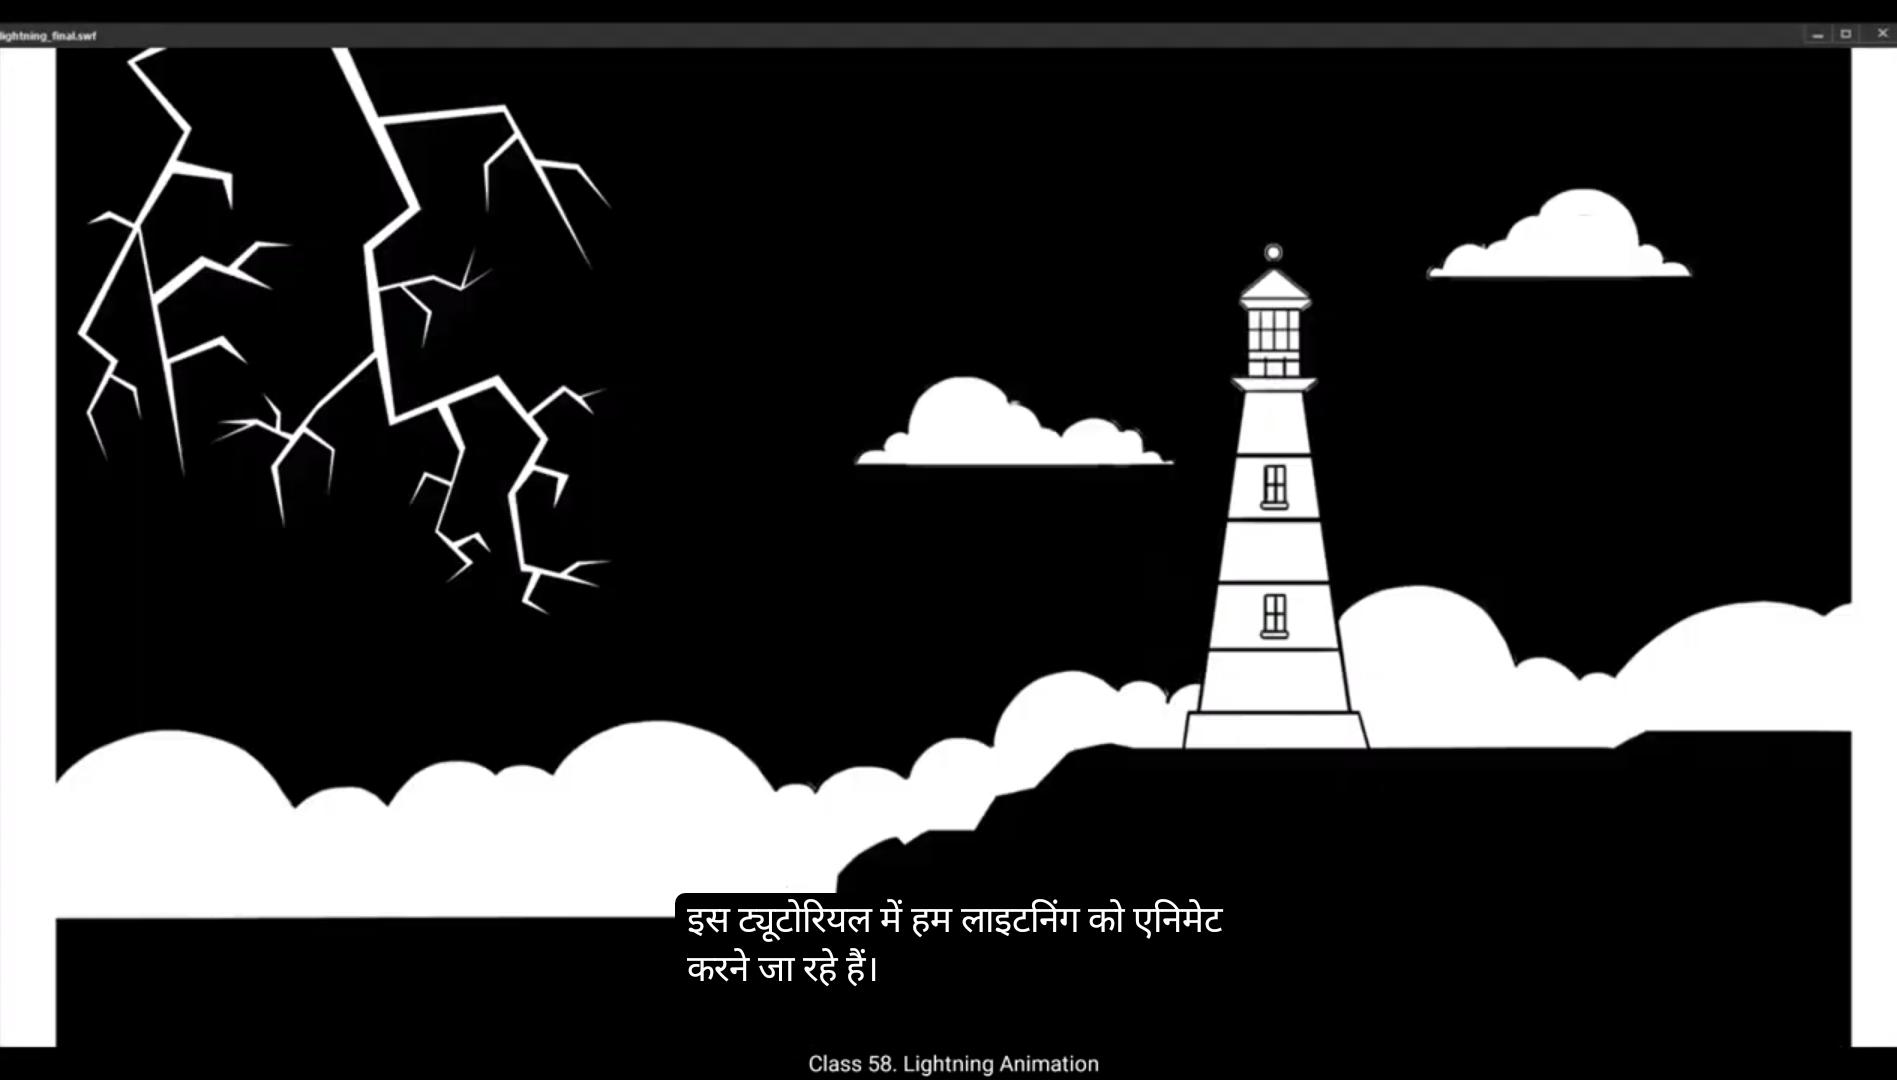
In this tutorial we are going to animate lightning.As you can see, we have one layer with us which is the background, so we name it BG. We'll then see that we've already extended our timeline to 120 frames. We've done this by selecting frames 120 and then using F5 to add frames. We now add a new layer for our animation. We start with a rectangle tool. The shortcut is R. Then, using the selection tool for which the shortcut is V, we are going to modify the shape of a rectangle into that of a striking lightning. Please follow the steps of the video.
Now that we have our shapes of lightning done, we select all by using control A or by using selection tool for which the shortcut is V. We now convert our lightning to a symbol by using F8 and we call it main lighting. We now enter the symbol by double clicking on our lightning and add a layer. We then create a keyframe on frame 10 and use F5 to add frames, here now Going to create a mask on our newly created layer so we lock our first layer as you can see in the video. We then use the rectangle tool to draw one. The shortcut is R Then we change the color fill of the rectangle by going to properties, Object color and style fill. We go to the check Red Square right next to the fill and bring down the opacity to 50% so that we can see the shape of our lightning and it will be easier for us to create the mask. We now Now add a keyframe on frame 2. Here we expand our shape so that it covers almost 80% of the lightning area. As you can see in the video, we again create a key on frame 3 using F6. On this keyframe, we'll pull our mask down so that it covers the entire lightning area. Please see the video.
😘
We now right click on the new layer and choose mask from the drop down menu.Now we exit the symbol by clicking on the Scene 1 tab as seen in the video.We can now see that the lightning appears in three frames. Now we go to frame 10 and convert that to a blank keyframe. We create a new layer on the BG layer. We move our keyframe 1-2, frame 10 so that our animation starts there and closes at frame 19. Now to make our lightning more effective, we are going to use another background for when the lightning is visible. We've already imported the background from the folder on our drive to the Library we create a frame on frame 12 using the shortcut F6. What we are trying to do is create a flash effect for when the lightning is visible. So we are going to use the background which enhances our flash effect. You can see we already have our second background done and we call it from the library for which the shortcut is Control L We select the lightning 2 backgrounds from the library.Hold the click down and drag it to our work area exactly as seen in the video. We then adjust it according to our work area and the earlier background. Now we hold this background for 2 frames. So we go to frame 14 and add a blank keyframe there using the shortcut F7.We now add a layer and add a keyframe on frame 14 using the shortcut F6 as seen in the video. We are going to change the background again here so that our flash looks powerful. For that we go back to the library again. The shortcut is Control L We select the Lightning 3 here and again holding down the click, we drag it to our work area. We again do the necessary adjustments so that the elements in the background match the position of the elements.
😘
The earlier ones we showed this background for 2 frames. So we go to frame 16 and using F7 we add a blank keyframe there. Next we are going to use our Lightning 2 background again. So we go to frame 13 and holding down the alt key we drag the frame to frame #16. We again add a blank keyframe to frames 18 using F7. Here we can see that when we use a background with white sky, we can't see the lightning because it is white, this compromises our flash effect and we need to do something to change this. So we double click our lightning animation layer and enter the symbol on layer one.
We add a keyframe on frame 5 using F6. We unlock the lightning animation layer and hide the mask layer, which is layer two. We come back to the new frame on layer one and select it. We now go to fill, which you'll see in properties, objects, color and style and change it to black here. As you can see, this makes our lightning black. Let's now click the keyframe 1 and holding down the Alt key to drag it to frame 7. Now let's exit the symbol by clicking In the screen one tab.Here we can see what our effect looks like and it looks good. We now want to make our effect longer, So what we do is we animate another lightning so that we don't see the exact same lightning again. This way we can make it more convincing and less monotonous. so
We add a new layer and go to frame 60 and add a keyframe again using the rectangle tool we draw one. The shortcut is R We draw a new lightning shape in the same way we've done the earlier.
Now that our new lightning is done, we select the shape using control A and using F8 we convert this symbol and name it Lightning one. We now enter the symbol and add a new layer. We go to frame 10 and add frames using F5 key.
😘
We now use the same process of creating a mask and animating the lightning as we used for the previous one. So we go ahead and work that process.Once the mask is created, we exit the symbol by clicking on the Scene 1 tab as seen in the video. We'll now work on the flash effect. For this new lightning. We are going to need the same background as before for the flash effect. We are now going to use the same process for the flash effect again, which we've created earlier. You can access the backgrounds for the flash effects from the library. Shortcut is Control L. Now we enter the symbol on layer 15 by double clicking it to change our lightning to black when seen on the white sky, just Like we've done for a earlier rash effect.We add a keyframe on frame 5 on layer one. Then we select the lightning shape using control A and go to fill which is properties object, colour and style and we choose black here. We then go to frame 7 and add keyframe as seen in the video. Then we exit the symbol by clicking the scene 1 tab again as seen in the video. Here we go to frame 68 and using F7 we add a blank keyframe here so that our animation close from this frame Ahead.
The lightning looks good.Let's go back and try to randomize the effect and make it more convincing. You can either follow the video for the next part, or if you are clear about how to do this and have the hang of it, you can randomize the timing of the lightning and flash as you please. You can experiment a little on your own. You can see in the video that we are just randomizing the timing of the lightning as well as the flash effect.
Hope you found this tutorial useful. Thank you for watching.
इस tutorial में हम lightning को animate करने जा रहे हैं। जैसा कि आप देख सकते हैं, हमारे पास एक layer है जो background है, इसलिए हम इसे BG नाम देते हैं। फिर हम देखते हैं कि हमने अपनी timeline को पहले से ही 120 frames तक बढ़ा दिया है। ये हमने frame 120 को select करके और F5 का इस्तेमाल करके frames जोड़कर किया है। अब हम अपनी animation के लिए एक नई layer जोड़ते हैं। हम rectangle tool से शुरू करते हैं। इसका shortcut है R। फिर selection tool का इस्तेमाल करके जिसका shortcut है V, हम rectangle के shape को modify करके उसे एक striking lightning के shape में बदलते हैं। कृपया वीडियो में दिखाए गए steps को follow करें। अब जब हमारे lightning के shapes बन चुके हैं, तो हम control A का इस्तेमाल करके या selection tool V से सबको select करते हैं। अब हम अपने lightning को एक symbol में convert करते हैं F8 का इस्तेमाल करके और इसका नाम रखते हैं main lightning। अब हम symbol में enter करते हैं lightning पर double click करके और एक layer add करते हैं। फिर हम frame 10 पर एक keyframe create करते हैं और F5 का इस्तेमाल करके frames जोड़ते हैं। अब हम अपनी नई बनाई हुई layer पर एक mask create करने जा रहे हैं इसलिए हम पहली layer को वीडियो में दिखाए अनुसार lock करते हैं। फिर हम rectangle tool का इस्तेमाल करके mask draw करते हैं। shortcut है R। फिर हम rectangle की fill color को बदलते हैं properties object color and style fill में जाकर। हम checkered square के right में दिख रहे box पर जाकर opacity को 50% तक नीचे लाते हैं ताकि lightning का shape हमें साफ दिख सके और mask बनाना आसान हो। अब हम frame 2 पर एक keyframe जोड़ते हैं। यहाँ हम अपनी shape को expand करते हैं ताकि ये lightning area के लगभग 80% हिस्से को cover करे जैसा कि वीडियो में दिखाया गया है। फिर हम frame 3 पर भी F6 का इस्तेमाल करके एक keyframe create करते हैं। इस keyframe पर हम अपने mask को नीचे की ओर खींचते हैं ताकि ये पूरे lightning area को cover कर ले। कृपया वीडियो देखें।
😘
अब हम नई लेयर पर right click करके drop down मेन्यू से Mask चुनते हैं। अब हम Scene 1 टैब पर क्लिक करके symbol से बाहर आते हैं जैसा वीडियो में दिखाया गया है। अब हम देख सकते हैं कि lightning तीन frames में दिखाई देती है। अब हम frame 10 पर जाते हैं और उसे एक Blank Keyframe में convert करते हैं। हम BG layer के ऊपर एक नई layer बनाते हैं। हम अपनी keyframe 1–2, frame 10 पर move करते हैं ताकि हमारी animation वहीं से शुरू होकर frame 19 पर बंद हो जाए। अब lightning को और effective बनाने के लिए, हम lightning दिखने के समय एक दूसरा background इस्तेमाल करने जा रहे हैं। हमने background को पहले ही अपनी drive के folder से Library में import कर लिया है। हम frame 12 पर एक keyframe बनाते हैं shortcut F6 से। हम यहाँ एक flash effect create करने की कोशिश कर रहे हैं जब lightning दिखाई दे। इसके लिए हम ऐसा background इस्तेमाल करेंगे जो flash effect को बेहतर दिखाए। आप देख सकते हैं कि हमारे पास दूसरा background पहले से मौजूद है और हम उसे library से call करते हैं जिसके लिए shortcut है Control + L। हम lightning 2 backgrounds को library से select करते हैं, क्लिक को hold करके उसे अपने work area पर drag करते हैं बिल्कुल वीडियो के अनुसार। फिर हम इसे work area और पहले background के हिसाब से adjust करते हैं। अब हम इस background को 2 frames तक hold करेंगे। इसलिए हम frame 14 पर जाते हैं और वहाँ एक blank keyframe add करते हैं shortcut F7 से। अब हम एक नई layer add करते हैं और frame 14 पर एक keyframe बनाते हैं shortcut F6 का इस्तेमाल करके जैसा वीडियो में दिखाया गया है। हम यहाँ background फिर से change करने जा रहे हैं ताकि हमारा flash और ज़्यादा powerful दिखे। इसके लिए हम वापस library में जाते हैं। shortcut है Control + L। हम यहाँ Lightning 3 select करते हैं और क्लिक hold करते हुए इसे अपने work area पर drag करते हैं। फिर से हम necessary adjustments करते हैं ताकि background के elements की positions एक दूसरे से match हों।
😘
पहले वाले मे हमने ये background 2 frames के लिए दिखाया था। तो हम frame 16 पर जाते हैं और F7 का use करके वहाँ एक blank keyframe add करते हैं। अगला हम फिर से अपना Lightning 2 background use करने वाले हैं। तो हम frame 13 पर जाते हैं और alt key दबाकर frame को खींचकर frame #16 पर ले जाते हैं। हम फिर से frame 18 पर एक blank keyframe add करते हैं F7 का use करके। यहाँ हम देख सकते हैं कि जब हम white sky वाला background use करते हैं, तो हमें lightning दिखाई नहीं देती क्योंकि वो white है, इससे हमारा flash effect compromise होता है और हमें इसे change करने के लिए कुछ करना होगा। तो हम अपने lightning animation layer पर double click करते हैं और layer one पर symbol के अंदर enter होते हैं। हम frame 5 पर F6 का use करके एक keyframe add करते हैं। हम lightning animation layer को unlock करते हैं और mask layer जो layer two है उसे hide कर देते हैं। हम वापस layer one के नए frame पर आते हैं और उसे select करते हैं। अब हम fill पर जाते हैं, जो properties, objects, color और style में दिखेगा और यहाँ इसे black में change कर देते हैं। जैसा कि आप देख सकते हैं, इससे हमारी lightning black हो गई है। अब हम keyframe 1 पर click करते हैं और Alt key दबाकर इसे frame 7 तक drag करते हैं। अब हम screen one tab पर click करके symbol से बाहर exit करते हैं। यहाँ हम देख सकते हैं कि हमारा effect कैसा दिख रहा है और यह अच्छा लग रहा है। अब हम चाहते हैं कि हमारा effect ज़्यादा time तक चले, तो हम क्या करते हैं कि हम एक और lightning animate करते हैं ताकि हमें वही exact lightning दोबारा न दिखे। इस तरह से यह ज़्यादा convincing और कम monotonous लगेगा। तो हम एक नया layer add करते हैं और frame 60 पर जाते हैं और फिर से एक keyframe add करते हैं rectangle tool का use करके हम एक lightning draw करते हैं। इसका shortcut R है हम पहले की तरह एक नया lightning shape draw करते हैं। अब जब हमारी नई lightning बन जाती है, तो हम shape को control A से select करते हैं और F8 से इसे symbol में convert करके इसका नाम Lightning one रखते हैं। हम अब symbol के अंदर enter होते हैं और एक नया layer add करते हैं। हम frame 10 पर जाते हैं और F5 key का use करके frames add करते हैं।
😘
अब हम वही process use करते हैं mask create करने और lightning को animate करने का जैसा हमने पिछले वाले के लिए किया था। तो हम आगे बढ़ते हैं और वो process work करते हैं। जैसे ही mask create हो जाता है, हम symbol से exit करते हैं Scene 1 tab पर click करके जैसा video में देखा गया है। अब हम flash effect पर काम करेंगे। इस नए lightning के लिए हमें पहले जैसा ही background चाहिए flash effect के लिए। अब हम फिर से वही process use करने जा रहे हैं flash effect के लिए जो हमने पहले create किया था। आप flash effects के backgrounds library से access कर सकते हैं। Shortcut है Control L। अब हम layer 15 के symbol में enter करते हैं double click करके lightning को black करने के लिए जब white sky पर देखा जाए, ठीक वैसे ही जैसे हमने पहले वाले flash effect के लिए किया था। हम frame 5 पर layer one पर एक keyframe add करते हैं। फिर हम lightning shape को control A से select करते हैं और fill पर जाते हैं जो properties object, colour और style में होता है और यहाँ हम black choose करते हैं। फिर हम frame 7 पर जाते हैं और video में दिखाया गया है वैसे ही keyframe add करते हैं। फिर हम Scene 1 tab पर click करके symbol से दोबारा exit करते हैं जैसा video में देखा गया है। यहाँ हम frame 68 पर जाते हैं और F7 का use करके एक blank keyframe add करते हैं ताकि हमारी animation इस frame के आगे close हो। Lightning अच्छा दिख रहा है। चलो वापस चलते हैं और effect को randomize करके इसे और convincing बनाने की कोशिश करते हैं। आप वीडियो को follow कर सकते हैं अगले हिस्से के लिए, या अगर आपको clear है कि ये कैसे करना है और आपको इसका hang मिल गया है, तो आप lightning और flash की timing को अपनी मर्जी से randomize कर सकते हैं। आप थोड़ा खुद से experiment कर सकते हैं। Video में आप देख सकते हैं कि हम बस lightning और flash effect की timing को randomize कर रहे हैं। आशा है आपको ये tutorial useful लगा। देखने के लिए धन्यवाद।