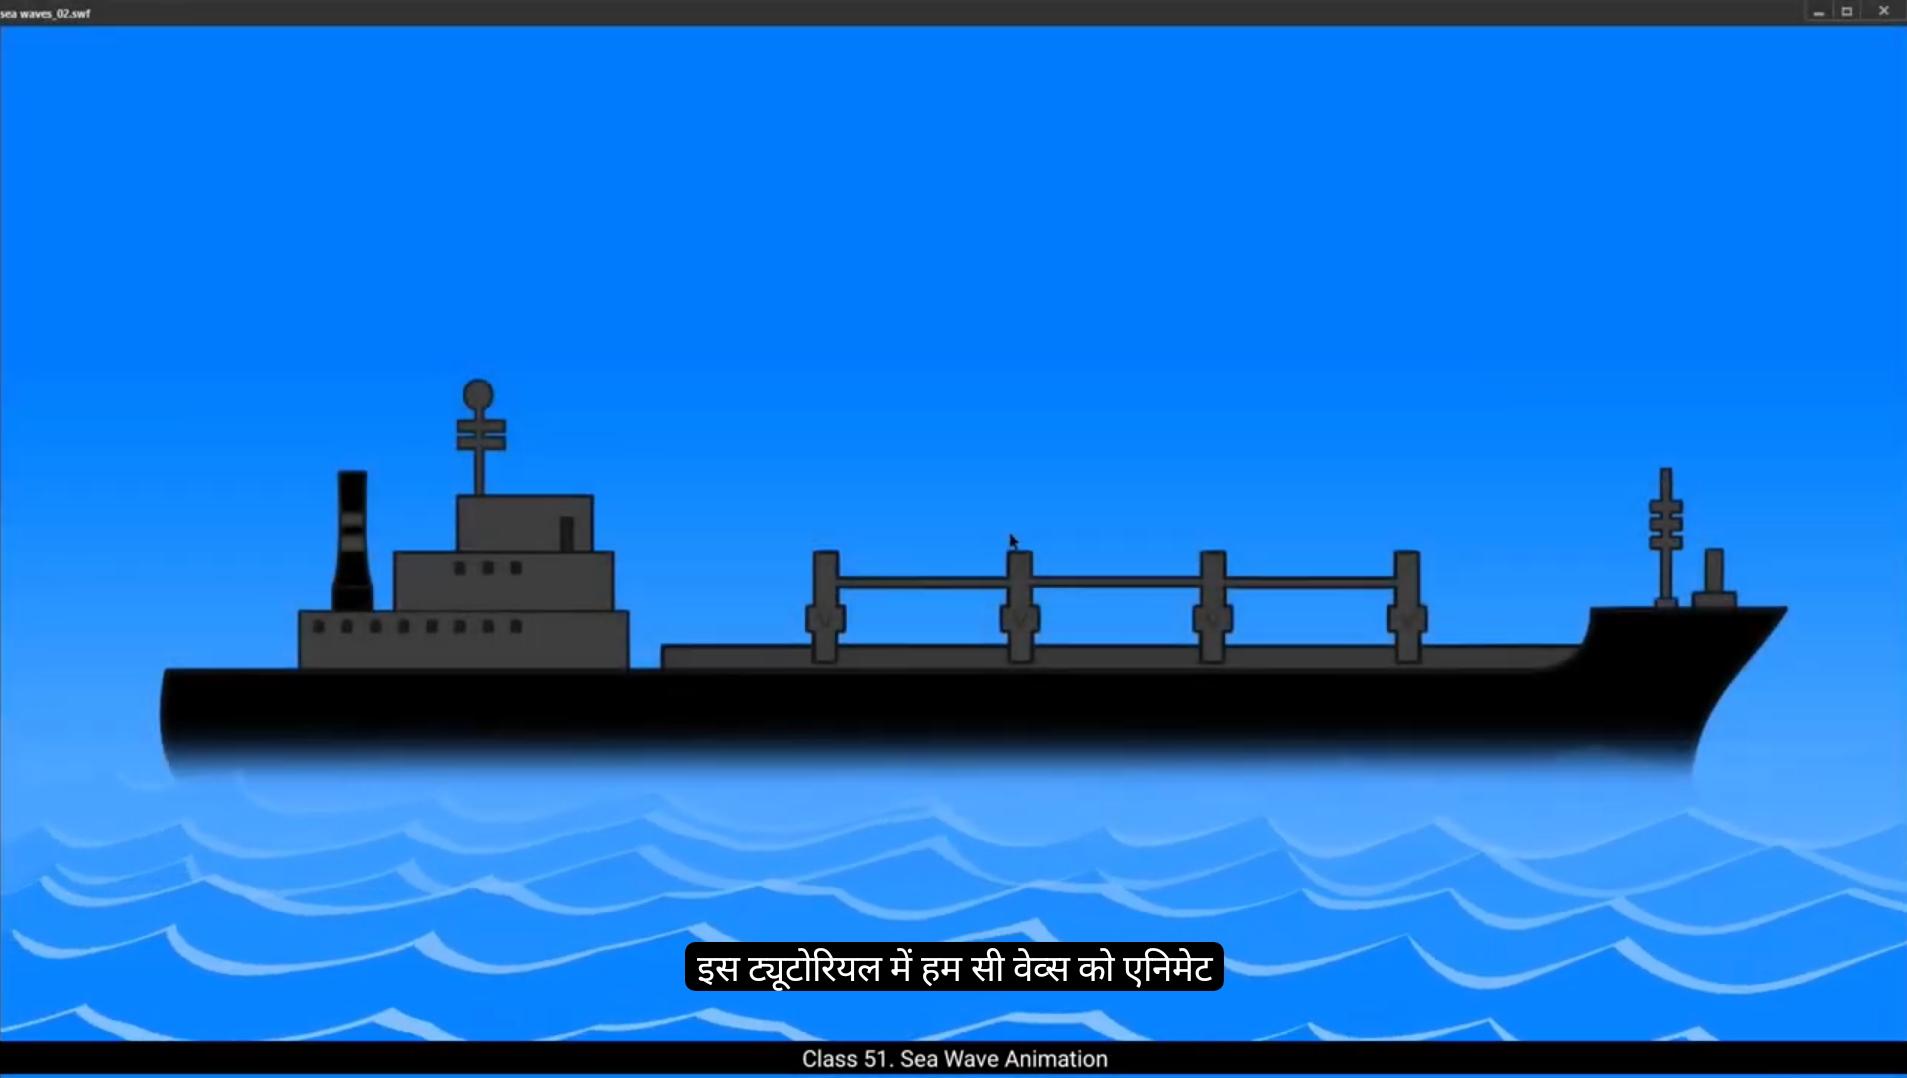
In this tutorial we are going to animate sea waves.We can see that we have 3 layers here. The first layer is a blue gradient that will work as sky and sea. The second layer is a big ship in middle now which will later look like it's on water after we animate the waves. And the third layer is for the animation. This is where the waves will be animated. We start by drawing a rectangle using the rectangle tool as seen in the video. The shortcut for this is.R We then stretch it so that it's longer than our work area. Then we select our rectangle.And press F8 to convert it into a symbol. We call it waves.We now double click on the rectangle to enter the symbol that we have created. We are already on the selection tool as you can see in the video. Now by pressing and holding down the alt key, we are going to start creating the wave shapes. Let's switch off the Snap to object tool so it will be easier for us to pull out these corners.Once we have the saw like shapes, we curve them and make them more like waves.
The waves Look OK here. Now we go to frame 40 and press F5 which will extend our timeline to this frame. We then press F6 which adds A keyframe. Then we select a few frames between frame one and frame 40 sort of randomly. Right click on anyone and from the top down menu we choose Create Shape Tween. We then go to keyframe one by using Control Shift H We are going to add shape hints here.We now place these shape pins at the four corners of the rectangle. We do the same on the next keyframe, which is frame 40.You'll see that the shape hints turn green after they're placed. Going back again to frame one, we add another shape hint and move it closer to the one place at the left top corner of the rectangle, which is the shape hint A as seen in the video.
😘
Then we go to frame 40 again and place the same shape hint close to the shape hint. See exactly as seen in the video.We can now see some of our animation which is in process but not quite done yet.We are now going to add more shape hints to make our animation smoother and more interesting. Please follow the video and add shape hence exactly like you see there. Just make sure you're on the right keyframe, exactly like the video.This looks Alright, now we want to add some volume to the waves to make them more convincing. So we add another layer, Go back to the layer one, select our entire animation, hold down the alt key and drag it to the new layer 2 as seen in the video. Make sure you log the layer and then convert to wireframe modes by clicking the rectangular purple icon next to the padlock icon. Now we are going to tweak these layers on layer 1, so let's switch off snap to Object tool.We select the first keyframe on layer one, hold down the Alt key and drag this frame to frame 40. As seen in the video S the 1st and the last key will be the same. This will help us to put our animation in a seamless loop. When we go back to the first keyframe, we can see that our shape hens are still in the hold position and we have changed the shape of our waves on this layer. So if we switch on the snap to object tool and edges the shape hens so that they are in the right position on the new shapes of the waves. Please follow the video exactly here so that you get the same result.
Now we are going to change the colour on this layer and make it lighter than the one above it.So that it will give a nice volume to the waves. For that we go to the fill box on the right tab. It's in properties, Objects, Color and style. We choose a lighter blue shade and apply it to the shapes on both the 1st and the last keyframe. We now click the wireframe mode off and you'll notice that the wave animation looks thicker, as if it has a volume to it.
😘
We now exit the symbol by clicking on the Scene 1 tab as seen in the video.We then convert this animation to a symbol again by pressing F8 and rename the symbol C waves. Then we double click on the waves to enter this new symbol and click on frame 40 and press F5 to add frames here.Next, we are going to duplicate these waves on several more layers so that we have a number of waves in our animation.Then we use the shortcut control D to duplicate the symbols.Next we use the Scale and Rotate tool to scale up the symbol. The shortcut for this is Control Alt S.We scale it up to 105%. Then we move the position of the symbol to make it look more random and all the waves will not look exactly as they are In Sync with each other. Now we duplicate the symbol several times and arrange the new symbols in such a way that they look like random waves as seen in the video.Once.This is duplicates are made. We then go to and change the starting time of each loop. This is a process of making them look more random. We go to properties object looping and in the first box right next to the frame picker we make random inputs for each symbol that we have duplicated. Please see the video and follow it exactly.Now to make the waves even more convincing, we go to the last wave symbol which is closest to the ship, select it, go to Properties object Color effects, click on the drop down arrow on the tab under the color effect and select Alpha. We change the alpha setting to 10% here.Next, we keep selecting the duplicate symbols as seen in the video and increasing the alpha setting for each symbol by 10% so that the closest wave animation symbol to our virtual camera will be 100% alpha and will be completely opaque and the closest wave symbol to the ship will be almost transparent.
😘
Now let's exit the symbol by clicking the Scene 1 tab as seen in the widget. It looks like changing the alpha values has surely Given us a nice depth of the field. Let's go in again and make some more changes so that the waves look even more convincing. We again start by closest wave to the ship and farthest away from the virtual camera, select it randomly and rotate it a bit. Let's do the same with the other layers. We randomly rotate them just a little bit so that some waves look like they are higher and then the others. As you can see, we've also stretched the symbol closes.The virtual camera which is us so that it looks bigger than the others and more convincing.Now let's click.The switch as seen in the video, which shows us only our work area and clips the rest. We can properly see our animation here. This looks alright so far. Now we press control enter to export an SWF format so that we can get a good preview of our animation.OK, the animation looks good, but the waves are moving too fast. It looks a bit strange, so let's go back and fix this.Let's go back to our animation layer and double click on our wave symbol. Now we select the last keyframe on both the layers and push the keyframes to frame 70. Doing this will slow down the speed of the waves. We now exit the symbols by clicking the C wave tab as seen in the video. Next we select frame 70 as we had done inside the symbol and press F5 to add frame here.Then we go back to scene 1 as seen in the video and do the same for all the layers here.Exactly as seen in the video. Once it's done, we can see that it's worked nicely. Let's confirm this in the preview. So press control enter to export SWF. And yes, the waves looks so much better at this speed. Hope you found this tutorial helpful. Thanks for watching.
इस ट्यूटोरियल में हम sea waves को animate करने वाले हैं। हम देख सकते हैं कि यहाँ हमारे पास 3 layers हैं। पहली layer एक blue gradient है जो sky और sea दोनों का काम करेगी। दूसरी layer में एक बड़ा ship है जो बाद में waves animate होने के बाद पानी पर तैरता हुआ दिखाई देगा। और तीसरी layer हमारी animation के लिए है — यहीं पर waves को animate किया जाएगा। हम rectangle tool का इस्तेमाल करके एक rectangle draw करते हैं जैसा कि वीडियो में दिखाया गया है। इसका shortcut है R। फिर हम rectangle को इतना stretch करते हैं कि वो हमारे work area से लंबा हो जाए। अब हम rectangle select करते हैं और F8 दबाकर उसे एक symbol में convert करते हैं। हम इसे waves नाम देते हैं। अब हम rectangle पर double click करके उस symbol में enter करते हैं जो हमने बनाया है। जैसा कि वीडियो में दिखाया गया है, हम पहले से ही selection tool पर हैं। अब Alt key को दबाकर हम wave shapes बनाना शुरू करते हैं। इसे आसान बनाने के लिए हम Snap to Object tool को बंद कर देते हैं ताकि कोनों को खींचना आसान हो जाए। जब हमारे पास saw जैसी shapes बन जाती हैं, तो हम उन्हें curve करते हैं ताकि वे असली लहरों जैसी दिखें। Waves अब ठीक लग रही हैं। अब हम frame 40 पर जाकर F5 दबाते हैं जिससे हमारा timeline उस frame तक extend हो जाता है। फिर हम F6 दबाकर एक keyframe जोड़ते हैं। अब हम frame 1 और frame 40 के बीच के कुछ random frames select करते हैं। फिर किसी भी frame पर right click करके drop down menu से Create Shape Tween चुनते हैं। अब हम Control Shift H दबाकर frame 1 पर जाते हैं ताकि shape hints जोड़ सकें। अब हम ये shape hints rectangle के चारों कोनों पर place करते हैं। यही काम हम अगले keyframe, यानी frame 40 पर भी करते हैं। जब हम hints place करते हैं तो वो green color में बदल जाते हैं। अब फिर से frame 1 पर जाकर हम एक और shape hint add करते हैं और उसे rectangle के left top corner पर रखे गए shape hint A के पास move करते हैं जैसा कि वीडियो में दिखाया गया है।
अब हम फिर से frame 40 पर जाते हैं और वही shape hint पिछले shape hint के पास रखते हैं, जैसा कि वीडियो में बिल्कुल दिखाया गया है। अब हम अपनी animation का कुछ हिस्सा देख सकते हैं जो बनना शुरू हो चुका है, लेकिन अभी पूरा नहीं हुआ है। अब हम अपनी animation को और smooth और interesting बनाने के लिए कुछ और shape hints जोड़ने वाले हैं। कृपया वीडियो को ध्यान से follow करें और shape hints बिल्कुल उसी तरह जोड़ें जैसा वहाँ दिखाया गया है। बस यह ध्यान रखें कि आप सही keyframe पर हों, ठीक वीडियो की तरह।
अब तक सब ठीक लग रहा है। अब हम waves में थोड़ा volume जोड़ना चाहते हैं ताकि वो ज़्यादा real लगें। इसके लिए हम एक नई layer जोड़ते हैं। फिर वापस layer 1 पर जाकर अपनी पूरी animation select करते हैं, Alt key दबाकर उसे नई layer 2 पर drag करते हैं जैसा कि वीडियो में दिखाया गया है। अब layer को lock कर लें और फिर wireframe mode में बदलें — इसके लिए padlock icon के बगल में बने purple rectangular icon पर क्लिक करें।
अब हम layer 1 की waves को adjust करने वाले हैं, तो चलिए पहले Snap to Object tool को बंद कर देते हैं। अब layer 1 के पहले keyframe को select करें, Alt key दबाकर उसे frame 40 पर drag करें। जैसा कि वीडियो में दिखाया गया है, अब पहला और आखिरी keyframe एक जैसे होंगे। इससे हमारी animation seamless loop में चलेगी। जब हम फिर से पहले keyframe पर लौटते हैं, तो देखते हैं कि हमारे shape hints अभी भी वहीं हैं, लेकिन हमने waves की shape बदल दी है। इसलिए अब हम Snap to Object tool को चालू करते हैं और shape hints को नए wave shapes के अनुसार सही position पर adjust करते हैं। कृपया यह हिस्सा वीडियो में जैसे दिखाया गया है, वैसा ही करें ताकि आपको सही result मिले।
अब हम इस layer का color बदलने वाले हैं ताकि यह ऊपर वाली layer से थोड़ा हल्का दिखे और waves में depth या volume का illusion बने। इसके लिए हम दाईं ओर Properties panel में जाते हैं — वहाँ Objects > Color and Style के अंतर्गत Fill box मिलेगा। हम एक हल्का नीला (light blue) color चुनते हैं और उसे पहले और आखिरी keyframe दोनों पर apply करते हैं। अब हम wireframe mode को बंद करते हैं, और आप देखेंगे कि अब wave animation ज़्यादा मोटी और गहराई वाली लग रही है — जैसे उसमें वास्तव में volume हो।
अब हम Scene 1 tab पर क्लिक करके symbol से बाहर निकलते हैं, जैसा कि वीडियो में दिखाया गया है। इसके बाद हम इस पूरी animation को फिर से एक symbol में convert करते हैं — इसके लिए F8 दबाते हैं और इस symbol का नाम रखते हैं C waves। फिर हम इस नए symbol को खोलने के लिए उस पर double click करते हैं। अब हम frame 40 पर क्लिक करते हैं और F5 दबाकर वहाँ frames जोड़ते हैं।
अब हम इन waves को कई layers पर duplicate करने वाले हैं ताकि हमारी animation में कई waves दिखाई दें। इसके लिए हम shortcut Control + D का इस्तेमाल करते हैं जिससे symbol duplicate हो जाता है। फिर हम Scale and Rotate Tool का इस्तेमाल करते हैं ताकि symbol को थोड़ा बड़ा किया जा सके। इसका shortcut है Control + Alt + S। हम इसे 105% तक scale up करते हैं और फिर symbol की position को थोड़ा इधर-उधर करते हैं ताकि waves random और natural लगें — यानी सभी waves एक जैसी या perfectly sync में न दिखें। अब हम इन symbols को कई बार duplicate करते हैं और उन्हें इस तरह arrange करते हैं कि वे अलग-अलग दिशाओं और positions में दिखें, जैसा कि वीडियो में दिखाया गया है।
जब ये सभी duplicates तैयार हो जाते हैं, तो हम उनका looping time थोड़ा बदलते हैं ताकि वे और ज़्यादा natural और random लगें। इसके लिए हम Properties > Object > Looping में जाते हैं और frame picker के बगल वाले पहले बॉक्स में हर symbol के लिए अलग-अलग random values डालते हैं। कृपया यह हिस्सा वीडियो देखकर step by step follow करें।
अब waves को और realistic और convincing बनाने के लिए हम उस wave symbol को select करते हैं जो ship के सबसे पास है। फिर हम जाते हैं Properties > Object > Color Effects, वहाँ Color Effect के drop-down में से Alpha option चुनते हैं। अब हम यहाँ alpha value को 10% पर सेट करते हैं।
इसके बाद, जैसे-जैसे हम अन्य duplicate symbols को select करते जाते हैं (वीडियो में दिखाए अनुसार), हम हर अगले symbol की alpha setting 10% बढ़ाते जाते हैं — यानी दूसरी wave की alpha 20%, तीसरी की 30%, और इसी तरह आखिरी wave जो हमारी virtual camera के सबसे करीब होगी, उसकी alpha 100% होगी ताकि वो पूरी तरह opaque दिखे। वहीं जो wave ship के सबसे पास होगी, वो लगभग transparent यानी बहुत हल्की दिखाई देगी।
इस तरह अलग-अलग transparency और positions के साथ हमारी sea waves animation बहुत ही natural और सुंदर लगने लगती है।
अब हम Scene 1 tab पर क्लिक करके symbol से बाहर निकलते हैं, जैसा कि वीडियो में दिखाया गया है। ऐसा लगता है कि alpha values बदलने से हमें एक अच्छा depth of field मिला है। अब चलिए वापस अंदर चलते हैं और कुछ और बदलाव करते हैं ताकि waves और भी ज़्यादा convincing दिखें।
हम फिर से ship के सबसे पास वाली wave से शुरू करते हैं और जो virtual camera से सबसे दूर है उसे select करके थोड़ी सी rotation करते हैं। अब हम बाकी layers के साथ भी यही करते हैं — उन्हें थोड़ा-थोड़ा randomly rotate करते हैं ताकि कुछ waves ऊँची लगें और कुछ नीची। जैसा कि वीडियो में दिखाया गया है, हमने camera के सबसे पास वाली wave symbol को थोड़ा stretch भी किया है ताकि वो बाकी से बड़ी और ज़्यादा realistic लगे।
अब हम उस switch पर क्लिक करते हैं जो सिर्फ हमारा work area दिखाता है और बाकी हिस्सों को clip करता है, जैसा कि वीडियो में बताया गया है। अब हम अपनी animation को ठीक से देख सकते हैं। यह अब तक काफी अच्छा लग रहा है।
अब हम Control + Enter दबाकर animation को SWF format में export करते हैं ताकि इसका एक अच्छा preview मिल सके। हाँ, animation अच्छी लग रही है — लेकिन waves थोड़ी ज़्यादा तेज़ चल रही हैं, जिससे यह थोड़ा अजीब लग रहा है। तो चलिए इसे ठीक करते हैं।
अब हम वापस अपनी animation layer पर जाते हैं और wave symbol पर double click करते हैं। फिर हम दोनों layers पर आख़िरी keyframe को select करते हैं और उन्हें frame 70 तक खींच देते हैं। ऐसा करने से waves की speed धीमी हो जाएगी।
अब हम symbols से बाहर निकलते हैं — इसके लिए C wave tab पर क्लिक करते हैं जैसा कि वीडियो में दिखाया गया है। इसके बाद हम frame 70 को select करते हैं और F5 दबाकर वहाँ frame जोड़ते हैं।
फिर हम वापस Scene 1 पर आते हैं और सभी layers पर भी यही process दोहराते हैं — ठीक वैसे ही जैसे वीडियो में दिखाया गया है।
जब ये सब हो जाता है, तो हम देखते हैं कि अब यह बहुत अच्छे से काम कर रहा है। चलिए इसे confirm करते हैं — Control + Enter दबाकर SWF export करते हैं।
और हाँ, अब waves की speed बिलकुल perfect है — animation बहुत smooth और natural लग रही है। Hope you found this tutorial helpful. Thanks for watching.