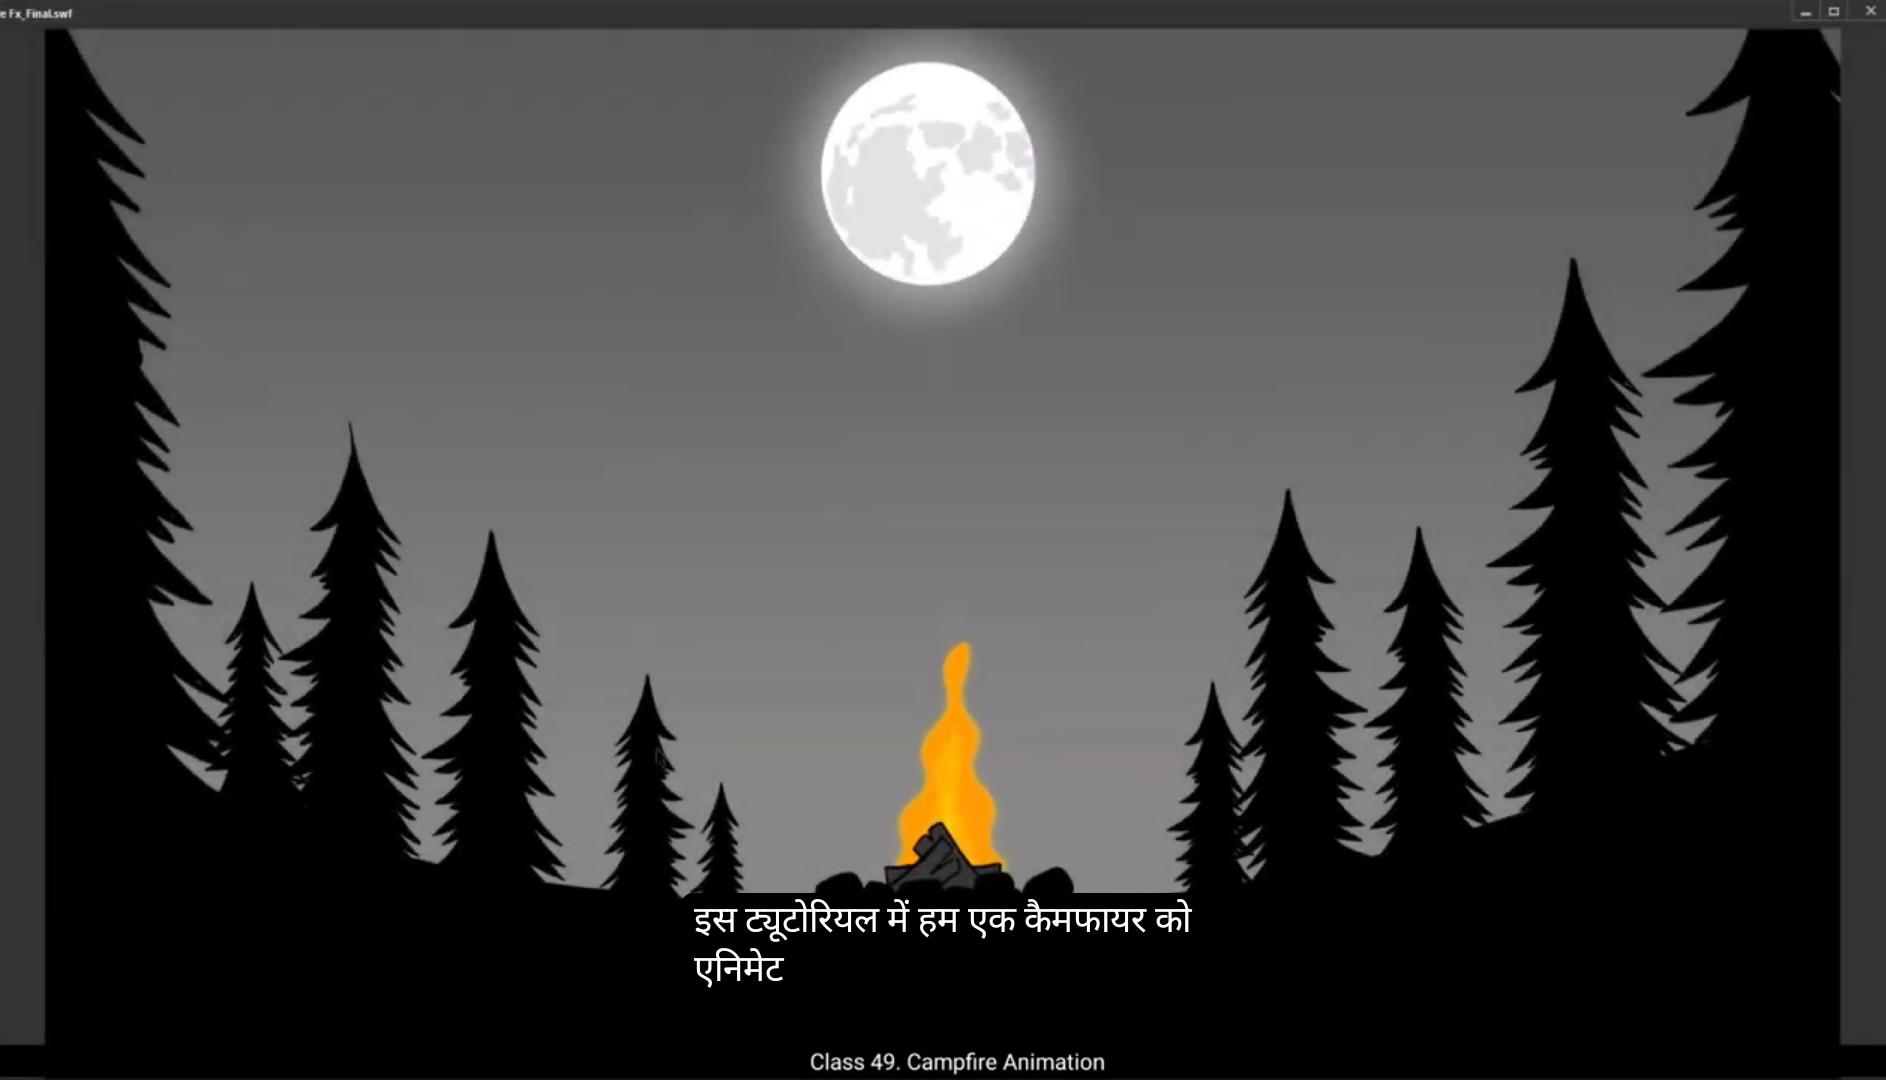
In this tutorial we are going to animate a campfire.We already have the background for it.Let's start by naming the layers.Now let's go to layer 2. This is obviously going to be placed over the animation, so let's call overlay.Then one is the sky in the background and is going to be placed behind the fire animation. So we call it underlay and layer 3 is going to have our animation on it.Now we are going to hide the overlay for time being. Let's go to the rectangle tool and draw one here. The keyboard shortcut for selecting the rectangle tool is R Let's start with color orange. Since we are animating fire, we are stretching the rectangle a little vertically using the selection tool, and the shortcut for this is V.Once this is done, we select the shape and press F8 to convert it into a symbol. Then we name our symbol shape one.Now we enter the symbol by double clicking the shape.We then go and set a rough timeline for this, let's say 25 frames. So we go to frame 25 and press F5 on it to add frames.Now we are going to distort the shape and take our first step toward animating fire using this rectangle.We press and hold down the Alt key and start changing our shape. Please follow the video for the changes. We'll turn off the Snap to object tool as seen in the video so that it becomes easier for us to make these distortions. Once we have the WAVY shape done, add a keyframe on frame 25. You can also right click and choose Insert Keyframe in the dropdown menu, but it's easier to use shortcuts so it'll be really good if you could memorize them. We now select some frames between 0 and 25.Press right click on Anyone and choose Create Shape Tween from the menu. 😘 Next we go to the keyframe one and then press control Shift H to add shape hints. We add 4 shape hints. You can see a red circle appear in the middle of our shape. Pull out the hints from the red circle and place them as seen in the video.Now we have 4 hints, ABC and D We then move to keyframe 25 and place them as seen in the video.You will notice that the shape hence on frame 25 will be green. Going back to keyframe one quickly using shortcut keys Control, Shift, Edge, we add another hint E and place it as seen in the video. We go back to frame 25 again and place the hint E again as seen in the video.Now when you press the enter key, you'll be able to see our shape animated. We exit the symbol now by clicking on the scene 1 tab as seen in the video. Next, we convert our symbol into a new one by pressing F8. We call it fire. We enter our new symbol and add a new layer as seen in the video. We then extend the frames to 25th frame in our timeline as seen in the video. Then select the shape that we have created and you will right click on it.We see a menu. We choose Copy here. The shortcut for this is Control C. Now we need to right click on layer 2. This again gives us a pop-up menu. We choose Paste and Place here, which will paste the shape in exact place from where it was copied. The shortcut for this is Control Shift V. Now we slide the newly created symbol over to the right as seen in the video.Then we go to the Free Transform tool from the toolbar menu. Please see the video for the location the shortcut. Coming back to the symbol, we click and hold one corner of the shape and pull it up. You can see that we have rotated the symbol 180°. We now write click on the symbol that we have just rotated. Then we get the pop up menu and we choose duplicate symbol. 😘 We call this one shape 2. We now double click on the duplicate symbol which we have named shape 2. Here we make sure we are on keyframe one. Then we use control shift H. We see the hints that we had created earlier. Now we move the second hint from the top and slide it down closer to the bottom hint, just as we see in the video. Next, we move the keyframe 25 and now we move the hint that's closer to the bottom hint and move it up so that it's close to the top hint exactly as seen in the video. We can press the enter key and see what our animation looks like now. Next we go back to the earlier symbol. We click on fire seen on tab. Please follow the video here. We then move the symbols to center of the screen as seen in the video. Going back to layer one, we rotate the symbol there a bit.Then do the same with symbol on layer 2 and place them overlapping each other exactly as seen in the video. Please make sure you follow the step exactly as it's seen in the video so that we get the shape from the intersection of these two symbols as you will seen soon. Now we go to layer 2 and right click on it and choose mask from the menu. As soon as we have done this, you will notice that only the intersection of two shapes or in other words overlapping area of two shapes is seen.The rest of the shapes have been hidden by the mask. We now have our basic shape of the flame that we are going to animate. We go back to Scene 1 tab as shown in the video. We then go to our overlay layer and unhide it by pressing the icon which is slash. As you can see, it's also good to check if other layers except our animation layers are logged so that we won't end up on anyone of them by mistake. Now we use the shortcut control Alt S to set the scale and rotate tool. 😘 Which is located and modified transform on the main menu in the scale value box. Let's put in 70%. This will reduce the size of our flame by 30%. As you can see in the video, we scale it down to 70%. Again, the size of the flame seems alright. Now. We adjust the position of the flame so that it fits nicely with the woods and stones in our background. Now we play. The animation we've done so far looks OK. Let's select our symbol. Press the F8 key on the keyboard.Again to convert it into a new symbol. Now we name our symbol Campfire. We now double click on the shape to enter the symbol. Go to frame 25 and press F5 key to add frames on the timeline. Then we add a new layer. As you can see in the video. We go back to layer one. Press control C to copy our symbol. We now select layer 2 and paste our copied symbol in this layer.Remember to paste in place so that the symbol is pasted in the exact position. From where it was copied. For this we use Control Shift V.Then we move it a little to the left so we can see both the symbols clearly. Now we go to the property tab as you can see in the video. Then go to Color Effects and select Tint. There we'll now choose a color for this tint and percentage will be 50. We again go back to the copied symbol on layer 2. Right click on it and in the pop up menu we choose Duplicate symbol.We can call this one Fire One now. We'll double click onto it to enter the fire symbol.We unlock both the layers and edges the shape a bit by moving them to their desired position. This will give us some randomness in our fire animation and all the layers will not look like they are In Sync. We exit the symbol and by using the free transform tool, the shortcut key for which is Q, we squash it a bit and move it in the center of the main fire. 😘 Please see the video for the position. Now you will notice that we positioned it in such a way.That it overlaps the bigger flame. We go to looping which is just before color effect and next to the frame picker box and we input a value of 10 in the first box. Copy the symbol from layer 2 and paste it in place using Control Shift V on the new layer. Just like we've done before, we again move the newly pasted symbol to the left so we can see it clearly. We right click on the symbol and duplicate it again and name it Fire 2. We now double click on the symbol to enter it and adjust the shape again just like before. exit symbol Now by clicking on the earlier tab as seen in the video, we go back to the property tab Color effect tint. This time we select a brighter yellow so that we have variety of shades in. Our fire percentage will be 50. Again. We want to scale down the symbol now. So we go back to the scale and rotate tool and we scale it down to 70%. We scale it down one more time in the same value and now place it over the earlier symbols. We go back to looping in the property tabs and now add a value of 15 in the first box.We scale up the symbol on layer 2 as it's not seen properly on the screen. Now we click on layer 3 and go to the properties. We'll find an option named Filters. Click on the little plus sign just beside it and click on the blur option. Set the quality to high and value for both X&Y will be 3. This will blur the core of the fire to give it more effect.Now the fire has some glue. We repeat the same process of adding the glue on layer one. We set the color to yellow and quality high. We change the strength to 150 and set the values to 10 for X&Y. We come back to scene one on the tab as you can see in the video and adjust the campfire symbol. We again use the free transform tool to squash the symbol a bit. We can play the animation by pressing the enter key now. And now for the preview we use control enter.This shortcut is used to export our animation to an SWF file format which is used for preview. The file looks fine now. Thank you for watching. इस ट्यूटोरियल में हम एक campfire को animate करने वाले हैं। हमारे पास पहले से ही इसका background तैयार है। सबसे पहले हम अपनी layers को नाम देंगे। Layer 2 को हम overlay कहेंगे क्योंकि ये हमारी animation के ऊपर रहने वाली है। Layer 1 में हमारे पास sky है जो background में है, इसलिए इसे underlay कहेंगे। Layer 3 पर हम अपनी animation बनाएँगे। अब कुछ देर के लिए हम overlay layer को hide कर देते हैं ताकि animation पर काम करना आसान हो जाए। अब हम Rectangle Tool का इस्तेमाल करेंगे — इसका shortcut key है R। हम एक rectangle बनाते हैं और इसका color orange रखते हैं क्योंकि हम fire animation बनाने जा रहे हैं। अब Selection Tool (shortcut V) से rectangle को थोड़ा vertically stretch कर देते हैं ताकि इसका shape आग की तरह लंबा दिखे। जब shape तैयार हो जाए, तो हम इसे select करके F8 दबाते हैं और इसे symbol में convert करते हैं। Symbol का नाम रखते हैं Shape 1। अब इस symbol में double click करके अंदर प्रवेश करते हैं। इसके बाद हम एक rough timeline सेट करते हैं — मान लीजिए 25 frames की। इसलिए हम frame 25 पर जाकर F5 दबाते हैं ताकि वहाँ तक frames add हो जाएँ। अब हम अपने rectangle के shape को distort करेंगे ताकि यह आग की लहरों जैसा दिखे — इसके लिए Alt key दबाकर shape को बदलते हैं। वीडियो में दिखाए गए steps को follow करें। साथ ही, Snap to Object tool को बंद कर दें ताकि shape को modify करना आसान हो जाए। जब हमारा wavy shape तैयार हो जाए, तो frame 25 पर एक keyframe add करें। आप चाहें तो right click → Insert Keyframe भी कर सकते हैं, लेकिन shortcut keys याद करना बेहतर रहेगा क्योंकि यह काम को तेज़ बनाता है। अब frame 0 से 25 के बीच के frames को select करें, उन पर right click करें और Create Shape Tween चुनें। इस तरह हमारा पहला step पूरा हो जाता है और हमने अपने rectangle को आग जैसी motion देने की शुरुआत कर दी है। 😘 अब हम Keyframe 1 पर जाते हैं और Control + Shift + H दबाकर Shape Hints जोड़ते हैं। हम यहाँ चार shape hints जोड़ेंगे। जैसे ही आप यह करेंगे, आपको अपनी shape के बीच में एक लाल रंग का छोटा circle दिखाई देगा। अब इन hints को उस लाल circle से बाहर खींचकर वीडियो में दिखाए अनुसार जगह-जगह पर रख दें। अब हमारे पास चार hints — A, B, C और D हैं। इसके बाद हम Keyframe 25 पर जाते हैं और इन चारों hints को फिर से वीडियो के अनुसार जगह पर रखते हैं। आप देखेंगे कि Frame 25 पर shape hints का रंग हरा (green) हो जाता है। अब हम Control + Shift + E दबाकर फिर से जल्दी से Keyframe 1 पर लौटते हैं और एक नया hint ‘E’ जोड़ते हैं। इसे वीडियो में दिखाए अनुसार जगह पर रखें। फिर Frame 25 पर वापस जाएँ और hint E को फिर से उसी जगह पर रखें जैसा वीडियो में दिखाया गया है। अब जब आप Enter key दबाएँगे, तो आप देख पाएँगे कि हमारा shape अब animated हो गया है। इसके बाद हम Scene 1 tab पर क्लिक करके symbol से बाहर आ जाते हैं। अब हम अपने symbol को एक नए symbol में बदलते हैं — इसके लिए F8 दबाते हैं और इसका नाम रखते हैं “Fire”। अब इस नए symbol में double click करके अंदर जाते हैं और एक नई layer जोड़ते हैं, जैसा वीडियो में दिखाया गया है। इसके बाद हम अपनी timeline को frame 25 तक बढ़ाते हैं (इसके लिए F5 दबाएँ)। अब हम उस shape को select करते हैं जो हमने पहले बनाई थी, उस पर right click करते हैं, और मेनू में से Copy (Control + C) चुनते हैं। फिर हम Layer 2 पर right click करते हैं, जिससे एक पॉपअप मेनू खुलता है। यहाँ से हम Paste in Place (Control + Shift + V) चुनते हैं — इससे shape ठीक उसी जगह पर paste होगी जहाँ से उसे कॉपी किया गया था। अब हम नई बनाई गई shape को थोड़ा दाईं तरफ स्लाइड करते हैं जैसा वीडियो में दिखाया गया है। फिर हम Free Transform Tool चुनते हैं (इसका shortcut वीडियो में दिखाया गया है)। अब shape के किसी एक कोने को पकड़कर ऊपर की ओर खींचते हैं — इससे shape 180° rotate हो जाती है। अब हम इस rotated symbol पर right click करते हैं, और जो पॉपअप मेनू आता है, उसमें से Duplicate Symbol चुनते हैं। इस तरह हमने अपने campfire animation के लिए दूसरी layer की लपटें (flames) तैयार कर ली हैं। 😘 हम इस नए symbol का नाम “Shape 2” रखते हैं। अब हम इस duplicate symbol (Shape 2) पर double click करके अंदर जाते हैं। यहाँ हम सुनिश्चित करते हैं कि हम Keyframe 1 पर ही हैं। अब हम Control + Shift + H दबाते हैं ताकि पहले बनाए गए shape hints दिखाई दें। अब हम दूसरे hint (ऊपर वाला hint) को पकड़कर नीचे की ओर खिसकाते हैं ताकि वह नीचे वाले hint के पास आ जाए — जैसा वीडियो में दिखाया गया है। इसके बाद हम Keyframe 25 पर जाते हैं और अब हम उस hint को पकड़कर ऊपर ले जाते हैं जो नीचे के पास था, ताकि वह ऊपरी hint के करीब आ जाए — ठीक वैसे ही जैसे वीडियो में दिखाया गया है। अब Enter key दबाकर आप देख सकते हैं कि अब हमारा नया animation कैसे दिख रहा है। अगला कदम है पहले वाले symbol पर वापस जाना, इसके लिए हम “Fire” tab पर क्लिक करते हैं जैसा वीडियो में दिखाया गया है। अब हम दोनों symbols को स्क्रीन के बीच में (center) ले जाते हैं ताकि वे सही alignment में हों। इसके बाद हम Layer 1 में जाते हैं और वहाँ के symbol को थोड़ा rotate करते हैं। अब हम यही काम Layer 2 वाले symbol के साथ भी करते हैं — यानी उसे भी थोड़ा rotate करते हैं और दोनों shapes को एक-दूसरे के ऊपर overlapping रखते हैं जैसा वीडियो में दिखाया गया है। यह स्टेप बहुत ज़रूरी है क्योंकि जब दोनों shapes intersect होती हैं, तभी हमें flame का सही shape मिलता है। अब हम Layer 2 पर right click करते हैं और मेनू से Mask चुनते हैं। जैसे ही हम ऐसा करते हैं, आप देखेंगे कि अब केवल दोनों shapes के overlapping वाला हिस्सा ही दिखाई दे रहा है, बाकी shapes mask हो चुकी हैं। यानी अब हमारे पास flame का बेसिक shape तैयार है जिसे हम animate करेंगे। अब हम Scene 1 tab पर वापस आते हैं जैसा वीडियो में दिखाया गया है। फिर हम अपनी overlay layer को unhide करते हैं — इसके लिए eye icon (slash symbol) पर क्लिक करते हैं। अब हम यह भी जांच लेते हैं कि animation के अलावा बाकी सभी layers locked हैं, ताकि हम गलती से उन पर काम न करने लगें। इसके बाद हम Control + Alt + S दबाते हैं ताकि Scale and Rotate Tool सक्रिय हो जाए। अब हम अपनी flame की साइज और angle को adjust करेंगे ताकि वह background के साथ perfectly fit हो जाए। 😘 अब हम Main Menu में जाकर Transform panel खोलते हैं। यहाँ पर हमें Scale value box दिखाई देगा। उसमें हम 70% का मान डालते हैं। इससे हमारी flame का size 30% कम हो जाएगा। जैसा कि वीडियो में दिखाया गया है, हमने flame को 70% तक scale कर लिया है। अब flame का आकार सही लग रहा है, तो हम उसकी position adjust करते हैं ताकि वह background में रखी लकड़ियों और पत्थरों के साथ perfectly fit हो जाए। अब जब हम animation play करते हैं, तो यह अब तक काफी अच्छा दिखता है। अगला कदम है अपने symbol को फिर से नए symbol में convert करना। इसके लिए हम symbol को select करते हैं और कीबोर्ड पर F8 key दबाते हैं। अब हम इस नए symbol का नाम “Campfire” रखते हैं। हम double click करके इस shape के अंदर जाते हैं ताकि symbol के अंदर काम कर सकें। फिर हम frame 25 पर जाकर F5 key दबाते हैं ताकि timeline में frames जोड़ सकें। इसके बाद हम एक नया layer add करते हैं जैसा वीडियो में दिखाया गया है। अब हम Layer 1 पर वापस जाते हैं और वहाँ से symbol को Control + C दबाकर copy करते हैं। अब हम Layer 2 को select करते हैं और वहाँ इस copied symbol को paste in place करते हैं ताकि यह ठीक उसी position पर paste हो जहाँ से इसे कॉपी किया गया था। इसके लिए हम Control + Shift + V का shortcut इस्तेमाल करते हैं। अब हम इस नए symbol को थोड़ा left की ओर move करते हैं ताकि दोनों symbols साफ दिखें। फिर हम Properties tab में जाते हैं जैसा वीडियो में दिखाया गया है। वहाँ से हम Color Effects में जाकर Tint select करते हैं। अब हम tint के लिए एक color चुनते हैं और percentage को 50% रखते हैं। इसके बाद हम Layer 2 वाले symbol पर right click करते हैं और popup menu से Duplicate Symbol चुनते हैं। इसका नाम हम “Fire 1” रखते हैं। अब हम इस नए symbol पर double click करके अंदर जाते हैं। यहाँ हम दोनों layers unlock करते हैं और shapes को थोड़ा adjust करते हैं — यानी उन्हें थोड़ा ऊपर-नीचे या साइड में खिसकाते हैं, जैसा वीडियो में दिखाया गया है। इससे हमें fire animation में कुछ randomness मिलेगी और दोनों layers perfectly in sync नहीं लगेंगी, जिससे animation ज्यादा natural लगेगा। अब हम symbol से बाहर निकलते हैं (Exit Symbol) और Free Transform Tool चुनते हैं, जिसका shortcut key है Q। अब हम flame को थोड़ा squash करते हैं यानी ऊँचाई से थोड़ी compress करते हैं, और फिर उसे main fire के center में position करते हैं। 😘 अब वीडियो में दिखाए गए अनुसार flame की position पर ध्यान दें। आप देखेंगे कि हमने इसे ऐसे place किया है कि यह बड़ी flame के ऊपर overlap हो रहा है। अब हम Looping option में जाते हैं, जो Color Effect के ठीक पहले और Frame Picker box के बगल में होता है। यहाँ पहले box में हम 10 का value डालते हैं। अब हम Layer 2 से symbol को copy करते हैं और नए layer में जाकर Control + Shift + V दबाकर paste in place करते हैं, जैसा हमने पहले किया था। फिर हम इस नए pasted symbol को थोड़ा left की ओर move करते हैं ताकि यह साफ दिखाई दे। अब हम symbol पर right click करते हैं, Duplicate Symbol चुनते हैं, और इसका नाम “Fire 2” रखते हैं। अब हम symbol पर double click करके अंदर जाते हैं और shapes को पहले की तरह adjust करते हैं ताकि थोड़ा फर्क दिखे। इसके बाद हम Exit Symbol पर क्लिक करके बाहर निकलते हैं और पहले वाले tab पर लौटते हैं जैसा वीडियो में दिखाया गया है। फिर हम Property tab → Color Effect → Tint में जाते हैं। इस बार हम एक brighter yellow color चुनते हैं ताकि हमारी आग (fire) में विभिन्न shades दिखाई दें। Percentage 50% पर ही रहेगा। अब हम इस symbol को थोड़ा scale down करना चाहते हैं। इसके लिए हम Scale and Rotate Tool (shortcut: Ctrl + Alt + S) चुनते हैं और flame को 70% तक scale down करते हैं। हम इसे एक बार और 70% तक scale करते हैं ताकि यह और compact दिखे और फिर इसे पहले वाले symbols के ऊपर position कर देते हैं। अब हम फिर से Property tab → Looping में जाकर पहले box में 15 का value डालते हैं। अब हम देखते हैं कि Layer 2 वाला symbol स्क्रीन पर ठीक से नहीं दिख रहा, तो हम उसे थोड़ा scale up कर देते हैं। इसके बाद हम Layer 3 पर क्लिक करते हैं और Properties panel में जाते हैं। वहाँ हमें एक Filters नाम का option दिखाई देगा। उसके बगल में बने छोटे + आइकन पर क्लिक करें और Blur चुनें। Quality को High पर सेट करें और X तथा Y दोनों का value 3 रखें। इससे fire का core थोड़ा blur हो जाएगा और ज्यादा natural glow effect देगा। अब आग में थोड़ा glow effect आ गया है। हम Layer 1 पर भी glow जोड़ने की यही प्रक्रिया दोहराते हैं। इस बार हम Color Yellow चुनते हैं, Quality High रखते हैं, Strength 150 सेट करते हैं और X व Y दोनों की value 10 रखते हैं। अब हम Scene 1 tab पर वापस आते हैं जैसा वीडियो में दिखाया गया है, और Campfire symbol को adjust करते हैं। फिर से हम Free Transform Tool (shortcut Q) का उपयोग करते हैं और flame को थोड़ा squash करते हैं ताकि इसका आकार सही लगे। अब हम Enter key दबाकर animation play कर सकते हैं और देख सकते हैं कि यह कैसा दिख रहा है। फिर हम Control + Enter shortcut दबाकर इसका SWF file format में preview export करते हैं। यह फ़ाइल preview के लिए इस्तेमाल होती है। Animation अब perfectly काम कर रहा है और बहुत अच्छा दिख रहा है। धन्यवाद, आपने यह tutorial देखा।