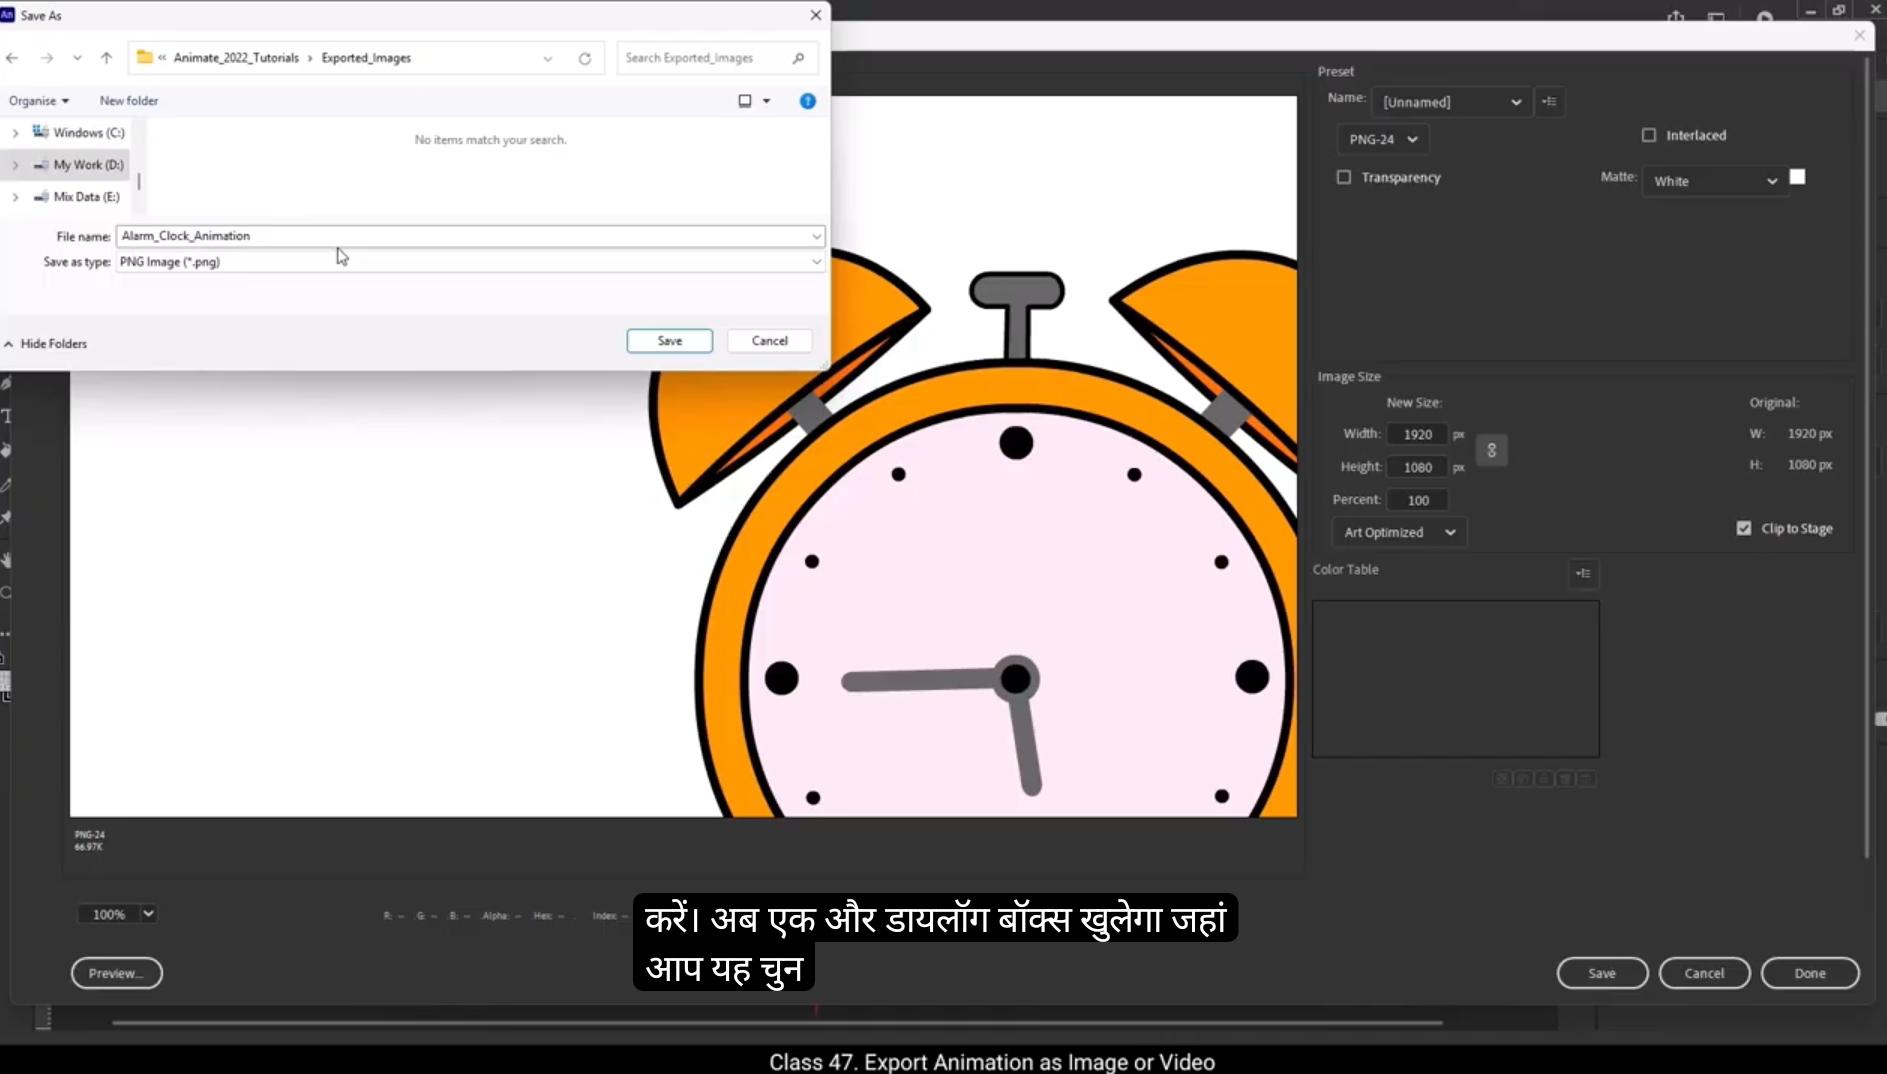
Hello students, in this tutorial we are going to learn how to export your animations in Adobe Animate to video files and image formats. There are several ways you can export your animation depending on your needs. You can export it as an image, an image sequence, a video, an animated GIF, or even as an asset for reuse in other projects.Since any animation you create in Adobe Animate needs to be shared in either an image or video format, understanding these export options is essential. First, open your animation file. One quick way to preview your animation is by pressing Control Enter on your keyboard. This will export the animation as an SWF file, which allows you to play it within Animate. However, this format is not downloadable to your device, It is only for preview purposes.To properly export your animation, go to the File menu and select Export. Here you will see multiple options including Export Image, Export Image, Legacy Export, Movie, Export Video Media Export Animated GIF, Export Seen as Assets.Each option serves a different purpose and we will explore them one by one. Let's first explore the export image option.When you select Export Image, it allows you to export a specific frame from your animation as an image. This means that only the currently selected frame will be saved as an image file. To do this, first navigate to the frame you want to export. Once you have selected the frame, go to the File menu, select Export, and then click on Export Image. A dialog box will appear giving you several options.Here you can choose the file format like GIF.JPEG or PNG, adjust the image quality based on your preference. Set the image size to control the resolution of the exported image. 😘 If you choose the PNG format, you will see an additional transparency option. If you want a transparent background, make sure to check this box. Once you have configured all the settings, click Save. Another dialog box will appear where you can select the destination folder where the image will be saved. Rename the file if needed. Finally, click Save and your image will be downloaded to your selected location. Remember the export.Which option only saves the frame you have selected. So if you need multiple frames as images, you'll have to repeat this process for each frame separately.Next, let's explore the Export movie option.When you choose Export Movie, it allows you to export your animation as a sequence of images, meaning each frame of your animation will be saved as a separate image file.It is highly recommended to create a separate folder for different export formats. This helps keep your exported files organized and prevents any confusion, especially when exporting a large number of frames.Let's first see Export a JPEG sequence. In the dialog box, choose JPEG Sequence as the export format. When naming the file, it is a good practice to add an under score at the end of the file name. This is because Animate will automatically rename all the frames in sequential order starting from 0001 and continuing up to the last frame.Now click save and another dialog box will appear. Here you can set the size of the exported images Adjust the resolution and choose the image quality for full HD output. Set the quality to 100% and size 1920 by 1080. Once all the settings are configured, press OK and Animate will begin exporting the entire animation as a sequence of images. After the export process is complete, open the folder where you save the files. 😘 You will see multiple images, each representing a single frame of your animation. This method is particularly useful when you need high quality frame by frame exports for use in video editing software, post production, or further modifications.Now let's look at another use case of exporting an image sequence, specifically in broadcast animation and visual effects composition. When working on broadcast animation or advanced post production, it's often necessary to export different elements of your animation separately. This allows for greater flexibility in compositing software like Adobe After Effects where you can apply effects.Lighting and adjustments individually to different objects or layers.For example, let's consider this car animation in VFX and motion graphics. Each element, like the car background and mountains, is often treated separately. This allows us to add realistic lighting effects on the car, apply color corrections to different objects, insert special effects or background modifications independently. To achieve this, we export each object as a separate image sequence, ensuring that.Each layer can be worked on independently in compositing software. Let's see how we can do this. First, hide all layers except the one you want to export. Guide the other layers by right clicking on them and selecting Guide. When you hide A layer, it won't be exported. This ensures that only the visible layer is processed.Now go to File Export and choose Export Movie. Create a separate folder for the car images to keep everything organized.Change the file name to Car, select PNG sequence and click Save.We will keep full HD 1920 by 1080 resolution, keep full document size selected, set colors to 32 bit for high quality output and tick the smooth option for better edge clarity. 😘 Click Export to start the process.Once done, you'll see that only the car layer has been exported as an image sequence, while the other layers, since they were guided, have not been included in the export.This method is extremely useful when preparing assets for compositing, layering in After Effects or advanced animation workflows where you need precise control over different elements.Now let's see how to export another layer. First we need to guide and hide the previously exported layer, in this case the car layer, so that it won't be included in the new export. Next we unhide and remove guide from the layer we want to export, which in this example is the cactus layer.Once the cactus layer is ready, we simply repeat the same process we used earlier to export the car layer.Now, if we check the folder we created, we'll see that it contains only the Cactus layer as a series of images. This process can be repeated for any other layers in the animation. In the Export Movie option, you can export an image sequence of your entire animation or just a particular layer. Don't be confused by the name movie. This feature is primarily for exporting animations as individual images.However, if you want to export your animation.As a video file to share on social media or any platform, then you need to select Export Video Media instead. Once you choose Export Video slash media, a settings panel appears. Here you can select the resolution of your video. For full HD output, set the resolution to 1920 by 1080 pixels. If it's just for a preview, you can render it at half size to save time. In the format section you'll find multiple output options. This means you can export only audio, only GIF, standard video formats, Blu-ray MP4 format, or MOV format. 😘 Each format serves a different purpose, so you can select the one that best suits your needs. If you want to export a MOV file, select the QuickTime format from the list.For presets, Animate provides a default setting along with multiple other options. However, we will keep the default Animate preset for our export. Now, in the Output section, you need to choose the destination folder where you want to save the exported video. Once everything is set, click Export. A notification window will appear confirming that the MOV file has been successfully created.Now if you check the destination folder, you'll see that the exported video file is ready for use.Now that we have learned how to export videos, let's move on to the next export type.For this demonstration, we have taken a different animation file. If your animation is very short, around one or two seconds, or contains very few frames, then instead of exporting it as a video, you can export it as an animated GIF. To export as a GIF, go to file Export and choose Animated GIF.A dialog box will open showing three tabs. Original displays the original animation without compression.Optimized shows the optimized version of the GIF with reduced file size. Two up allows you to compare both versions side by side. You can clearly see the difference. The original file has a larger file size while the optimized version is much smaller.In the settings panel, you can adjust various options. You can control the number of colors in your GIF. For lower quality, choose fewer colors and for better quality choose higher color values up to 256 colors. There are different color reduction options available. Selective gives the best color quality and retains the most details. Perceptual prioritizes colors that the human eye perceives best.Adaptive chooses colors based on the most frequently used shades in the image. 😘 Dithering is used to simulate missing colors by blending pixels together. Here are the options. No dealer keeps the image clean, but color gradients may appear rough.Diffusion. Dither scatters pixels randomly to create smoother transitions. Pattern dither uses a fixed dot pattern, making the image look pixelated. Noise Dither adds random noise to break up color banding.If you need a transparent background, check the transparency option.You can adjust the image size. If you don't need an HD GIF, you can reduce the size to keep the file lightweight. In the looping options you can control how the GIF plays. Choose once to play only once, and stop and choose forever to play continuously without stopping.For this example, we will keep the forever option enabled to ensure the gift plays in a continuous loop. Once all settings are configured, click Save. Select the destination folder where you want to save the GIF. If needed, rename the file for better organization.Click save again. Now if you check the selected folder, you'll find the GIF file is downloaded, and when you open it, you'll notice that it keeps playing continuously thanks to the forever looping setting.Now let's move on to the final export type, Export seen as Asset. This is a new feature available in recent versions of Adobe Animate. It is mainly used to backup or reuse elements like objects, symbols, audio or motion from your animation file. For example, in this animation we have an audio file and several symbols that we have created. Using this feature, we can export these elements and reuse them in different animation projects. To export as an asset, go to File Export and select Export Scene as Asset. A dialog box will appear allowing you to choose which assets you want to export. 😘 Objects include shapes, drawings, and graphic elements.Motion saves, motion tweens and animations. Audio Export sound files used in the scene.Bones export skeletal structures used for character animation. We will cover the bone tool in our upcoming character animation course.You can also add tags for better organization.Click Export, choose the destination folder, give the file a name, and click Save. This will export the Adobe Animate Asset file with a dot Ana extension. Now let's see how to use the exported asset file in another animation project.I'll open a new animation file, a rotating globe animation. Suppose we want to add an alarm clock animation to this scene.Instead of copying all the clock animation layers and pasting them manually, we will import the asset file we exported earlier. For that go to window option in menu bar and select assets.The Assets panel will open.Here you will see some default assets provided by Adobe Animate. You can use these assets in your animations as well. To add an asset, simply drag an animation onto the stage.You can see it is already animated and ready to use.Now to import our custom alarm clock animation, go to the Custom tab in the Assets panel. Click the Plus icon to import an asset.Select the Ana file we exported earlier and click Open. You will now see the alarm clock animation appear in the Assets panel. Simply drag it onto the stage and it will be ready to use. This way you can import an entire animation into another animation file using Export Scene as asset. So these are the different export options we have explored in this tutorial. I hope you now have a clear understanding of these export types.Now go ahead, create amazing animations and share them with the world. Thank you for watching and keep animating. हेलो स्टूडेंट्स, इस ट्यूटोरियल में हम सीखेंगे कि Adobe Animate में बनाई गई animations को video files और image formats में कैसे export किया जाता है। आप अपनी जरूरत के हिसाब से animation को कई तरीकों से export कर सकते हैं — जैसे image, image sequence, video, animated GIF, या फिर ऐसे assets के रूप में जिन्हें आप दूसरे projects में reuse कर सकें। क्योंकि Adobe Animate में बनाई गई किसी भी animation को अंत में image या video format में share करना जरूरी होता है, इसलिए इन export options को समझना बहुत महत्वपूर्ण है। सबसे पहले अपनी animation file को खोलिए। अगर आप अपनी animation को जल्दी preview करना चाहते हैं, तो कीबोर्ड पर Control + Enter दबाइए। इससे आपकी animation एक SWF file के रूप में export हो जाएगी, जिसे आप Animate के अंदर play कर सकते हैं। लेकिन ध्यान रखें — SWF format downloadable नहीं होता, यह सिर्फ preview के लिए होता है। अब animation को सही तरीके से export करने के लिए, File menu में जाएँ और Export option को select करें। यहाँ आपको कई export options दिखाई देंगे, जैसे — Export Image, Export Image (Legacy), Export Movie, Export Video/Media, Export Animated GIF, और Export Scene as Assets। हर option का एक अलग purpose होता है, और हम इन्हें एक-एक करके समझेंगे। सबसे पहले देखते हैं Export Image option को। जब आप Export Image चुनते हैं, तो यह आपको animation के किसी specific frame को image के रूप में export करने की सुविधा देता है। इसका मतलब है कि सिर्फ वही frame, जो उस समय timeline में selected है, image file के रूप में save होगा। ऐसा करने के लिए, पहले उस frame पर जाएँ जिसे आप export करना चाहते हैं। फिर File → Export → Export Image पर क्लिक करें। इसके बाद एक dialog box खुलेगा जिसमें कई settings होंगी। यहाँ आप file format चुन सकते हैं — जैसे GIF, JPEG या PNG। आप image की quality को अपनी जरूरत के हिसाब से adjust कर सकते हैं, और image size सेट करके exported image की resolution को control कर सकते हैं। 😘 अगर आप PNG format चुनते हैं, तो आपको एक Transparency option भी दिखाई देगा। अगर आप अपनी image में transparent background चाहते हैं, तो इस box को ज़रूर check करें। सारी settings configure करने के बाद Save पर क्लिक करें। अब एक और dialog box खुलेगा, जहाँ आप यह चुन सकते हैं कि image को किस folder में save करना है। अगर चाहें तो file का नाम बदल सकते हैं। अंत में Save पर क्लिक करें, और आपकी image आपके चुने हुए location पर download हो जाएगी। ध्यान रहे — Export Image option सिर्फ उसी frame को save करता है जो आपने select किया है। अगर आपको कई frames को image के रूप में export करना है, तो आपको यह process हर frame के लिए अलग-अलग दोहरानी होगी। अब चलते हैं अगले option पर — Export Movie। जब आप Export Movie चुनते हैं, तो यह आपकी animation को image sequence के रूप में export करता है, यानि आपकी animation के हर frame को अलग-अलग image file के रूप में save किया जाएगा। यह सुझाव दिया जाता है कि आप हर export format के लिए एक अलग folder बनाएं, ताकि आपकी exported files properly organized रहें और confusion न हो, खासकर तब जब आप बड़ी संख्या में frames export कर रहे हों। अब देखते हैं कि JPEG Sequence कैसे export किया जाता है। Dialog box में export format के रूप में JPEG Sequence चुनिए। File को नाम देते समय एक underscore ( _ ) लगाना अच्छा practice है, क्योंकि Animate अपने आप सभी frames को sequential order में rename करेगा — जैसे 0001, 0002, 0003, और इसी तरह last frame तक। अब Save पर क्लिक करें। इसके बाद एक और dialog box खुलेगा, जहाँ आप exported images की size, resolution और image quality सेट कर सकते हैं। अगर आप Full HD output चाहते हैं, तो quality को 100% और size को 1920 x 1080 pixels पर सेट करें। सभी settings configure करने के बाद OK दबाएँ। Animate अब आपकी पूरी animation को image sequence के रूप में export करना शुरू करेगा। Export process complete होने के बाद, उस folder को खोलिए जहाँ आपने files save की थीं, और वहाँ आपको आपकी animation के सारे frames अलग-अलग images के रूप में मिल जाएँगे। 😘 जब export process पूरा हो जाता है, तो आपको कई images दिखाई देंगी, जिनमें से हर एक आपकी animation के एक frame का प्रतिनिधित्व करती है। यह method खास तौर पर तब बहुत उपयोगी होती है जब आपको high-quality frame-by-frame exports की जरूरत होती है — जैसे video editing software, post-production, या further modification के लिए। अब देखते हैं कि image sequence export करने का एक और use case क्या है — broadcast animation और visual effects (VFX) composition में। जब आप broadcast animation या advanced post-production पर काम करते हैं, तो कई बार जरूरी होता है कि animation के अलग-अलग elements को अलग-अलग export किया जाए। इससे आपको compositing software जैसे Adobe After Effects में ज़्यादा flexibility मिलती है, जहाँ आप हर object या layer पर अलग-अलग effects, lighting और adjustments लगा सकते हैं। उदाहरण के तौर पर मान लीजिए कि हमारे पास एक car animation है जो VFX या motion graphics के लिए बनाई गई है। इसमें हर element — जैसे car, background, और mountains — को अलग-अलग treat किया जाता है। ऐसा करने से हम car पर realistic lighting effects लगा सकते हैं, विभिन्न objects पर color corrections कर सकते हैं, और special effects या background modifications को independently apply कर सकते हैं। इसे achieve करने के लिए, हम हर object को अलग-अलग image sequence के रूप में export करते हैं, ताकि हर layer को compositing software में individually edit किया जा सके। अब देखते हैं इसे practically कैसे किया जाता है — सबसे पहले, जिन layers को आप export नहीं करना चाहते, उन्हें hide कर दीजिए। इसके लिए उन layers पर right-click करें और Guide option select करें। जब कोई layer hidden या guide पर set होती है, तो वह export नहीं होती। इस तरह सिर्फ वही layer export होगी जो visible है। अब जाएँ File → Export → Export Movie पर। एक नया folder बनाइए — जैसे Car Images — ताकि सारी files organized रहें। फिर file name को “Car” रखिए, और export format के रूप में PNG Sequence चुनिए। इसके बाद Save पर क्लिक करें। Dialog box में settings इस प्रकार रखें — • Resolution: Full HD (1920 x 1080) • Document Size: Full Document Size selected रहे • Colors: 32-bit (High Quality Output के लिए) • Smooth Option: Tick करें ताकि edges ज़्यादा साफ़ और sharp दिखें इन settings के साथ export शुरू कीजिए — और Adobe Animate अब आपकी car layer को एक high-quality PNG image sequence के रूप में export कर देगा। 😘 अब Export बटन पर क्लिक कीजिए ताकि export process शुरू हो जाए। Process पूरा होते ही आप देखेंगे कि सिर्फ car layer ही image sequence के रूप में export हुई है, जबकि बाकी layers — जो guide mode में थीं — वो export में शामिल नहीं हुईं। यह method बहुत useful होती है जब आप compositing, layering in After Effects या advanced animation workflows पर काम कर रहे होते हैं, जहाँ आपको अलग-अलग elements पर precise control की ज़रूरत होती है। अब देखते हैं कि हम दूसरी layer कैसे export करेंगे। सबसे पहले हमें पहले वाली exported layer — यानी car layer — को guide और hide करना होगा, ताकि वो दोबारा export में शामिल न हो। अब जिस layer को export करना है — जैसे इस उदाहरण में cactus layer — उसे unhide करें और guide option हटा दें। जब cactus layer तैयार हो जाए, तो वही process दोहराइए जो हमने car layer के लिए किया था — यानि File → Export → Export Movie, फिर PNG Sequence चुनिए और Save पर क्लिक कीजिए। Export पूरा होने के बाद, जब आप उस folder को check करेंगे जो हमने पहले बनाया था, तो आपको उसमें सिर्फ Cactus layer की image sequence मिलेगी। इसी तरह आप animation की किसी भी दूसरी layer को export कर सकते हैं। Export Movie option में आप चाहें तो पूरी animation को एक image sequence के रूप में export कर सकते हैं, या सिर्फ किसी specific layer को। नाम से यह “Movie” option थोड़ा misleading लग सकता है, लेकिन इसका main purpose animation को individual images के रूप में export करना ही है। हालाँकि, अगर आप अपनी animation को एक video file के रूप में export करना चाहते हैं — ताकि उसे social media या किसी platform पर share किया जा सके — तो इसके लिए आपको Export → Video/Media option चुनना होगा। जब आप Export Video/Media चुनते हैं, तो एक settings panel खुलता है जिसमें आप अपने वीडियो की resolution सेट कर सकते हैं। Full HD output के लिए resolution को 1920 × 1080 pixels पर सेट करें। अगर सिर्फ preview चाहिए, तो आप half size पर render कर सकते हैं ताकि time save हो। Format section में आपको कई output options मिलेंगे — जैसे केवल audio export, सिर्फ GIF export, standard video formats, Blu-ray, MP4 format, या MOV format में export करने का option। 😘 हर format का अपना अलग purpose होता है, इसलिए आप अपनी ज़रूरत के हिसाब से सही option चुन सकते हैं। अगर आप अपनी animation को MOV file के रूप में export करना चाहते हैं, तो list में से QuickTime format चुनिए। Presets में Animate एक default setting के साथ कई और options देता है, लेकिन हम यहाँ default Animate preset ही रखेंगे। अब Output section में जाएँ और वह destination folder चुनें जहाँ आप अपनी exported video को save करना चाहते हैं। जब सब settings पूरी हो जाएँ, तो Export पर क्लिक करें। कुछ ही देर में एक notification window दिखाई देगी जो confirm करेगी कि आपका MOV file successfully create हो गया है। अब अगर आप अपने destination folder को check करेंगे, तो वहाँ आपकी exported video file ready मिलेगी, जिसे आप किसी भी platform पर use या share कर सकते हैं। अब जब हमने video export करना सीख लिया, तो चलिए अगले export type पर चलते हैं। इस demonstration के लिए हमने एक अलग animation file ली है। अगर आपकी animation बहुत short है, जैसे सिर्फ 1 या 2 seconds की या उसमें बहुत कम frames हैं, तो उसे video के बजाय animated GIF के रूप में export करना बेहतर होता है। इसके लिए File → Export → Animated GIF पर जाएँ। एक dialog box खुलेगा जिसमें तीन tabs दिखेंगे — Original, Optimized, और 2-Up। Original में आपकी animation बिना compression के दिखाई देती है, Optimized में GIF का optimized version दिखता है जिसमें file size छोटा हो जाता है, और 2-Up दोनों versions को side-by-side compare करने देता है ताकि आप clearly फर्क देख सकें। यहाँ आप notice करेंगे कि original file का size बड़ा है जबकि optimized version का size काफी छोटा है। Settings panel में आप GIF के लिए कई options control कर सकते हैं। आप GIF में इस्तेमाल होने वाले colors की संख्या चुन सकते हैं। अगर आपको lower quality चाहिए तो कम colors चुनिए, और better quality के लिए ज्यादा colors (up to 256) सेट कीजिए। Color reduction के लिए अलग-अलग modes होते हैं — Selective सबसे अच्छा color quality देता है और details को बनाए रखता है, Perceptual उन colors को प्राथमिकता देता है जिन्हें human eye सबसे ज्यादा notice करती है, और Adaptive image में सबसे ज्यादा इस्तेमाल हुए shades के आधार पर colors चुनता है। 😘 Dithering का इस्तेमाल missing colors को simulate करने के लिए किया जाता है, जहाँ pixels को blend करके smooth color transitions बनाई जाती हैं। इसके कुछ main options होते हैं — No Dither, जो image को साफ रखता है लेकिन color gradients थोड़ा rough दिख सकते हैं; Diffusion Dither, जो pixels को random तरीके से scatter करता है ताकि transitions ज्यादा smooth लगें; Pattern Dither, जो fixed dot pattern का उपयोग करता है जिससे image थोड़ी pixelated लग सकती है; और Noise Dither, जो random noise जोड़कर color banding को कम करता है। अगर आपको transparent background चाहिए, तो Transparency option को check करें। आप image का size भी adjust कर सकते हैं — अगर आपको HD quality की ज़रूरत नहीं है, तो size को कम रखकर file को lightweight बना सकते हैं। Looping options में आप तय कर सकते हैं कि आपका GIF कैसे चलेगा — “Once” चुनने पर GIF सिर्फ एक बार चलेगा और रुक जाएगा, जबकि “Forever” चुनने पर GIF लगातार loop में चलता रहेगा। इस example में हम Forever option को enable करेंगे ताकि GIF बिना रुके चलता रहे। जब सारी settings पूरी हो जाएँ, तो Save पर क्लिक करें, और वह folder चुनें जहाँ आप GIF को save करना चाहते हैं। ज़रूरत हो तो file का नाम बदलकर organize कर सकते हैं। फिर से Save पर क्लिक करें, और अब अगर आप selected folder को check करें, तो वहाँ आपका GIF file दिखाई देगा। जब आप उसे open करेंगे, तो देखेंगे कि वो लगातार play हो रहा है — ये possible हुआ है “Forever Looping” setting की वजह से। अब चलते हैं final export type की ओर — Export Scene as Asset। यह Adobe Animate के हाल के versions में जोड़ा गया एक नया feature है, जो animation elements जैसे objects, symbols, audio files, या motion tweens को backup या reuse करने के लिए इस्तेमाल किया जाता है। उदाहरण के तौर पर, इस animation में हमारे पास एक audio file और कुछ symbols हैं जिन्हें हमने खुद बनाया है। इस feature का इस्तेमाल करके हम इन elements को export कर सकते हैं और future में किसी भी नए animation project में reuse कर सकते हैं। इसके लिए File → Export → Export Scene as Asset पर जाएँ। इसके बाद एक dialog box खुलेगा जिसमें आप चुन सकते हैं कि कौन से assets को export करना है। 😘 Objects में shapes, drawings, aur graphic elements शामिल होते हैं। Motion option से आप motion tweens और पूरी animations को export कर सकते हैं, जबकि Audio से आप अपने scene में इस्तेमाल हुए sound files को export कर सकते हैं। Bones option character animation के लिए इस्तेमाल होने वाले skeletal structures को export करता है — हम इस bone tool को अपने आने वाले Character Animation Course में detail में सीखेंगे। आप चाहें तो बेहतर organization के लिए tags भी जोड़ सकते हैं। जब सारी settings पूरी हो जाएँ, तो Export पर क्लिक करें, फिर destination folder चुनें, file को एक नाम दें और Save पर क्लिक करें। इससे आपका Adobe Animate Asset file .ana extension के साथ export हो जाएगा। अब देखते हैं कि इस exported asset file को किसी और animation project में कैसे use किया जा सकता है। मान लीजिए हमने एक नया animation file खोला है — जैसे Rotating Globe Animation। अब अगर हमें इस scene में Alarm Clock Animation जोड़नी है, तो सारे clock animation layers को manually copy-paste करने की बजाय हम वो asset file import करेंगे जो हमने पहले export की थी। इसके लिए Window menu में जाएँ और Assets option को select करें। अब Assets Panel खुल जाएगा, जहाँ आपको Adobe Animate द्वारा दिए गए कुछ default assets दिखाई देंगे। आप इन्हें भी अपनी animations में इस्तेमाल कर सकते हैं — बस किसी भी animation asset को drag करके stage पर लाएँ, और वो पहले से animated और ready-to-use होगी। अब अपने custom alarm clock animation को import करने के लिए Assets Panel में Custom tab पर जाएँ। वहाँ Plus (+) icon पर क्लिक करें और import asset चुनें। अब उस .ana file को select करें जिसे हमने पहले export किया था, और Open पर क्लिक करें। आप देखेंगे कि alarm clock animation अब Assets Panel में दिखाई दे रही है। बस इसे stage पर drag करें, और ये पूरी तरह ready है इस्तेमाल के लिए। इस तरह आप Export Scene as Asset feature का उपयोग करके एक पूरी animation को दूसरे animation project में import कर सकते हैं — बिना manually copy-paste किए। तो ये थे Adobe Animate के अलग-अलग export options जिनके बारे में हमने इस tutorial में सीखा। अब आपको इन सभी export types की clear understanding हो गई होगी। तो आगे बढ़िए, शानदार animations बनाइए और उन्हें दुनिया के साथ share कीजिए। धन्यवाद देखने के लिए — और हमेशा की तरह, keep animating!